Posts by Léon & George
Olive Trees & Yellow Leaves

Yellow leaves on your Olive Tree? Find out what could be causing them.

The Olive Tree varieties are without a doubt having a moment amongst other tropical potted houseplants and outdoor plants, with their effortlessly ornamental branches and Mediterranean vibe that may even bloom ripe edible olives. However, while Olive Trees can be incredibly low maintenance (they are highly drought-resistant, after all!) they can take some patience for new plant owners, especially when planted indoors. Seeing the emergence of yellow leaves on your Olive Tree can be disconcerting, and in this comprehensive guide, we’ll delve into the reasons and symptoms behind yellowing leaves and provide practical solutions to ensure the vibrancy of the foliage and help your Olive Tree thrive while increasing your green thumb and horticulture expertise.

  1. Yellow Curling Leaves

  2. Leaves Turning Yellow and Falling Off

  3. Leaves Turning Yellow and Drooping

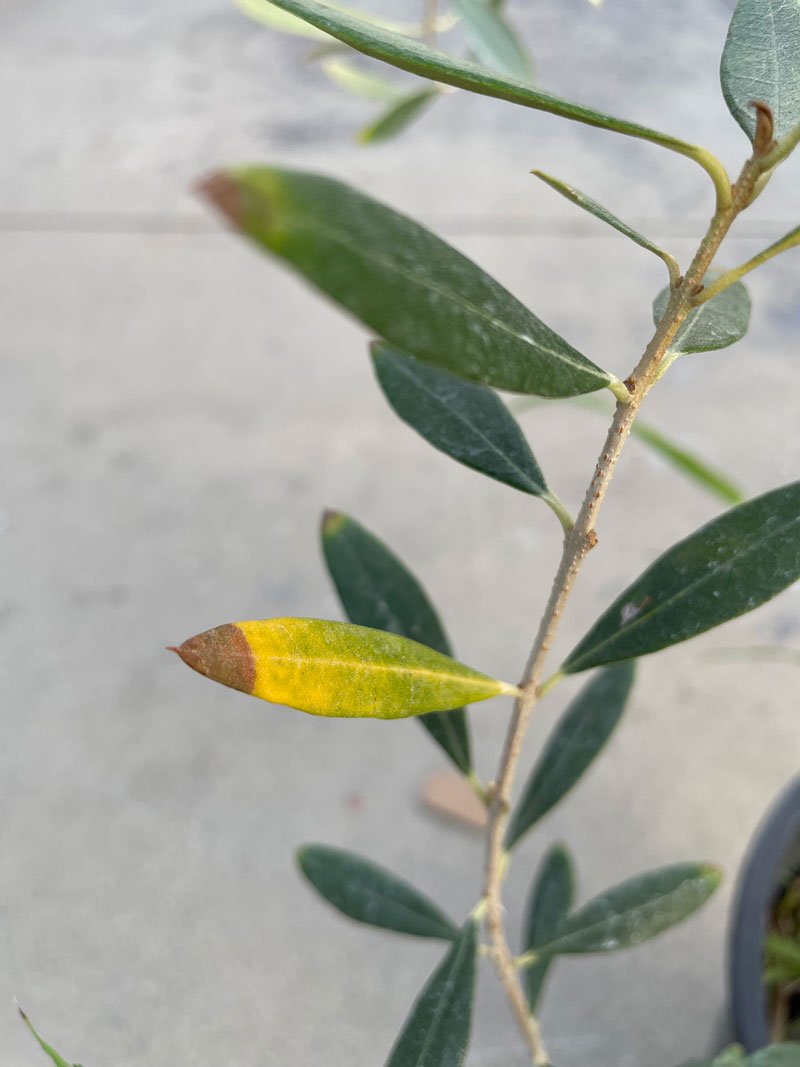
  4. Yellow Leaves with Dry Brown Edges

  5. Normal Seasonal Drop: Nature's Course

  6. Avoiding Yellow Leaves on Olive Trees

Yellow Curling Leaves

Olive Trees, though hardy, can suffer from nutritional deficiencies, particularly in nitrogen. Signs such as yellow-tinged leaves, curling leaves and stunted growth indicate this issue. What causes this can be a nitrogen or magnesium deficiency. Using fertilizer regularly can assist in alleviating the issue, and if you’ve had your Olive Tree for a long period of time, you may consider repotting to replenish nutrients within the soil.

Leaves Turning Yellow and Falling Off

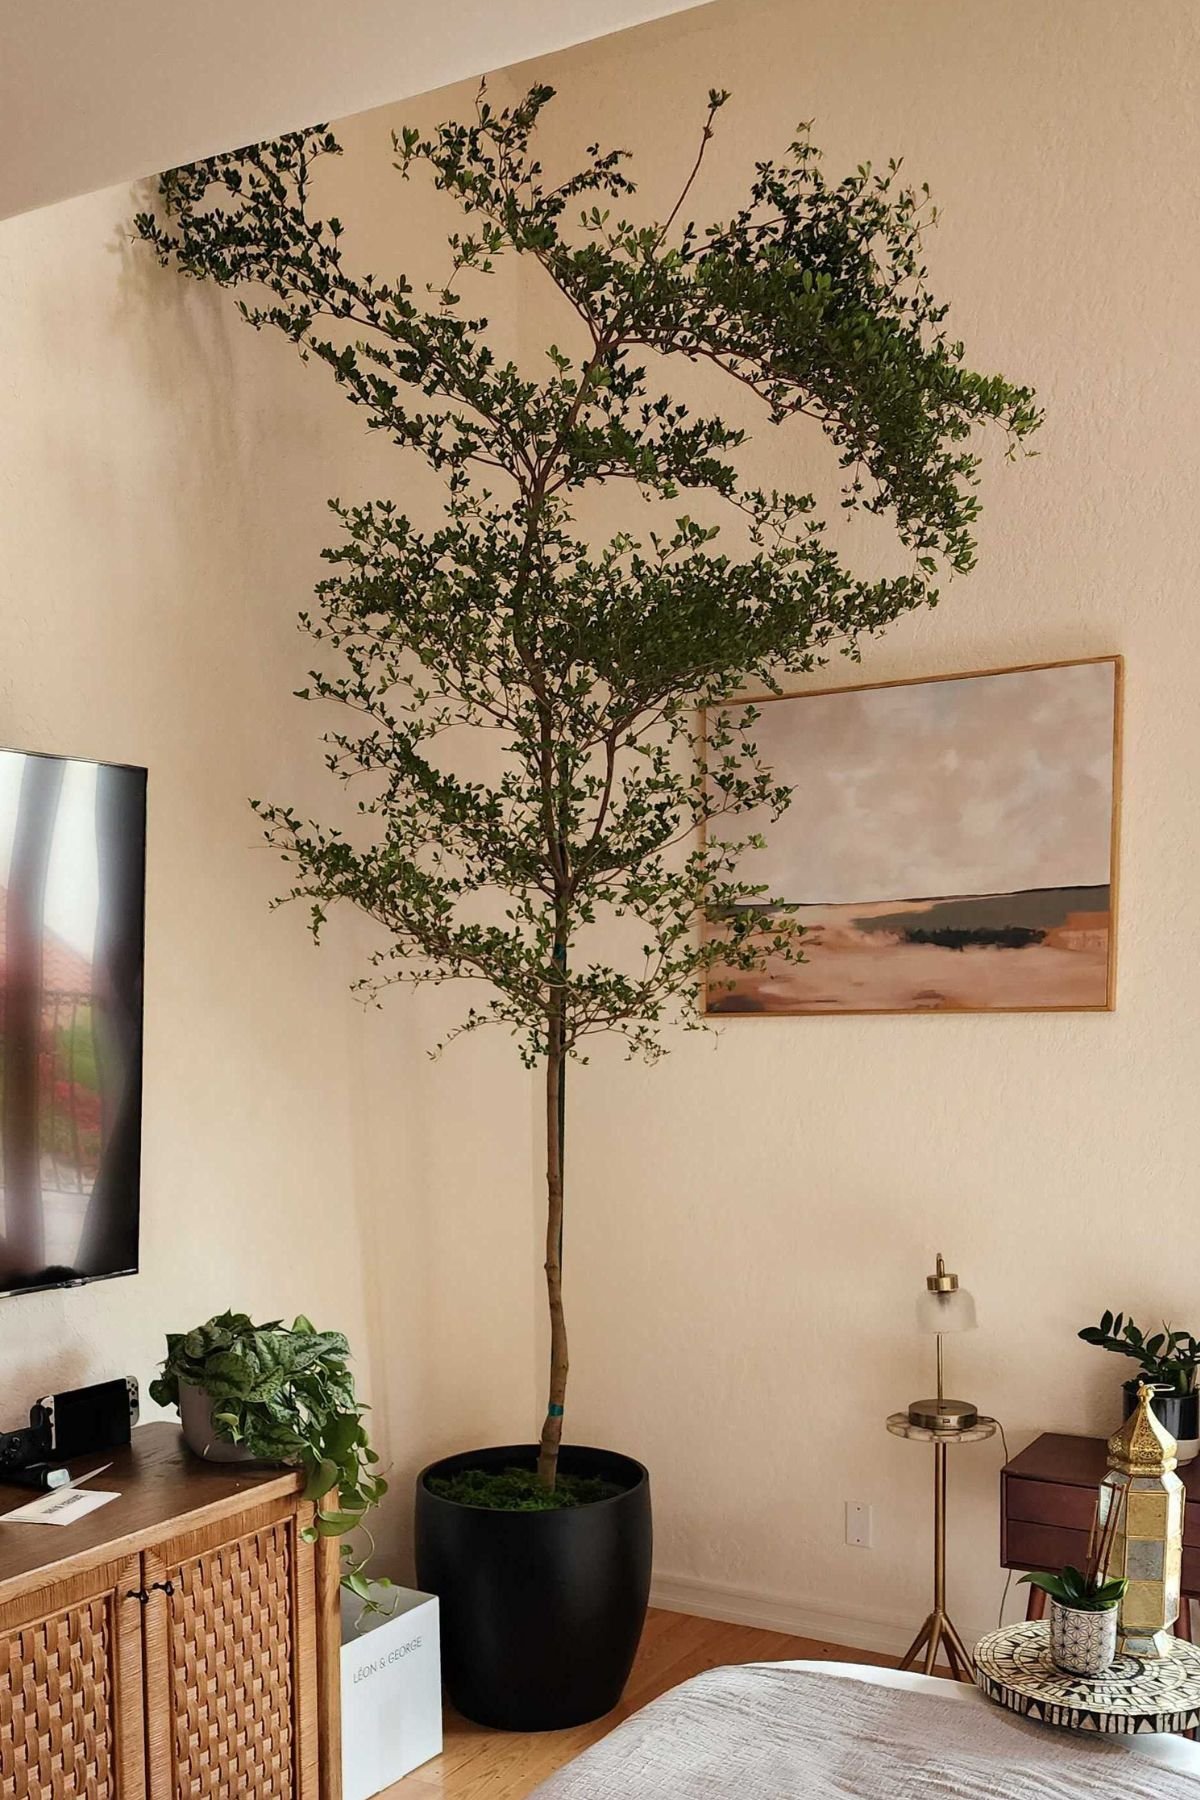
If your Olive Tree is shedding pale yellow leaves at a somewhat alarming rate, the most likely culprit is a lack of sunlight. Olive Trees typically don’t tolerate low light, and need at least 6 hours of direct sunlight per day, and are best-suited for outdoor areas. If you’d like to keep your Olive Tree indoors, make sure to place it in a bright, unobstructed window with no shade, ideally south-facing, and possibly even consider supplementing with an artificial grow light.

Leaves Turning Yellow and Drooping

The delicate dance of watering significantly influences Olive Tree health. If you see leaves that are yellow with discoloration, limp or drooping, begin to wilt, or are dropping overwatering is a common cause. Remember that Olive Trees are native to hot, arid climates and are very drought-resistant. Heavily overwatering any plant can lead to root rot, and if you suspect you’ve overwatered your Olive Tree, check the soil and roots to see if it will need repotting.

Yellow Leaves with Dry Brown Edges

Both insufficient and excessive water can make your Olive Tree susceptible to yellow leaves, cause them to begin wilting, or lead to brown spots. While Olive Trees are known for their drought tolerance, they still need regular watering. Prolonged periods of drought will result in yellow leaves with dry brown plant leaves and edges. While you won’t be able to bring these leaves back to their former state, giving your plant a good, healthy drink of water should prevent more leaves from drying and turning yellow and brown.

Normal Seasonal Drop: Nature's Course

Despite being classified as evergreens, Olive Trees can undergo a natural leaf-shedding process. Some yellowing leaves in spring for example are part of this seasonal cycle and are generally not a cause for alarm. Understanding this normal drop can ease concerns associated with the occasional yellow leaf and may need pruning, similar to other plants to encourage plant growth. Olive trees, typically tropical plants, may go dormant in the winter, even when kept as indoor potted plants. Despite being tolerant of full sun conditions and thriving in humid climates, their natural response to seasonal changes may involve a period of dormancy during colder months.

Avoiding Yellow Leaves on Olive Trees

Prevention is the best cure for any plant woe, but the good news is that many cases of yellow tree leaves and stems are easily fixable! Here are a few preventative measures as well as cures for yellow leaves on Olive Trees:

Find the Perfect Watering Balance

To avoid the yellowing blues, make sure you're not drowning, providing too little water, or soaking your Olive Tree. Ensure you are using a well draining, less compacted potting soil or potting mix and let the top two inches of soil dry out before giving it a good drink. Established outdoor trees are pretty low-maintenance in the watering department, but those young indoor ones may need to be watered more frequently, especially in hot and dry months. As always, ensure there is proper drainage included with the pot. This will ensure your Olive Tree does not remain damp and can be drained through the roots before placing it into your decorative planter.

Additionally, misting the foliage with a watering can mister creates a mini oasis for your Olive Tree, boosting the natural humidity around the plant. This pampering session helps keep those lush green leaves happy and thriving and combats dry indoor air. Adding a layer of moss or pebbles to the top of the soil not only enhances the aesthetic appeal but also serves as an effective natural mulch, helping to retain moisture in the soil and adding to organic matter for healthy soil.

Try this - The bottom watering method

In the pursuit of fostering optimal growth and combatting yellow foliage, the bottom watering method emerges as a horticultural game-changer and prevents your Olive Tree from taking in too much water. By employing this technique, you can maintain a delicate balance in the soil moisture crucial for your olive tree's well-being and prevent your tree from becoming rotted. This method allows your Olive Tree to self-water itself, ensuring that the root system receives hydration without the risk of drowning or waterlogging. This method not only promotes the longevity of your greenery but also simplifies the maintenance process, making it an excellent choice for a harmonious and hassle-free approach to watering your Olive Tree.

PROVIDE AT LEAST 6 HOURS A DAY OF DIRECT LIGHT

Light-intensity is important for your Olive Tree, as it is a light-lover through and through and enjoys at least 6 hours of bright light or full direct sunlight a day. If you aren’t sure what constitutes direct sunlight, think unobstructed exposure to the sun. Sunlight not only helps your tree become a quicker grower, but also helps keep those leaves nice and dry, preventing any unwanted mildew and fungus.

NUTRIENT BOOST

Olive trees are not too picky about about nutrient deficiency in their soil, but feeding your tree a nutrient-rich fertilizer or plant food during the active growing season will help keep yellow leaves at bay, increase your gardening expertise, balance the soil ph, and encourage new growth. Be careful not to over fertilize and refrain from fertilizing during dormancy, though, by following the correct dosage during active growing months— fertilizer burn can cause even worse damage on the foliage of your plant.

PESTS

Pests pose a significant threat to the vitality of an olive tree, often causing distressing consequences for its foliage. Various pests, including bugs like aphids, spider mites, and mealybugs, can infiltrate the leaves, compromising the overall health of the tree. Neglect in houseplant care can increase the issue, creating an environment conducive to infestations in their pots. Fungus gnats, attracted to moist soils, can further worsen the situation. To combat these unwanted guests, incorporating neem oil mixes into your plant care routine can be an effective solution. Neem oil acts as a natural repellent against pests, offering a sustainable and eco-friendly approach to safeguarding your olive tree from the potential harm caused by these pesky invaders. Prioritizing vigilant pest management is essential for ensuring the enduring beauty and health of your olive tree's foliage.


olive trees yellow leaves

Olive Tree Collection

Premium Olive Trees, potted and delivered, plus lifetime access to 24/7 Plant Doctor support. Order online at leonandgeorge.com
10 Super Specific Gifts (For All Your Super Specific People)
Holiday gift guide with plants

For many of us, holiday gifting can be a major source of stress, but it doesn’t have to be that way. Gift them something that speaks to their personality, is unique and one-of-a-kind, and that will only grow better over time. What’s that unicorn of a gift? A plant, of course! For inspiration, we’ve compiled some super specific gift ideas so that this year, you can give them something as special and unique as they are!

For the friend who can only keep fake plants alive

Or so they think. The Zanzibar Gem is so easy to care for, people will often wonder if it’s actually fake (that’s how good it will look). Boost their confidence and for goodness sake, don’t let them be a fake plant person.

Shop now →

For the Pinterest fanatic who thinks she's an interior designer

The sweetheart of trendy houseplants, there’s a reason why the Fiddle Leaf Fig is interior designers’ favorite. Let your friend bring their Pinterest dreams to life with a plant that instantly creates a photoshoot-worthy feel to any room it graces.

Shop now →

For the opinionated mother-in-law who has no filter

What better than a plant commonly coined as “mother-in-law’s tongue"? But in all seriousness, this powerful air purifier will make mom proud, and let her breathe a little easier, too.

Shop now →

For the couple who just bought their first house and don't know where to start

Decorating a house is no joke, especially for first time homeowners. Give them a unique piece that will grow with them over the years (plus instantly improve their somewhat stark living room situation!). The Bird of Paradise is a low-maintenance crowdpleaser that goes with any decor.

Shop now

For the ultimate homebody who not-so-secretly loved quarantine

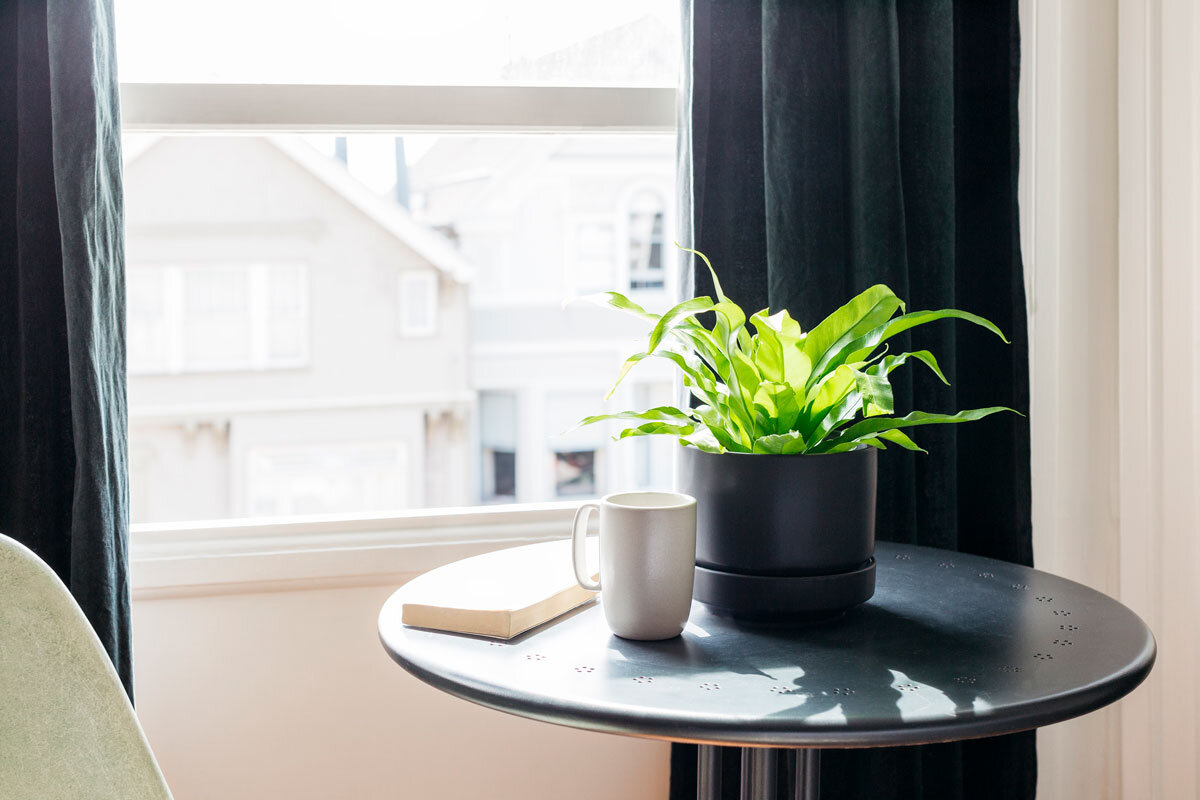
Quarantine came with its fair struggles, but not for the friend who unabashedly indulged in staying home. A gift as beautiful as they are, and speaks to their nesting ways: the Bird’s Nest Fern.

Shop now

For the 20-something whose apartment still looks like their college dorm room

Second hand sofas and pinned up posters will look that much sharper with a plant that’s at once as beautiful as it is hardy. Give them their first “big kid” plant that will stand the test of time, and look just as good once they graduate to more sophisticated digs and decor.

Shop now →

For the friend who feeds their dog filet mignon

It’s no secret that many of us coddle our pets (we even named our company after them!). But this friend takes things to the next level for their furry family member. From gourmet snacks to perfectly fitting sweaters, their pup deserves only the best. That’s what makes the pet-safe Braided Money Tree just the right addition: a plant lauded for its feng shui powers, and elegant enough for a four-legged friend’s esteemed taste in decor.

Shop now →

For the perfectionist who irons their sheets

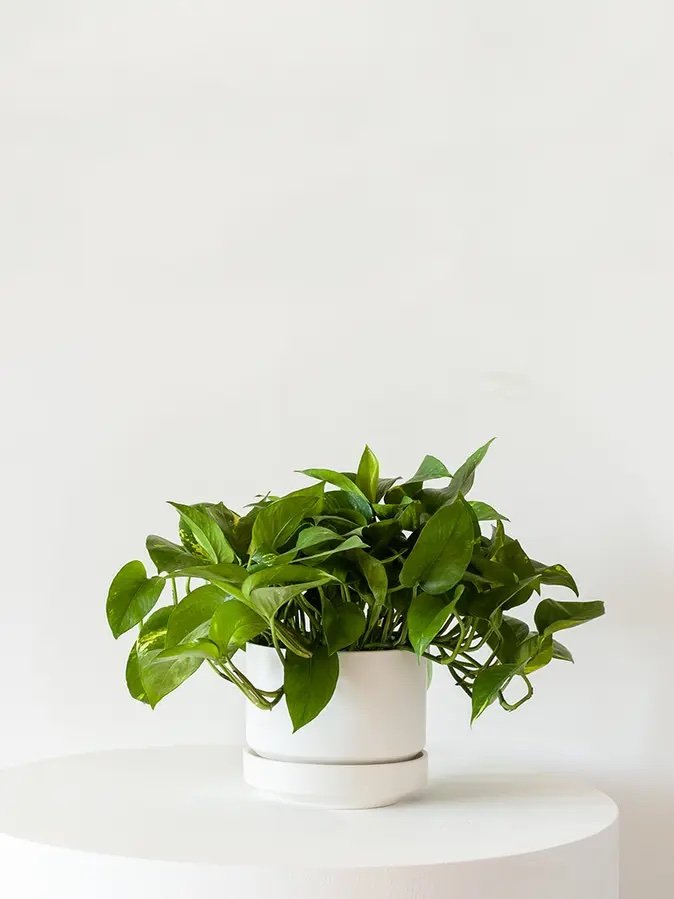
Their home is always spotless and not a single thing is out of place. For the perfectionist friend, get them a plant that will, with almost zero maintenance, maintain a perfect shape over time. The Cascading Pothos will look just as beautiful after three years as it did on day one.

Shop now →

For the nostalgic type who thinks they were born in the wrong era

A popular plant of the art deco era, the Monstera Deliciosa is the perfect plant for the friend who lauds the style of years past, and whose drawn to all things vintage and cool.

Shop now →

for the cat lady who is also a plant lady

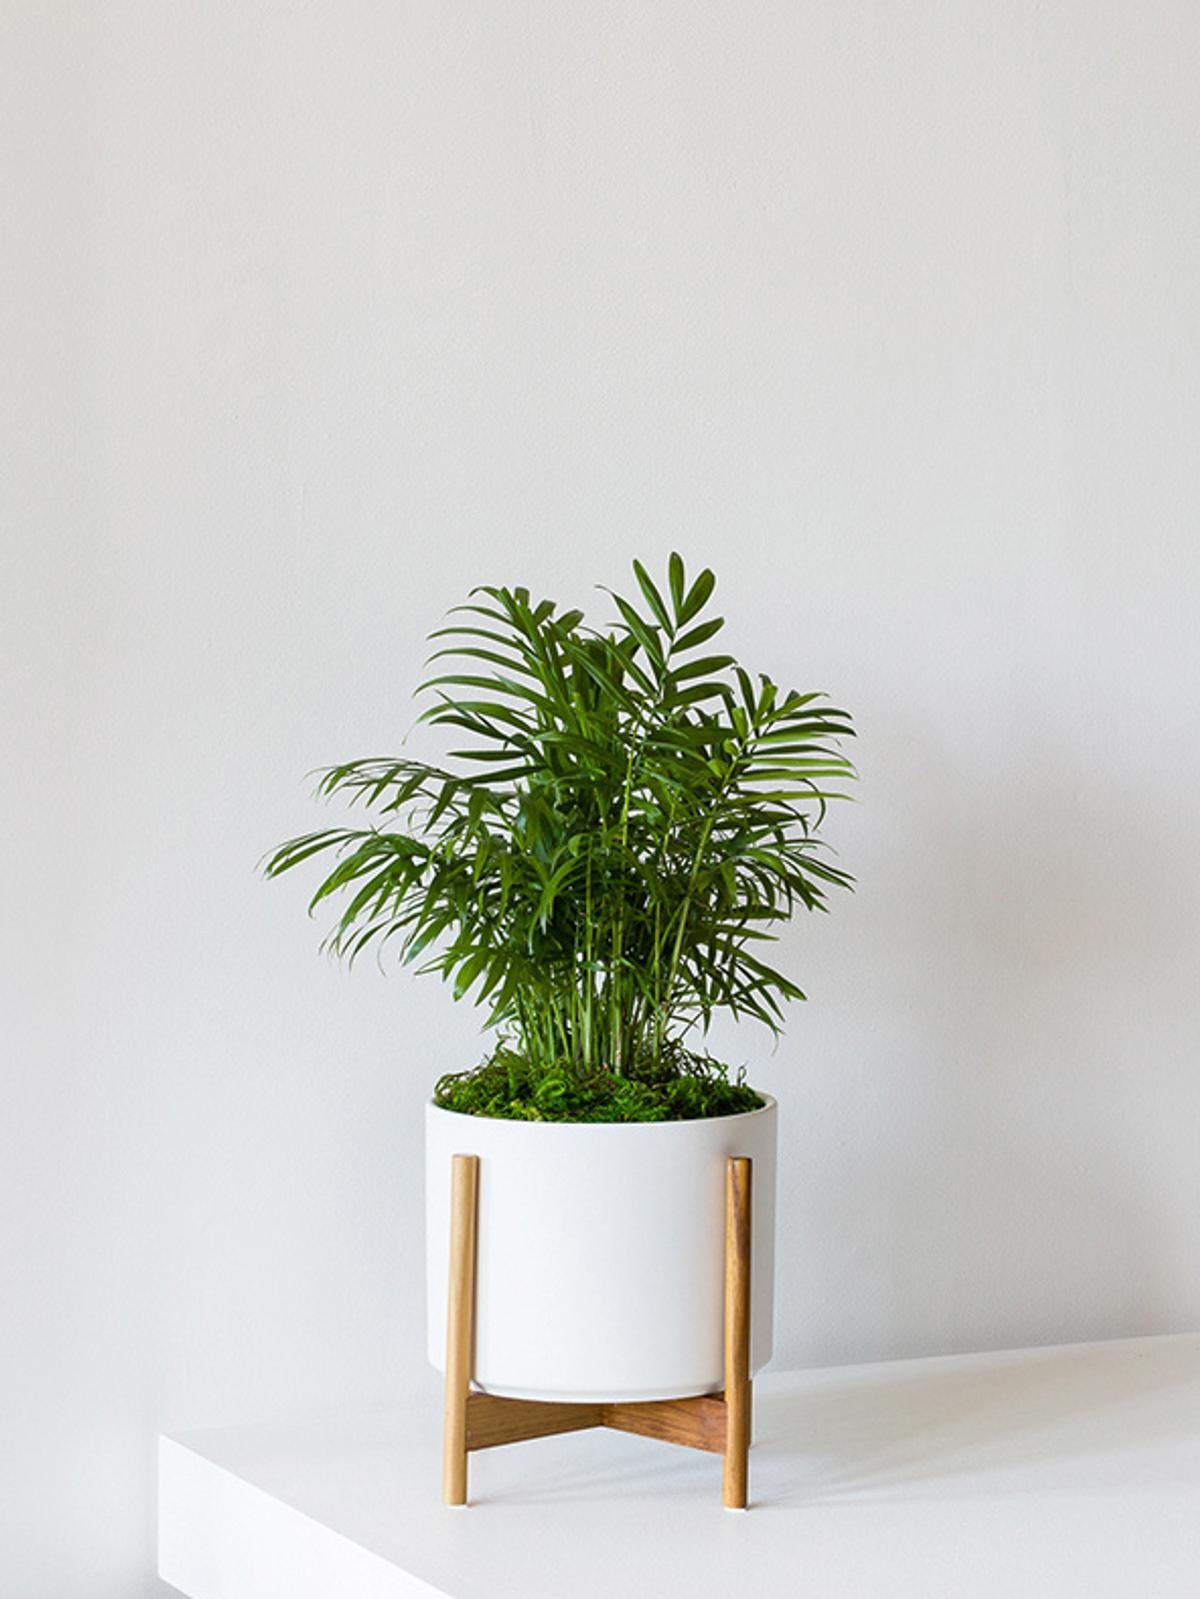
Lover of both flora and fauna, get them something that both owner and pet will enjoy. A pet-safe Parlor Palm will instantly bring the jungle vibes into theirs (and their feline’s) home.

Shop now →

For more green gift inspiration shipped straight to their door, browse our full collection of potted plants.


THE HOLIDAY COLLECTION

Shop a selection of holiday favorites to bring light, warmth and love to yours or a loved one's home, this season and beyond.

Gifts They’ll Adore: The Léon & George Holiday Gift Guide
gift ideas for plant lovers

Finding the perfect gift is an art, and if you’ve landed here, you’re already halfway there. Gifting a lush living plant goes a long way, all throughout the year and especially so during the holiday season: plants promote our well-being, they brighten our spaces, and they help us bring that unmistakable feeling of a cozy holiday home to life.

So go ahead and bring joy to faces and spaces this season with some of these curated ideas for all the special people in your life.

  1. For The Green Thumb

  2. For The New Plant Enthusiast

  3. For The Traveler

  4. For The Host

  5. For The Pet Parent


The Holiday Collection

Like the unmistakable smell of cookies baking in the oven or the soft glow of twinkling lights late into the night, there’s nothing cozier or more appealing than a warm holiday home. Shop a selection of holiday favorites to bring light, warmth and love to yours or a loved one's home, this season and beyond.

The First Six Months With Your Black Olive Tree: What To Expect

The Black Olive Tree is an indoor plant that thrives in bright light, making it an enchanting addition to any space topped with preserved forest moss for a touch of natural elegance.

With its delicate clusters of dark green, glossy leaves and enduring, one-of-a-kind charm, the Black Olive Tree, also known as Bucida Buceras or Shady Lady Olive Tree, is a striking addition to any space. Native to tropical regions, this tree-like beauty is often mistaken for other varieties like its outdoor-loving cousin, the Olive Tree, but it doesn't bear edible fruit and in reality is not an olive tree at all. Nonetheless, its airy, Mediterranean appearance has earned it the common name of Black Olive Tree, and if you’ve welcomed one of these treasures into your indoor plants collection or are considering it, prepare for a rewarding journey as you guide this elegant plant through its initial adaptation phase into its new home. Let’s learn how to grow and bloom your new Black Olive Tree!

The Early Days: Understanding Changes

When you first introduce your new Black Olive Tree to your home, don't be surprised or alarmed if it undergoes a period of adjustment or grows slow as it adjusts to new climates. Many houseplants react to new environments by dropping leaves, and the Black Olive Tree is no exception. This particular variety of plant is incredibly sensitive to shifts in light, humidity, and temperature, and it is not uncommon for some or even all of the foliage to dry up initially and fall off.

IMPORTANT! This does not mean your plant is dead. It is simply responding to the change in its environment, and this behavior is very common for the Black Olive Tree. Keep reading to see how you can best support your plant as it bounces back and begins to grow new leaves.

Leaves on the Black Olive Tree will begin to dry up and fall in the initial adjustment phase after moving your plant.

Patience While Shedding

The key to helping your Black Olive Tree adapt successfully is patience. Let your tree shed its leaves—there is nothing to be done while it goes through this phase besides regularly sweeping up the dry leaves from the floor. It can take anywhere from 1-4 weeks for your plant to lose all its leaves. If you’d like to reduce the amount of sweeping, once a week give your tree a gentle shake so that any leaves that are ready to go may fall all at once.

Providing the Right Conditions

To support your Black Olive Tree during this adjustment phase, ensure you provide the ideal conditions:

  1. Light: These trees thrive in plenty of bright indirect light and full sun, and also like some direct sunlight, so ensure they are planted in its pot near a sunny window with at least a few hours of direct sunlight year-round and refrain from placing in low-light areas.

  2. Watering: The Black Olive Tree can be particularly thirsty while its going through the adjustment phase. Ensure it is watered thoroughly every few days, or at a minimum once a week, and prevent drought or letting your plant dry-out.

  3. Preventing overwatering is crucial for Black Olive Trees, as excessive dampness can lead to root rot, affecting the root-ball and jeopardizing the health of the entire plant. To maintain the ideal balance for growing plants, it's essential to keep the soil moist but not waterlogged, ensuring the well-being of both foliage and root systems.

  4. Proper Drainage: Ensuring proper drainage in the potting soil is crucial for the well-being of black olive trees, as these easy-care plants are highly tolerant but require well-draining conditions. It is essential to avoid waterlogging and maintain a slightly damp environment when watering, promoting optimal growth for these resilient and adaptable trees.

  5. Temperature: Keep your Black Olive Tree away from drafts and sudden temperature fluctuations, as these can stress the plant further.

  6. Fertilizing: Hold off on feeding your plant during the initial adjustment period. Once you notice new growth emerging you can begin to fertilize, introduce a mild plant food to support its development during the growing season.

  7. Pests: In the care of Black Olive Trees, especially those in, maintaining a green thumb involves vigilant pest prevention. These trees may be susceptible to common pests like aphids and spider mites, so regular inspections and appropriate insect control measures are essential to ensure their overall health and vitality.

  8. Humidity: Black Olive Trees, thriving in humid conditions, tolerate soil moistness and benefit from a regular mist to prevent wilting. To maintain their optimal health, consider incorporating a mister into your care routine to provide the necessary humidity for these resilient trees.

In general, try to provide adequate light and water, and do not do anything else as your plant adapts. Patience is key!

Getting Past the Adjustment Phase

Between 6-12 weeks, you'll likely witness a remarkable transformation in your Black Olive Tree and notice that it is fairly easy-to-grow. New leaves will emerge, demonstrating the tree's adaptability and resilience. As you begin to see new buds and fast-growth forming, rest assured that your tree will become fuller and more beautiful in no time, enriching your space with its timeless elegance.

Despite swiftly losing many if not all their leaves as they adjust to their new space, your Black Olive Tree will astound you with how rapidly it begins to fill out again with new growth.

You've Got This!

While the Black Olive Tree might demand a bit more attention than other plants and low maintenance plants during its initial phase, the rewards are immeasurable. With patience and proper care, you'll have the pleasure of enjoying your new Black Olive Tree for years to come. As you observe its journey of renewal and growth over the first six months, you'll gain a deeper appreciation for nature's wonders and your Black Olive Tree's incredible resilience. Embrace the gardening adventure, and soon you'll have a thriving, magnificent tree!


black olive tree

Designed to Thrive

Premium Black Olive Trees, potted and delivered, plus lifetime access to 24/7 Plant Doctor support.

What To Know Before You Buy A New Planter

When it comes to potted plants, the pot or planter is often just as important as the plant itself! The pot your plant calls home goes far beyond aesthetics, and the planter you choose (and how you pot your plant in it) will dictate the overall health of your plant over time. 

But there's more to choosing a planter than meets the eye. From the best materials for plant pots to finding the ideal size and ensuring proper drainage, here's what you need to know before buying a new planter.

  1. Best Materials for Plant Pots

  2. Finding the Right Fit

  3. The Importance of Drainage

  4. What to Do If Your Pot Has No Drainage

  5. Where to Buy High-Quality Pots for Plants

Best Materials for Plant Pots

The first step in choosing a planter is picking the right material. There are various options available, each with its own set of advantages:

  • Ceramic: Ceramic pots are classic and come in a wide range of designs and colors. They're excellent for retaining moisture, making them suitable for plants that like consistent hydration. Many ceramic pots, like these Mid-Century style planters and our Scandinavian line of pots, are fully water-sealed as well, an added bonus if you’re worried about your pots damaging precious surfaces like wood floors or rugs.

  • Terracotta: These porous clay pots are great for plants that prefer well-draining soil. They allow air to reach the roots and are perfect for succulents and cacti. Note that terracotta pots will “age” overtime, changing colors as it absorbs minerals from the soil, fertilizer and water.

  • Metal: Metal planters, like those made from galvanized steel, are durable and often have a modern aesthetic. They can withstand the elements, making them suitable for outdoor use.

  • Wood: Wooden planters offer a rustic charm and can be a great choice for herbs or ornamental plants. They do require a liner to prevent water damage to the wood.

Finding the Right Fit

One of the common dilemmas plant lovers face is finding a planter that seems like the perfect fit, only to discover it either swallows the nursery pot or is entirely too small. Here are a few tips:

  • Room to Grow: Choose a planter that accommodates your plant's current size with some room for growth. A too-small planter can restrict your plant's development, but you also don’t want your plant to be swimming in soil as most like to have their roots very cozy. When choosing the right size planter, think about 2-3 inches bigger than the nursery pot your plant comes in.

  • Proportions: Consider your plant's height and width. Taller, top-heavy plants may require a planter with a wider base to prevent tipping. Most nursery pots come in standard widths, such as 4", 6", 8", or 10". If your planter is wider than the nursery pot and you do not plan on potting directly in your planter, use a foam collar or any suitable material to eliminate wiggle room and keep it from tipping over. This method is called “staging”—keep scrolling to read more about how this works and why it’s our preferred method for potting plants.

  • Trimming the Nursery Pot: Unfortunately many planters are not designed with the nursery pot in mind. Once again, this is an issue if you don’t plan on potting your plant directly into your planter. To ensure your plant fits the planter snuggly, trim the nursery pot's height by an inch or two. This process typically requires a sharp blade, as nursery pots are often made of tough plastic.

Léon & George planters are made of high-fired stoneware, 100% water-sealed so they’ll never damage your floors.

The Importance of Drainage

Drainage is a non-negotiable feature in plant pots. Without it, excess water can accumulate, leading to root rot and other issues. It is crucial that you either purchase a planter with drainage holes or that you set your plant up for proper drainage within its planter without holes. It’s quite easy—keep reading to learn how!

What to Do If Your Pot Has No Drainage

If you have your eyes set on a planter that lacks drainage holes (there are so many beautiful ones out there!), you can still make it work. Add a layer of small rocks , pebbles, or foam to the bottom to elevate your plant and create space for excess water. This prevents your plant from sitting in water for extended periods. Then set the plant inside its nursery pot inside the decorative planter. A block of styrofoam or a similar material also does the trick, rendering drainage holes unnecessary.

This is called “staging”, and it’s our preferred method of potting plants. Why is that? As a start, it helps with airflow for your plant, as many planters will not allow your plant’s roots to easily breathe. It also makes caring for your plants easier, as popping them in and out of their planter is a breeze. We stand by this method so firmly that we even stage when the planter has its own drainage holes!

Read more (and see a diagram) about how to stage your plants here.

Where to Buy High-Quality Pots for Plants

Now that you know what to look for in a planter, where can you find the perfect one? Here are some reputable places to consider:

  • Léon & George: A curated collection of minimalist, high-quality ceramic planters that pair well with any decor style.

  • Light & Ladder: Light & Ladder offers beautifully designed planters that are both unique and functional.

  • Goodee: Goodee is a treasure trove of sustainable and eco-friendly items for the home, including a highly curated selection of plant pots, perfect for the environmentally conscious plant lover.

  • Etsy: Etsy is the place to go for artisanal and unique planters. You'll find a vast assortment of handmade as well as vintage options to suit your style.

In conclusion, selecting the right planter is essential for the health and well-being of your plants. Choose the best material, ensure the planter's size is suitable, and prioritize drainage. With these tips in mind and the right planter in hand, your plants will thrive, and your space will flourish with greenery. Happy planting!


Designed to Thrive

Premium plants, potted and delivered, plus lifetime access to 24/7 Plant Doctor support. Order online at leonandgeorge.com

The Ten Commandments of Braided Money Tree Care
braided money tree sizes

Triple the prosperity! Our Braided Money Trees are available in small, medium, and large sizes.

Are you ready to care for your very own Braided Money Tree? With its striking braided trunk and lush green foliage, the Braided Money Tree is a captivating plant that brings an aura of prosperity and positive energy to any space. They even say it brings good luck, but of course,  we imagine those luck-bearing properties are at their strongest when the plant is thriving!

Bring a wealth of good fortune to your home or office with the Braided Money Tree, and adhere to these Ten Commandments so that you and your plant will flourish for years to come!

Provide abundant light (if you want it to grow!) 

braided money tree light

Braided Money Trees thrive in moderate to bright indirect light.

The Braided Money Tree can be a very fast grower, and will do so in bright, indirect light. Place your plant near a window where it can bask in ample indirect light if you’d like to see it flourish and grow bigger over time. Note that the Braided Money Tree can adapt to medium levels of light, but it will grow more slowly. 

And whatever you do, keep it out of harsh direct sunlight! The Braided Money Tree is a houseplant, not a beach bum, and will quickly burn if left to roast in the sun.

Maintain plenty of humidity 

The Braided Money Tree is no diva, but it does hail from humid environments and as such appreciates a moist atmosphere. Increase humidity levels by regularly misting its leaves or placing a tray of water and pebbles near the plant or a humidifier. This will help recreate its natural habitat.

braided money tree

Elevate your space with lush charm! Braided Money Tees bring a touch of vibrant greenery to any environment.

Keep things cozy

The Braided Money Tree prefers a temperature range between 65°F and 80°F (18°C to 27°C). Shield it from extreme temperature fluctuations and drafts, which can stress the plant. If you’re cold, your plant is probably cold too!

And keep it away from heaters and AC units

A quick path to unattractiveness for most indoor houseplants is placing them right next to air vents. Likewise with the Braided Money Tree– avoid placing it near vents, air conditioners, or heating units, as they can cause dry air and disrupt the plant's health. Optimal conditions include a moderate and consistent temperature throughout the year.

Fertilize with care

Feed your Braided Money Tree with a balanced, water-soluble fertilizer during the growing season (spring and summer). Consider using Boost Vitamine, an all natural plant food that is ideal for Braided Money Trees and other indoor specimens. Follow the instructions and take care not to overdo it! Over-fertilizing can lead to “fertilizer burn” on your plant’s foliage.

Water judiciously

While the Braided Money Tree appreciates regular watering, it dislikes “wet feet” or waterlogged soil. Allow the top inch (2.5 cm) of soil to dry out before watering again. Ensure proper drainage by using a well-draining potting mix and a pot with drainage holes.

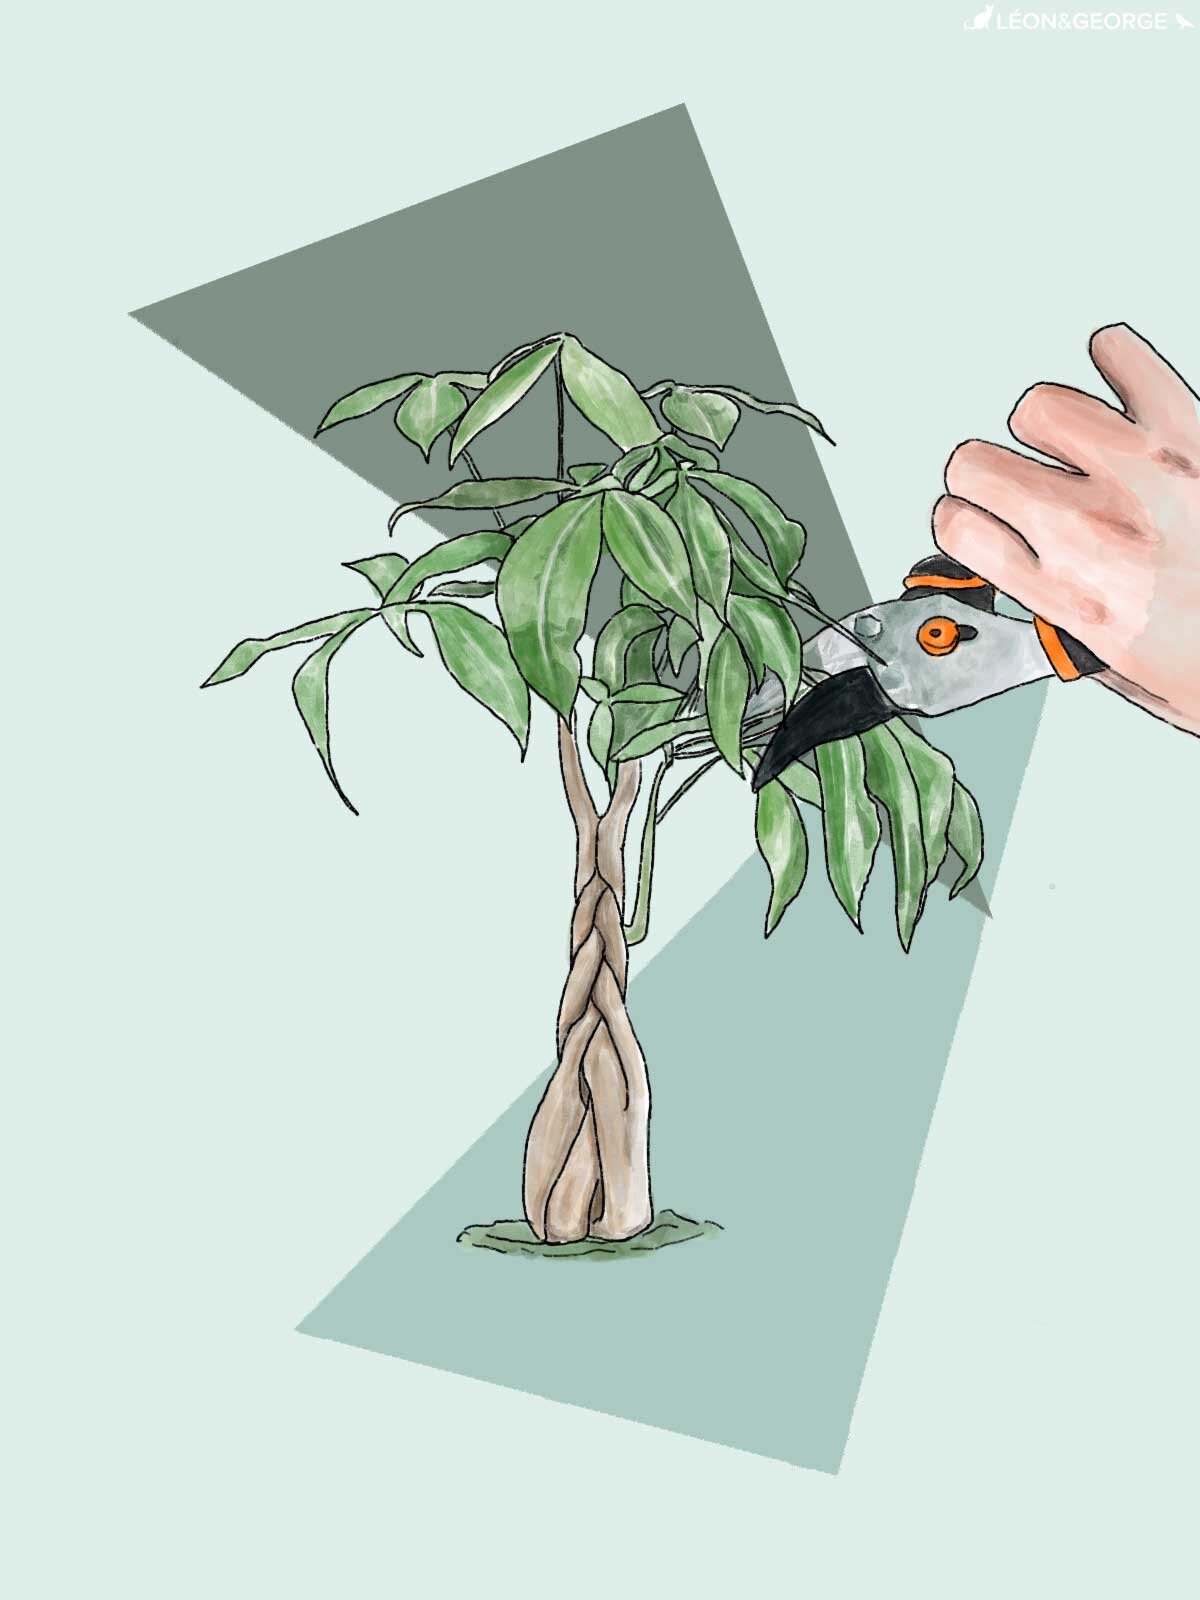
money tree prune

Braided Money Trees flourish with occasional trimming, shaping your wealth and growth.

Prune with purpose 

Pruning is essential to maintain the shape and health of your Braided Money Tree, as well as to promote new growth. Trim away any dead or yellowing leaves, as well as leggy growth, to encourage a fuller and more balanced appearance. Use clean and sharp pruning tools to minimize the risk of disease. As always with pruning, never remove more than 30% of the leaves at a time. 

Be vigilant against pests

Plants don’t attract pests, but they can be an attractive home for pests if not cared for properly. Regularly inspect your Braided Money Tree for signs of infestation, such as webbing, tiny crawling insects, or sticky residue. Keep your plant clean with soap specially formulated for indoor plants, and treat any pest issues promptly with organic insecticidal soaps or other appropriate natural remedies like Neem Oil.

Repot wisely

When your Braided Money Tree outgrows its current pot, transfer it to a slightly larger container with fresh, well-draining soil. Repotting every two to three years, preferably in spring, allows the roots to have adequate space for growth and prevents the plant from becoming root-bound. Read our full guide on how to repot your plant.

Embrace plant companions

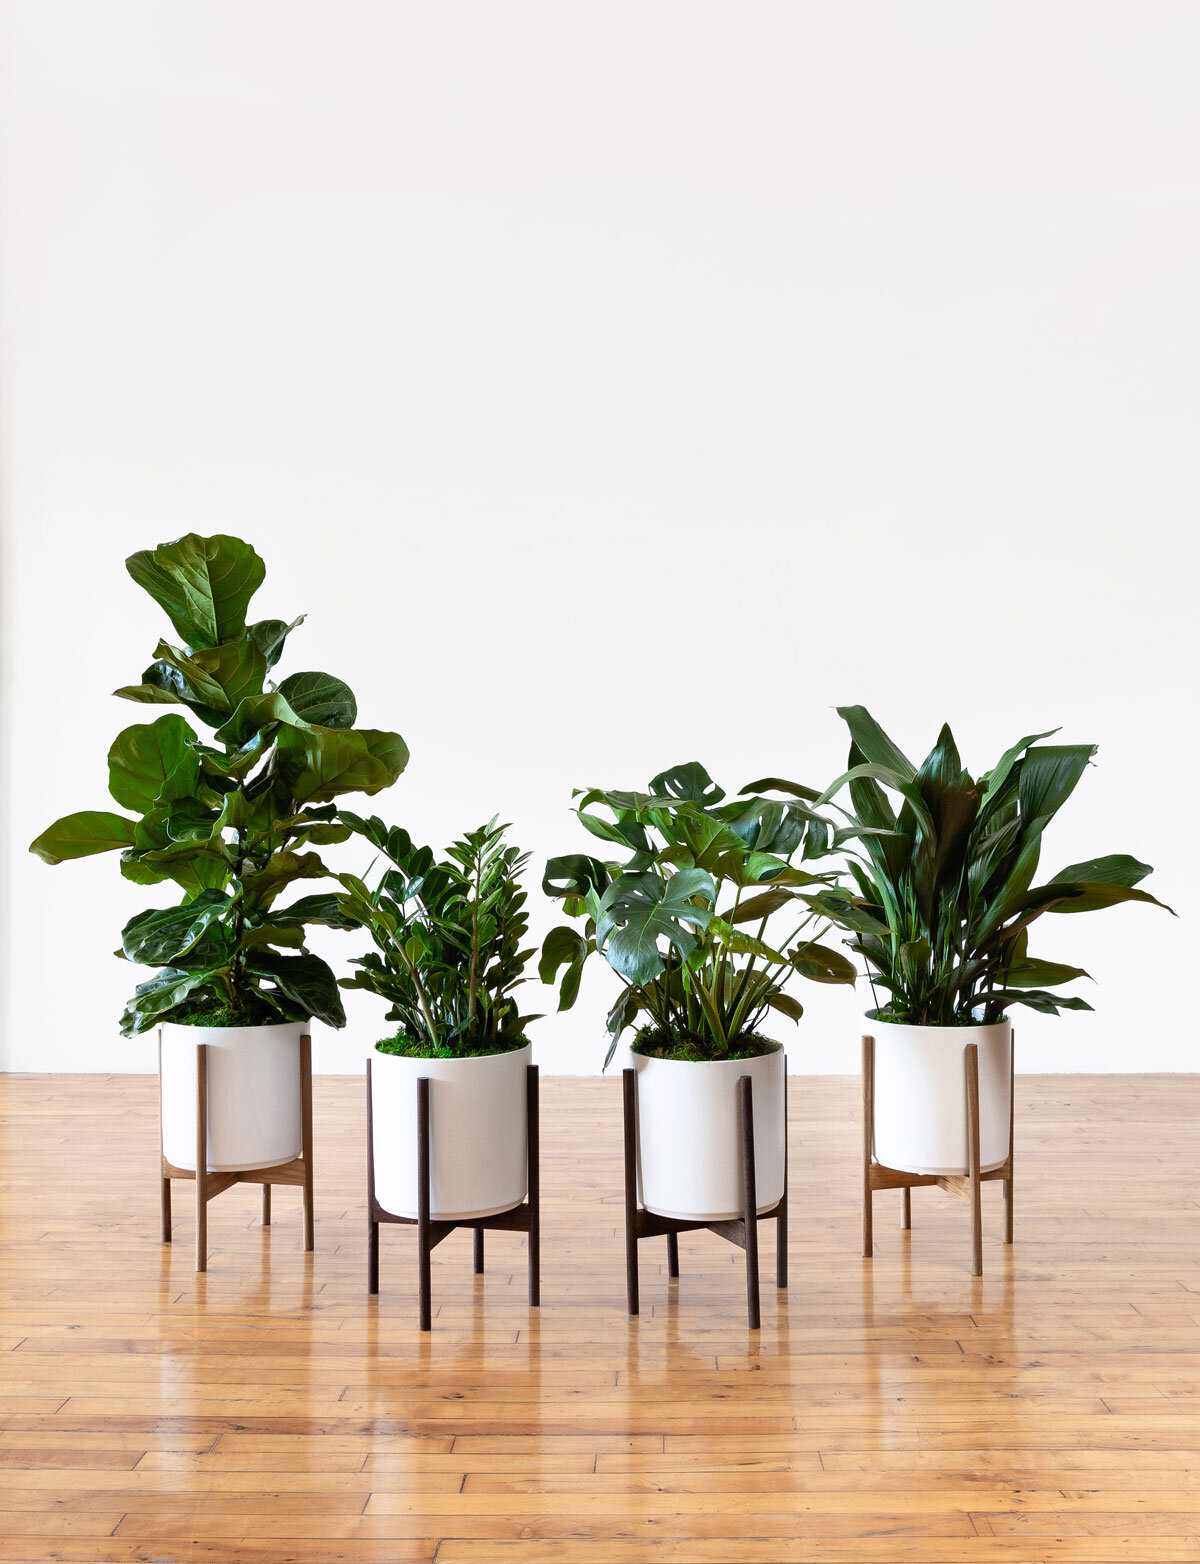
Consider grouping your Braided Money Tree with other compatible houseplants. Plants in proximity create a microclimate of increased humidity and can benefit each other. Just ensure their light and watering requirements align, and they will thrive together.

parlor palm braided money tree

Pair a Braided Money Tree with a Parlor Palm to create a stunning botanical oasis.

Ready to take on the luck-bearing Braided Money Tree? Follow these ten commandments and we guarantee you will have a lush, flourishing Money Tree in no time!


braided money tree

Designed to Thrive

Premium plants, potted and delivered, plus lifetime access to 24/7 Plant Doctor support. Order online at leonandgeorge.com

What To Know Before You Fertilize Your Plants

Fertilizing your plants is like giving them a nutrient-packed smoothie – it's the secret recipe for their vibrant and blooming success!

Like all living creatures, plants have certain needs in order to live their best lives: they require light, water, and nutrients to thrive. While most of the nutrients come from the soil, potted plants can experience nutrient depletion over time. This is where fertilizer steps in, and is an important part of keeping your plant “well-fed” over time. But before you dive into feeding your leafy companions, there are a few important things you should know about fertilizers.

  1. When to Fertilize

  2. What Type of Fertilizer to Use

  3. Types of Fertilizers

  4. Recommended Fertilizers for Indoor Plants

  5. How to Fertilize Indoor Plants

When to Fertilize

Timing is everything when it comes to fertilizing your plants. In general, you should fertilize during the growing season, which usually spans spring and summer. During these months, increased warmth and light stimulate plant growth that might slow down in the colder, darker winter. Feeding your plants with nutrients at the right time helps boost their growth. 

When it comes to indoor houseplants, you might also fertilize in the fall and winter, particularly if the plant is putting out new growth. Feeding it lightly during this time will support that new growth!

Read more about the best time to fertilize your plants!

What Type of Fertilizer to Use

Fertilizers typically contain three primary nutrients: nitrogen, phosphorus, and potassium, often abbreviated as NPK. These nutrients are represented by numbers on the fertilizer's packaging, such as 10-20-15 or 15-15-15, and they correspond to the percentages of N-P-K in the fertilizer. A balanced, all-purpose fertilizer usually has them in equal proportions. However, there are specialized fertilizers for specific plants, like orchids or roses, which may have different NPK ratios and additional micronutrients tailored to the plants' needs. The fertilizer's label should provide all the necessary information about its intended use. Also check out the best fertilizer for popular plants like the Bird of Paradise, Snake Plant and Fiddle Leaf Fig!

Types of Fertilizers

Liquid Fertilizer: This water-soluble fertilizer is added directly to your watering can every two weeks. Be sure to follow the label instructions carefully for accurate measurements, as overdoing it can harm your plant's leaves. The benefits of liquid fertilizer include precise control over nutrient delivery and the ability to observe your plant's reaction and adjust future feedings accordingly.

Slow Release: At the start of the growing season, incorporate slow-release fertilizer directly into your plant's soil. These fertilizers release nutrients gradually over 2-3 months, reducing the need for frequent feeding. It's particularly handy if you're planning a vacation, as your plants will receive the nourishment they need in your absence.

Recommended Fertilizers for Indoor Plants

While any indoor plant food will suffice, here are some recommended products to consider:

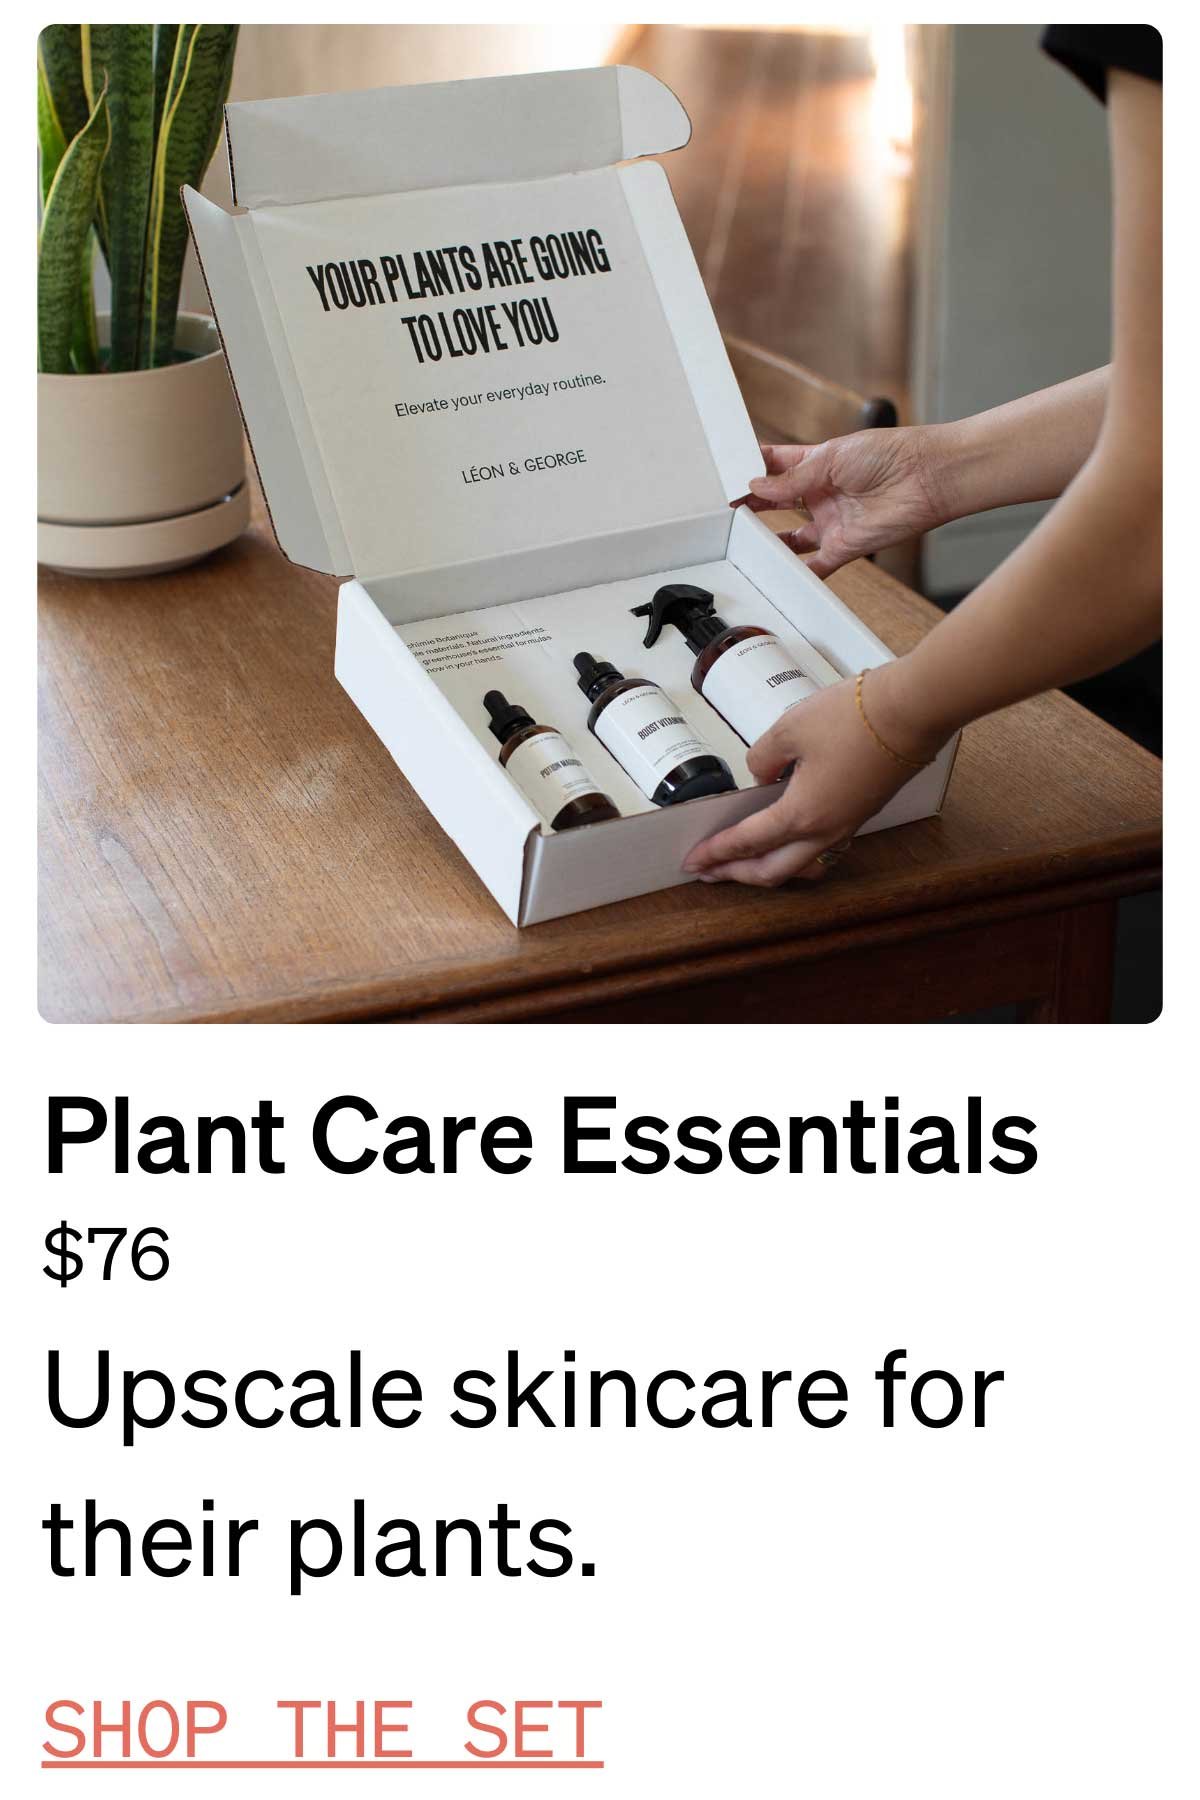
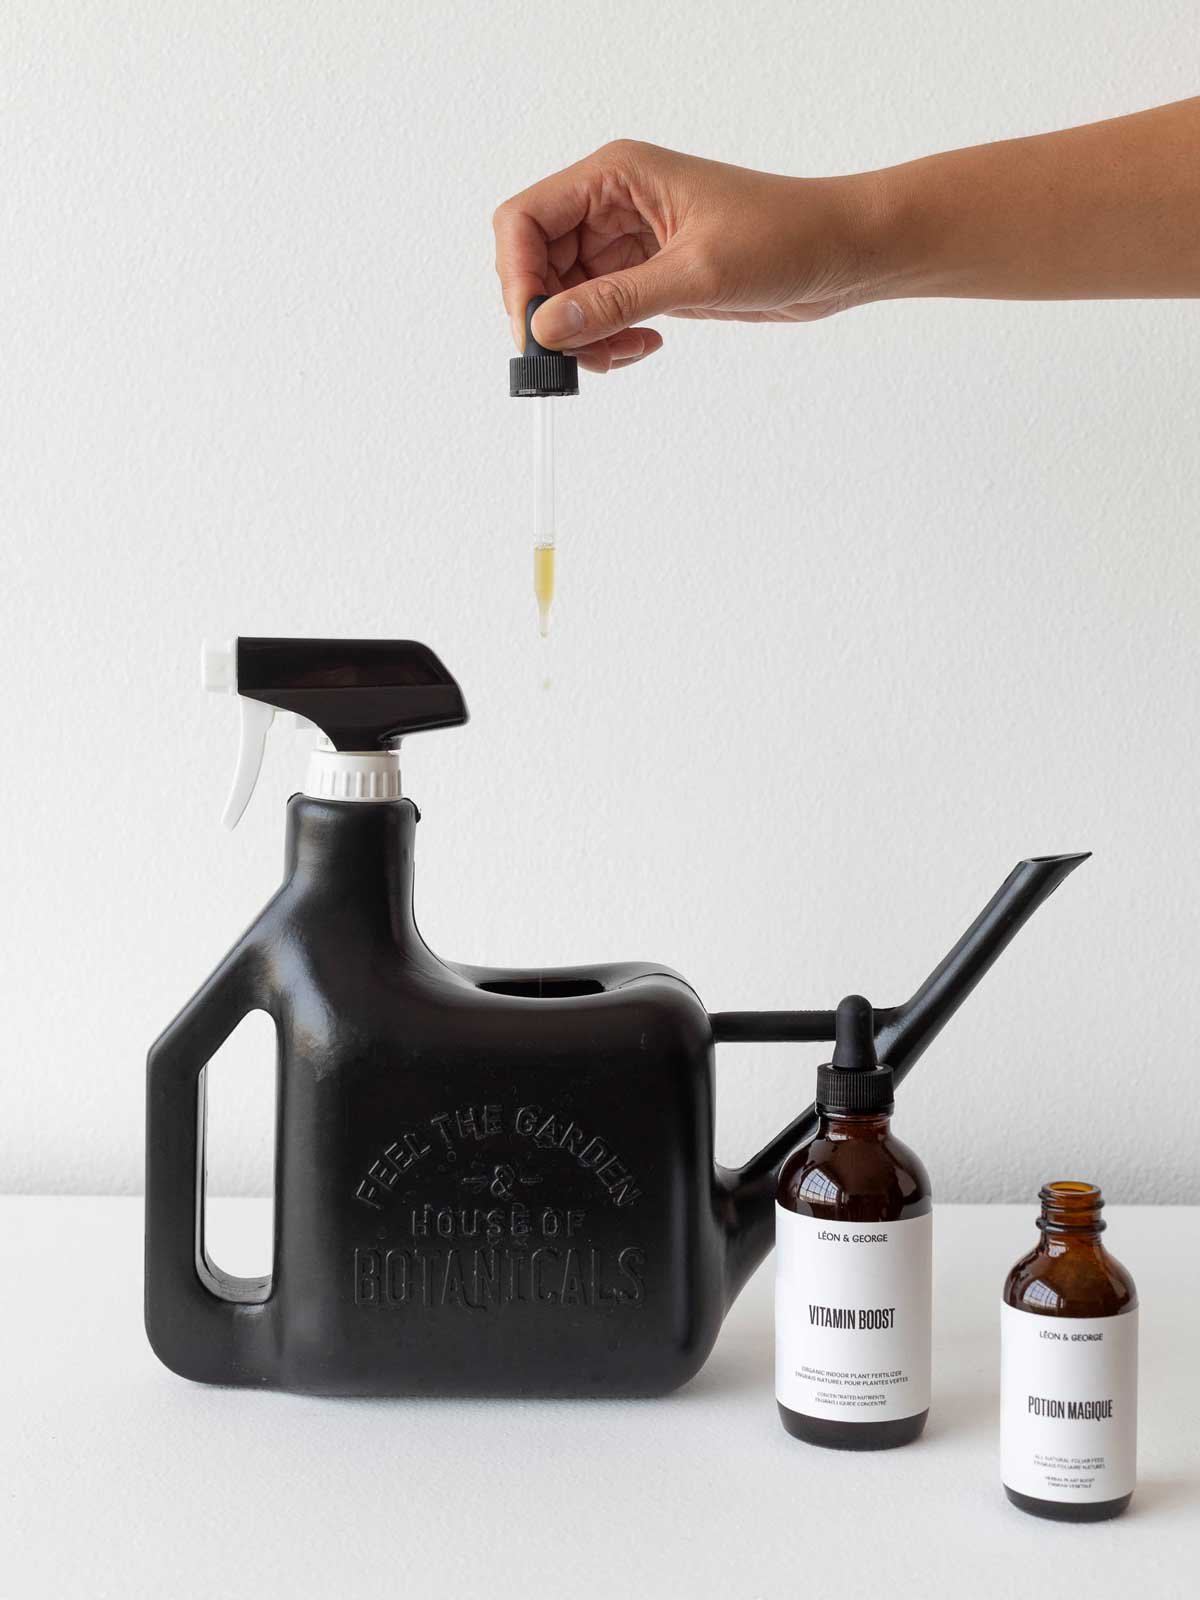
Boost Vitaminé Natural Plant Food: This natural plant food, with only four ingredients, is suitable for use with any indoor plant. What makes it stand out is its gentle formula, making it safe to use sparingly even in winter.

Potion Magique Foliar Feed: Ever tried foliar feeding? It might not be as effective for promoting new growth, but it increases nutrient intake through the plant's leaves. Potion Magique is a potent, all-natural foliar feed that you can incorporate into your misting routine. Plus, it smells divine!

Boost Vitaminé Natural Plant Food: The four-ingredient wonder that's gentle enough for your indoor plants, even when the winter chill sets in!

How to Fertilize Indoor Plants

Always follow the guidelines provided with your chosen fertilizer. Some come in liquid form to mix with your watering, while others are solid and can be placed in the soil or sprinkled on top. As a general rule, fertilize your plants 1-2 times per month in spring and summer. Reduce to once a month or cease fertilizing during the winter, depending on the strength of your plant food.

Remember, it's entirely possible to over-fertilize your plant, leading to "burning" or yellowing/browning of the leaf tips. Also, be aware that new commercial potting mixes often contain fertilizer, so you should wait about a month before fertilizing a newly potted plant.

Now that you're equipped with these fertilizer fundamentals, go ahead and nurture your hungry plants to ensure they flourish and thrive. Happy feeding!


Designed to Thrive

Premium plants, potted and delivered, plus lifetime access to 24/7 Plant Doctor support. Order online at leonandgeorge.com

The Secrets Behind Fall's Changing Light
falllight.jpg

Autumn brings a host of visual treats with it, but none more soothing than the way it causes the world to glow with that unforgettable, soft fall light. And it’s not just a figment of your imagination! The fall season really does cause a change in sunlight and the way we perceive it. Even our plants embrace autumn light with new behaviors. Read on to learn more. 

The Hows and Whys of Fall Light

Seasons occur as a result of the Earth turning on its axis as our planet orbits the sun. It all comes down to this tilt: at the height of summer (for the northern hemisphere), the sun is shining directly down on us creating bright beams of summer sunshine. 

During autumn, the tilt of the Earth means the sun is lower on the horizon, casting a longer, weaker ray of light, hence the glow that we’ve come to love and associate with this season. This is also why shadows are longer during the fall: because of the Earth’s tilt, the Sun’s light hits the Earth at a lower angle. 

But What Does This Mean for my Plants?

Because fall light is more evenly diffused, this will likely result in your plant receiving more or less light (depending on the time of day) than it did in the summer. Plants can react to this with phototropic behavior (reaching and growing toward the source of light). 

This newly softened sunlight can also mean that plants that you would usually keep away from direct sunlight can be placed in its path without issues. Depending on your plant’s individual lighting requirements, you may wish to move it to a brighter location. 

Beautiful Fall Light in Action

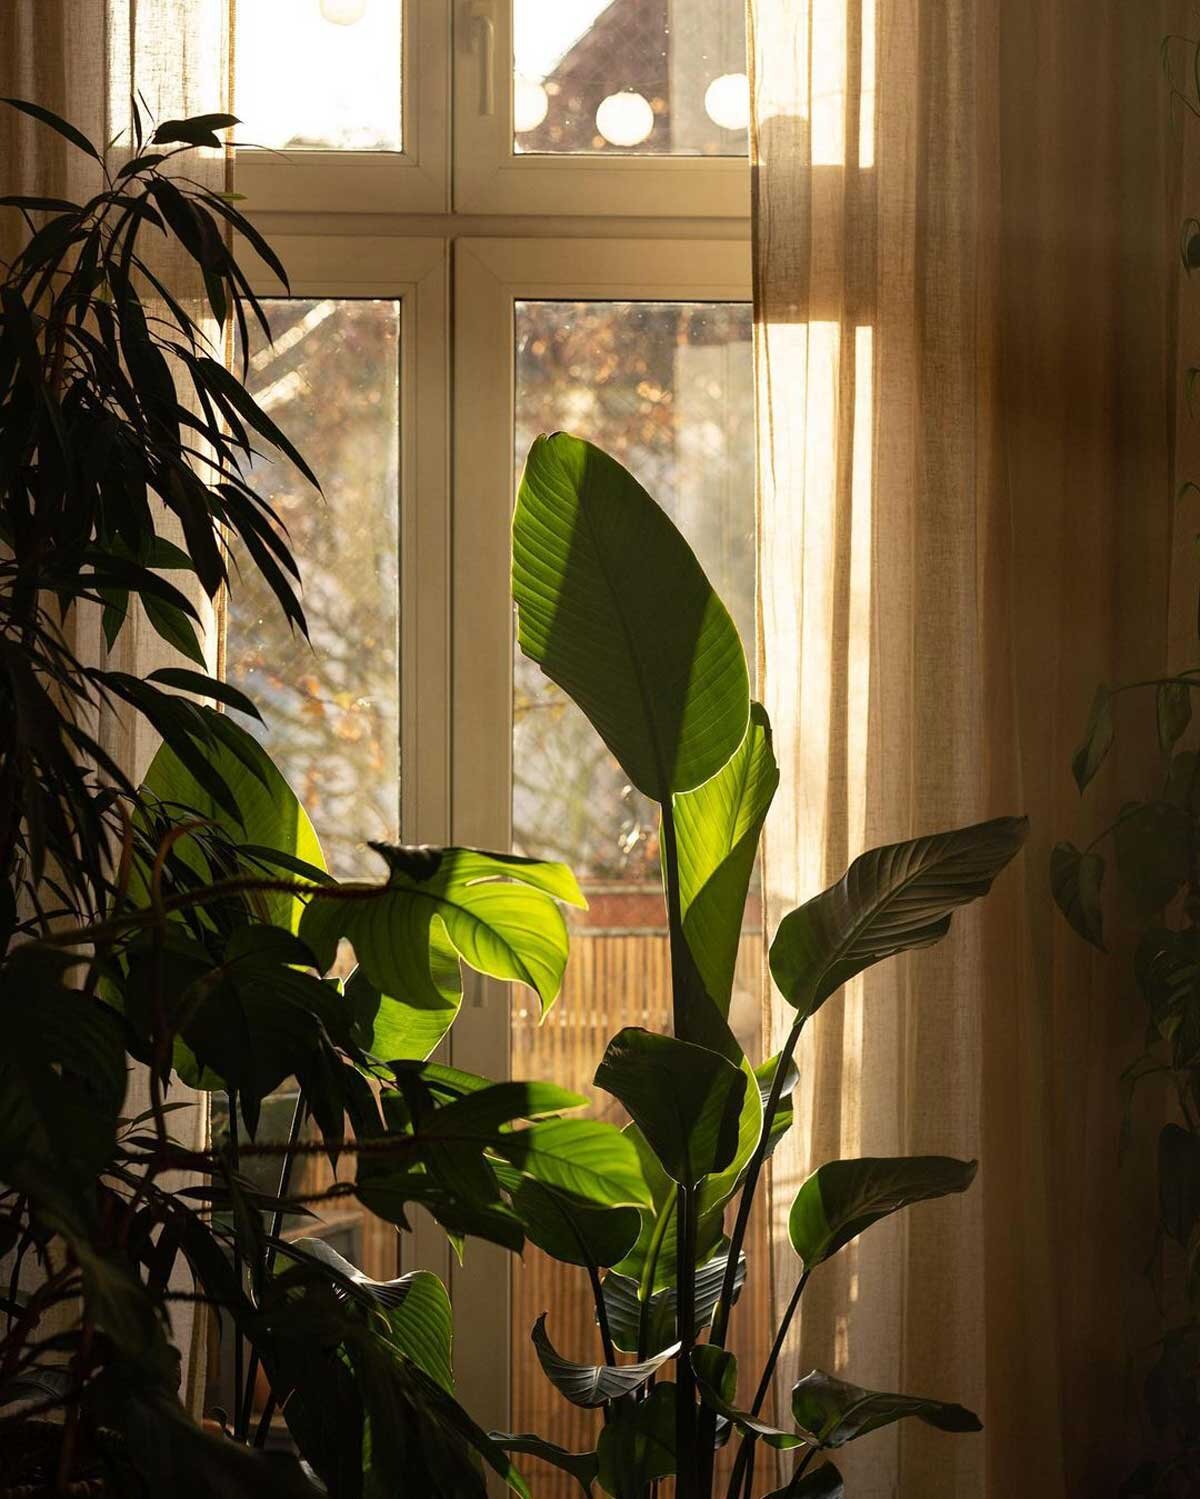
What an exquisite example of the soft autumn light we love! This gorgeous Bird of Paradise is bathed in classic, afternoon fall light. Note the shadows and deep, plush quality of the sunlight- it’s a far cry from the strong light of summer, and it softens the entire space. Because the light-loving Bird of Paradise is still situated close to the window, it’s still healthily nourished, even as the season shifts. Photo credit: @caropeony

What an exquisite example of the soft autumn light we love! This gorgeous Bird of Paradise is bathed in classic, afternoon fall light. Note the shadows and deep, plush quality of the sunlight- it’s a far cry from the strong light of summer, and it softens the entire space. Because the light-loving Bird of Paradise is still situated close to the window, it’s still healthily nourished, even as the season shifts. Photo credit: @caropeony

This gorgeous apartment features two Léon & George plant varieties and they both appear to be loving the diffuse autumn light they’re receiving. The Monstera (ever the easy-going spirit!) has no qualms about the direct sunlight it is receiving. Too much bright, direct light can irritate Monsteras, but this is less likely to be a problem during the fall, when the light is soft and golden. The towering Fiddle Leaf Fig Tree is also thriving in direct sunlight. Photo credit: @mr.cigar

This gorgeous apartment features two Léon & George plant varieties and they both appear to be loving the diffuse autumn light they’re receiving. The Monstera (ever the easy-going spirit!) has no qualms about the direct sunlight it is receiving. Too much bright, direct light can irritate Monsteras, but this is less likely to be a problem during the fall, when the light is soft and golden. The towering Fiddle Leaf Fig Tree is also thriving in direct sunlight. Photo credit: @mr.cigar

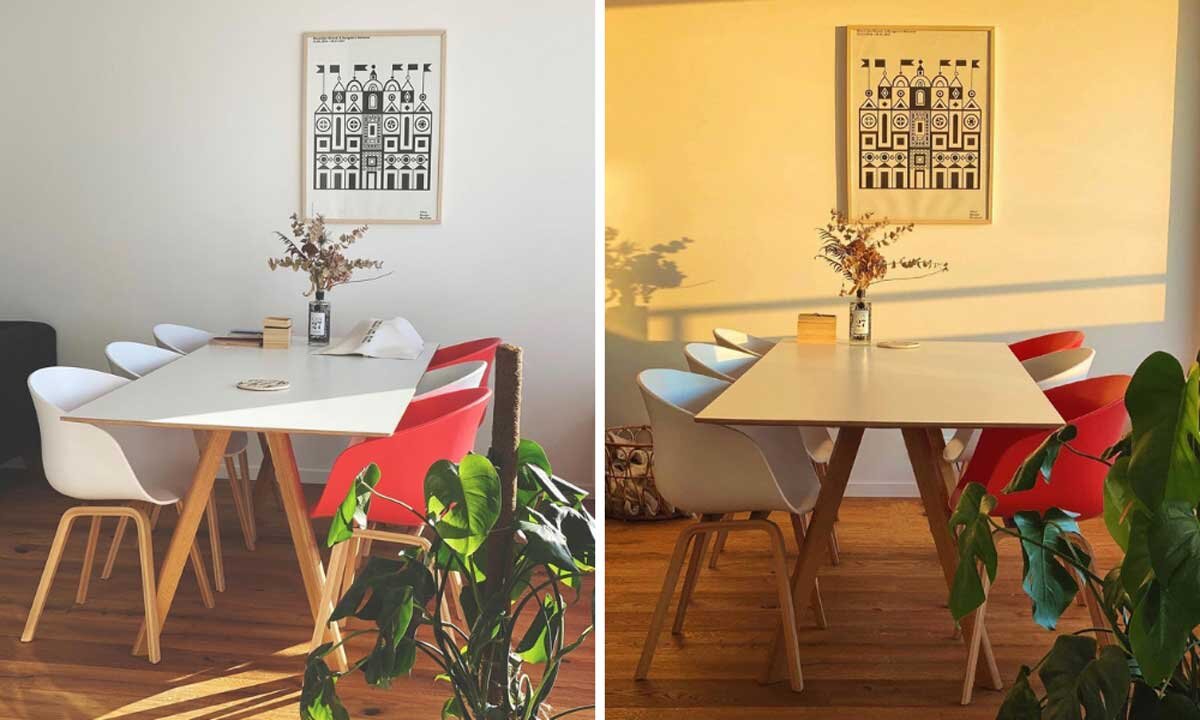
What a difference a few hours can make! The hazy, golden late afternoon light on the left is so evocative. In the photo to the right, we see the long, crisp shadows and even distribution of soft light that is typical of fall mornings. Photo credit: @twenty_figs

What a difference a few hours can make! In the photo to the left, we see the long, crisp shadows and even distribution of soft light that is typical of fall mornings. The hazy, golden late afternoon light on the right is so evocative. Photo credit: @twenty_figs

Ready to learn more? Check out our light guide for indoor plants, a complete guide on indoor plants and their light needs.


Easy Care Plants, Delivered

Beautifully potted plants, plus lifetime plant care support. Order online at leonandgeorge.com

L&G Travels: Longwood Gardens

Albee Larry/Courtesy Longwood Gardens

Bio·​phil·​ia /ˌbī-ō-ˈfi-lē-ə  /-ˈfēl-yə : a desire or tendency to commune with nature

Explore the wonders of nature with us in our Léon & George Travels series as we delve into captivating biophilic experiences across the globe.


Nestled in the picturesque Brandywine Creek Valley in Kennett Square, Pennsylvania, you’ll find a sprawling botanical paradise known as Longwood Gardens. Spanning an impressive 1,077 acres, this horticultural masterpiece is among the most impressive display gardens in the United States, offering year-round access to a captivating world of native and exotic plants, both indoors and outdoors, as well as a testament to the artistry of horticulture and human hands.

A Glimpse into Longwood Gardens' Rich History

Longwood Gardens is so much more than a botanical garden. For thousands of years, the native Lenni Lenape tribe fished its streams, hunted its forests, and planted its fields, but how it got to be what it is today began in the early 20th century when industrialist Pierre S. du Pont purchased the property to save the trees from being harvested for lumber. Du Pont's vision was to create a garden that would not only be a sanctuary for plants but a place of art, science, and education.

Over the years, Longwood Gardens has evolved into one of the most remarkable horticultural displays in the world, sprawling across gardens, woodlands, and meadows, and is an awe-inspiring living work of art that continues to inspire generations.

Albee Larry/Courtesy Longwood Gardens

A Garden of Wonders

One of the most captivating aspects of Longwood Gardens is the sheer diversity of flora and the meticulous care that goes into maintaining them. As you wander through the grounds, you'll find yourself surrounded by a symphony of colors and fragrances, with each season bringing new surprises.

The Highlights of Longwood Gardens

  • The Conservatory: The crown jewel of Longwood Gardens, the conservatory is a vast, four-acre indoor garden filled with an astonishing array of plants. Here, you'll encounter orchids, palms, and even a soaring treehouse that offers a unique perspective on the garden's beauty.

  • The Main Fountain Garden: No visit to Longwood Gardens is complete without witnessing the Main Fountain Garden in all its splendor. This mesmerizing display features 750 jets that shoot water as high as 175 feet into the air, creating an intricate and choreographed dance of water and light. The historic Italian Water Garden, surrounding the fountains, adds a touch of timeless elegance to the spectacle. It's a place where the beauty of nature and the ingenuity of design come together in perfect harmony.

  • The Meadow Garden: For those seeking a more naturalistic and wild experience, the Meadow Garden is a testament to the garden's commitment to preserving the environment and showcasing native flora. During the fall, the Meadow Garden bursts into a vibrant display of golden grasses and late-blooming wildflowers, offering a serene and contemplative contrast to the more formal gardens.

  • The Idea Garden: This space serves as an educational garden, demonstrating various gardening techniques, creative ideas, and inspiring combinations of plants.

Albee Larry/Courtesy Longwood Gardens

Visiting in Autumn: The Annual Chrysanthemum Festival

While Longwood Gardens is a breathtaking destination year-round, there's something magical about visiting during the fall season. As the leaves turn vibrant shades of red, orange, and yellow, the garden takes on a completely new character. The crisp air, the scent of fallen leaves, and the vibrant foliage create an enchanting atmosphere that puts the pumpkin spice latte to shame.

What’s more, each fall Longwood Gardens holds its annual Chrysanthemum Festival, a spectacular showcase that brings an ancient artform practiced throughout Japan and China to the US. Fall’s favorite flower fills the gardens, with more than 5,000 colorful chrysanthemum plants that transform the Conservatory into an autumnal dream.

Visit Longwood Gardens

If you find yourself in this northeast pocket of the US, don’t think twice about making a visit to Longwood Gardens.

Longwood Gardens

1001 Longwood Road, Kennett Square, PA 19348

Plant your visit to Longwood Gardens


designed to thrive

Premium plants paired with handcrafted ceramics, plus lifetime Plant Doctor access. Order online at leonandgeorge.com

The Best Fertilizer For Snake Plants

Help your Snake Plant live its best life with a regular fertilizing routine!

  1. Understanding the NPK Ratio

  2. The Best Plant Food for a Snake Plant

  3. Can Fertilizing My Snake Plant Help It Grow?

  4. When To Fertilize Your Snake Plant

With their striking upright leaves and air-purifying qualities, Snake Plants (Sanseverias) are a popular choice for indoor plant enthusiasts and novices alike. Native to the arid regions of West Africa, they are well-suited to indoor environments due to their ability to tolerate low light conditions and infrequent watering. While Snake Plants are known for their adaptability, providing them with the right nutrients can boost their growth and overall health. Keep reading to learn about the best fertilizer for all varieties of Snake Plants and how to best fertilize these low-maintenance plants effectively.

Understanding the NPK Ratio

Fertilizer labels often display an NPK ratio, representing the ratio of nitrogen (N), phosphorus (P), and potassium (K) in the product. Different plants have specific nutrient requirements, so it's important to choose a fertilizer that matches your Snake Plant's needs.

Snake plants thrive with a balanced, all-purpose liquid fertilizer with an NPK ratio of 10-10-10 or similar. This balanced ratio ensures that your Snake Plant receives essential nutrients for overall growth and health.

The Best Plant Food for a Snake Plant

While various fertilizers with the right NPK ratio can effectively nourish your Snake Plant, consider using a high-quality, all-natural liquid plant food that is gentle enough to use year round. Our Boost Vitaminé is an all-natural plant food that promotes growth, strengthens roots, and enhances overall plant vigor. It's suitable for Snake Plants and many other indoor plants, offering a convenient solution to your plant care needs.

Feed your Snake Plant's inner beauty with the secret to lush leaves: the perfect fertilizer.

Can Fertilizing My Snake Plant Help It Grow?

Snake Plants are primarily grown for their attractive foliage and air-purifying qualities, making them a favorite for those seeking low-maintenance greenery. While Snake Plants can occasionally produce small, fragrant white flowers, especially when grown outdoors, indoor Snake Plants rarely bloom as indoor houseplants. Fertilization may encourage leaf growth and overall plant health but is unlikely to trigger flowering in indoor settings.

By choosing the right fertilizer and following a simple feeding schedule, you can keep your Snake Plant thriving and looking its best. Remember that Snake Plants are hardy and forgiving, making them an excellent choice for both beginners and experienced plant enthusiasts. 

When To Fertilize Your Snake Plant

Timing is key when it comes to fertilizing Snake Plants. These plants experience active growth during the spring and summer months, making this the ideal time to focus on providing them with nutrients. To ensure your Snake Plant receives the nourishment it needs, incorporate a balanced liquid fertilizer into your watering routine every four to six weeks during the growing season.

Liquid fertilizers like the Natural Plant Food are convenient for Snake Plants because they are easy to apply and less likely to cause fertilizer burn (when you give your plant too much fertilizer), provided you follow the package instructions and dilute the fertilizer correctly in water.

As fall and winter approach and your Snake Plant enters a period of slower growth, reduce feeding your Snake Plant to once every two months. During this dormant phase, Snake Plants require fewer nutrients, and over-fertilizing can harm their health.

Good luck! The Snake Plant is an easy-going houseplant that requires little to no maintenance over time, but by giving it a little nutrient boost, you’ll enjoy its beauty for years and years to come!


Designed to Thrive

Premium plants, potted and delivered, plus lifetime access to 24/7 Plant Doctor support. Order online at leonandgeorge.com

Fact or Fiction: Do Houseplants Go Dormant in Winter?

The Snake Plant and Jade Pothos, basking in winter light. Photo by @thenamestesa

With the change of seasons, it's natural to wonder how your beloved houseplants are faring in the winter months. There are many myths and misconceptions about house plants going dormant during winter, and it's time to debunk any myths!

Dormancy in Winter

Do Plants Need Less Care in the Winter?

Repotting in Winter

Temperatures in Winter

Light Conditions in Winter

Dormancy in Winter

While many outdoor plants and trees shed their leaves and go dormant in winter, most common houseplants don't follow the same pattern. Houseplants come from a variety of climates, and many, including many from our collection at Leon & George, are native to tropical regions where winter is just a slightly cooler and drier season. While kept indoors, these conditions are generally kept pretty constant as well, except for shorter days in winter. So, unless your houseplant is specifically adapted to a dormant period, it's likely to keep growing year-round, though it is not uncommon for houseplants to grow much more slowly during the winter months than they do during spring and summer. 

Do Plants Need Less Care in the Winter?

While most houseplants may not go dormant, their growth may slow down during the winter. This can sometimes be mistaken for dormancy, but in reality, your plant is just conserving energy since there is less daylight this time of year. This reduced growth means they require less water and fertilizer, but it doesn't mean you can forget about them. Houseplants still need regular attention and care throughout the year. Consider reducing your watering frequency and amount, and definitely reduce fertilizer use– in fact, most fertilizers are too strong to use during the winter, but our natural plant food is gentle enough to use all year round (just reduce to once per month in the winter!). 

Repotting in Winter

In general, it's best to avoid repotting your houseplants during the winter months. Repotting can stress the plant, and during the winter, they are already dealing with lower light levels and potentially cooler temperatures. Wait until the growing season in spring to give your houseplants a fresh start, and only repot if absolutely necessary, for example, your plant has been overwatered and is experiencing root rot.

Temperatures in Winter

While many common houseplants can often tolerate slightly cooler temperatures in winter, most generally prefer to be kept in a stable, warm environment. Most common houseplants come from tropical regions where temperatures remain relatively constant year-round. Sudden drops in temperature can stress your plants, so try to keep your home in the same temperature range throughout the year. 

Light Conditions in Winter

While some houseplants may require less light during the winter due to their slowed growth, many still need their usual requirements, in some cases plenty of bright, indirect light. Make sure to place your plants near windows where they can receive enough light to keep them happy. If you live in an area with long, dark winters, you might consider supplementing with grow lights to keep your plants thriving, or at the very least, moving your plants around throughout the day to give them the light they need. 

The idea that houseplants universally go dormant in winter is more fiction than fact. It's crucial to understand your specific plant's needs and provide the right care year-round. While your plants might not be as active during the winter, they still rely on you for proper care and attention to remain happy and thrive!


Designed to Thrive

Premium plants, potted and delivered, plus lifetime access to 24/7 Plant Doctor support.

Dear Plant Stylist: Help Me Decorate This Desert Abode!

This Mid-Century desert home enjoys a Bird of Paradise for a splash of green.

In our Dear Plant Stylist series, we share styling and lighting inquiries received by our in-house stylists with our audience. So read on-- you just might find that your plant styling questions are answered below! 

Dear Plant Stylist,

I recently moved to the desert and want to decorate my home with more plants. I used to live in a very wet climate, on a tree-lined street, and while my new home is nestled amidst the arid beauty of the desert (and this landscape is stunning in its own right) I can't help but feel that I need some more lush greenery in my life! Can you offer some guidance on the types of plants that would thrive in my desert home while adding the vibrancy and life I'm yearning for?

Sincerely,

D.D.

Dear D.D.,

The desert is so beautiful, but for someone who loves to gaze at green, I understand it can feel stark! Creating a green haven in a desert environment is not only achievable but also incredibly rewarding, and the good news is, as far as houseplants go, a desert climate won’t limit you too much, since your plants will live indoors. I’m sure we can help you select plants that should help scratch your itch, as well as complement the stunning landscape that surrounds your home!

First things first—as I mentioned, don’t feel limited by the dry and arid climate of your new home. While your outdoor landscaping will be a completely different story, your houseplants will live (I imagine!) in a climatized setting indoors. That means mostly indirect light and regular watering with a watering can—no need to wait for the desert rain for these plants! However, depending on how much you run your AC, you may like to consider getting a humidifier.

Now that we have this out of the way, we can focus on plants that bring lushness to a whole new level, while also vibing well with a desert decor—think Joshua Tree or Marfa inspired! The Fiddle Leaf Fig is such a classic and popular plant, probably because it so gracefully complements quite literally any decor. It’s big, fiddle-shaped leaves will surely inspire you, and having an tree inside your home is obviously a no-brainer if you miss your tree-lined street!

A Fiddle Leaf Fig blends into an environment, including a desert decor. Photo via newdarlings.com

Another statement plant you may consider is an Olive Tree. The Olive Tree is actually a very drought-resistant and heat-tolerant plant that you could even place outdoors in your desert home. If you do place it indoors, make sure to find a very sunny spot as this plant likes to have several hours of direct sunshine per day.

And we would be remiss not to mention a cactus—it is the desert after all! Both the Jade Cactus and Desert Cactus are, in reality, tree-like succulents that are adapted to live indoors (but can also go outside!). If you’d truly like to make a nod to your new home’s beautiful landscape, consider one of these gorgeous and minimalist cacti. Another perk of these plants is they need very infrequent watering and in general next to no upkeep!

desert home plant ideas

How can you resist a cactus moment in a desert setting? Photo via @thejoshuatreehouse

For smaller floor plants, you might consider something like the Dracaena Compacta—its lush green leaves look great against neutral interiors and the sand-toned exteriors of the desert. The Ponytail Palm is a quirky plant that seems to marry a jungle look with dry, desert vibes, and Snake Plants are great air purifiers whose minimalist look will complement a desert decor.

Don’t forget to add accents here and there: consider a Cascading Pothos to bring lushness to shelves, bathrooms or other areas where its trailing foliage may hang, or a Parlor Palm for a mini oasis wherever you place it.

Finally, might I suggest grouping plants together in clusters. Mix and match different heights, colors and foliage shapes to maximize the feeling of lushness in your home.

I hope this was helpful, and please share the results— I’m so excited to see your desert abode come to life!


designed to thrive

Premium indoor plants paired with stylish ceramics, plus lifetime access to Plant Doctor support. Order online at leonandgeorge.com