Celebrate Spring With Your Neighbors!
email  grid.jpg

Love your neighbors? So do we. We started in our San Francisco backyard and as our local restaurants find ways to welcome us all back, we're excited to show our support and continue our mission to bring our customers closer to nature each and every day.

That’s why this spring, we’re thrilled to launch a series of promotions in our home state of California to bring nature indoors, get you out, and support our wonderful local restaurants while we do it!

How does it work? Book your delivery on a specified date and get a gift card to dine al fresco in a beautiful outdoor setting this spring.

First up, the beloved Foreign Cinema! Find your perfect plant, select white glove delivery for Wednesday, March 31 and score a $50 gift card to treat yourself to Foreign Cinema’s beautiful courtyard patio.

Keep in mind that delivery slots are limited so hurry to grab your spot. Find more details below, and happy spring!

Offer applies to local, white glove delivery only with minimum purchase of $300 before tax. Order must be placed between 3/20-3/27 for plant delivery on Wednesday, March 31, 2021 in the San Francisco Bay Area. Gift cards will be included with your delivery. Limited availability promotion and will be gifted on a first come first serve basis. Cannot be combined with any other offer.

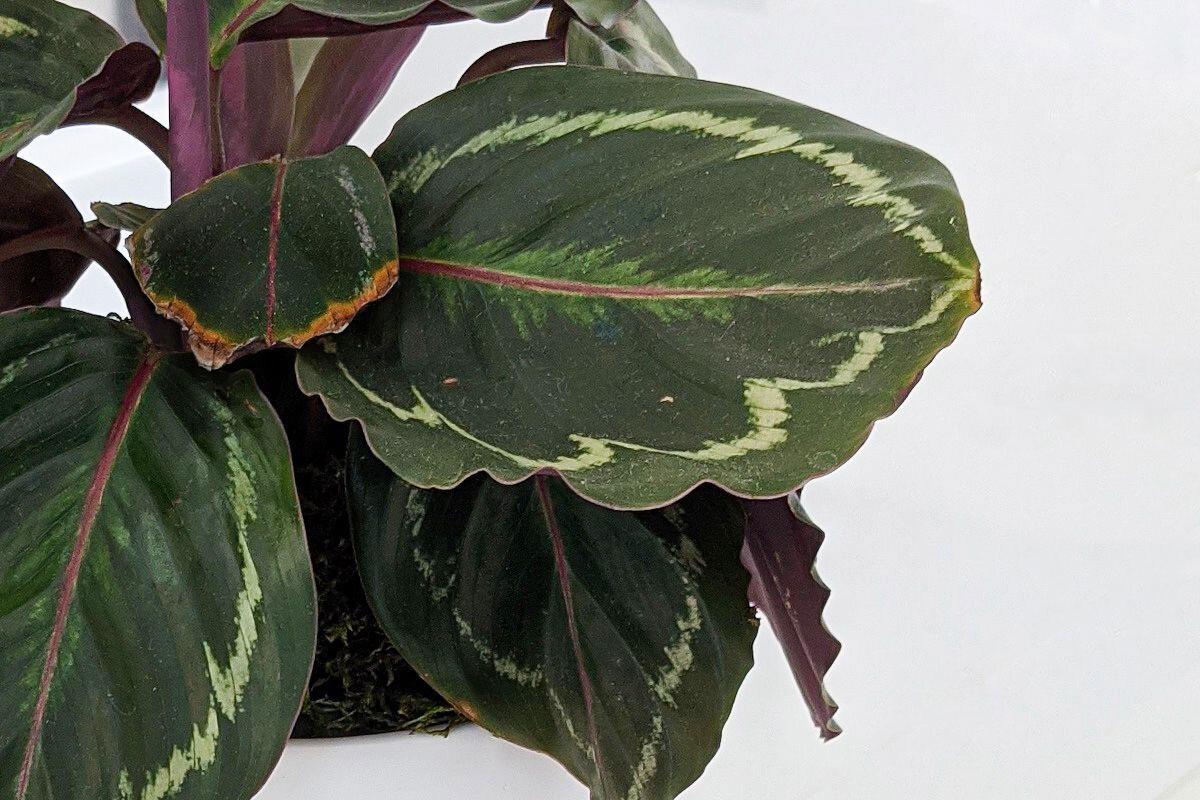
Help! Why Are My Calathea's Leaf Edges Browning?
The Calathea Rattlesnake after a quick trim.

What causes brown edges on Calathea leaves?

Calatheas have expressive leaves. They engage in a type of circadian rhythmic movement known as nyctinasty: this means that their sensitive leaves move in reaction to the light they receive. In the evening, they turn their leaves up, and during daylight hours, those same leaves are lowered.

As you might imagine, plants with sensory skills like these can also be delicate, with a preference for specific conditions. When it comes to Calatheas, this can mean that if the water, light, soil or food that your plant receives isn’t just right, the plant may respond with something all plant owners dread: browning leaf edges. 

But not to worry! In keeping with our commitment to providing the best resources available for indoor plant owners online, we’ve got solutions! Read on, and let us take the mystery out of Calathea care.

Incorrect Lighting

A Sunburn? Not For Me, Thank You. Never forget that Calatheas need indirect light. They’re no desert darlings, and they must not be placed directly in front of windows or below skylights. Plan on making a home for your Calathea in an area that receives steady, indirect light and plenty of moisture. (Yes, this plant is a perfect bathroom buddy!) 

Water Quality

Calatheas would prefer to receive the quality of water that they get in their native environments (moist rainforests in South America and Southeast Asia). On the off chance that you happen to live in a jungle, this shouldn’t be a problem. But for the rest of us, we have to rely on some more urbane life hacks. 

The hard minerals in your water like chlorine, salt and fluoride can be harsh for indoor plants like Calatheas. If you have a water filtration system, it’s a great idea to use it to filter your water before watering your plant. Another hack is to simply leave your water out to “breathe” in a bowl or the kitchen sink overnight before watering your Calathea with it. This gives the water time for the fluoride to dissipate (evaporate,) which occurs when it meets oxygen. 

Lack of Humidity

Plan on misting your Calathea at least once weekly and consider keeping your plant in a part of your home that receives regular moisture like the bathroom or kitchen. You can also place your Calathea near a humidifier and reap the double-benefits of the humidifier softening your air while your Calathea purifies it! Need a mister? Look no further: this one is beautiful, sustainable and has components for both misting and watering!

Dry Is Good for Humor and Martinis; Not So Good for Calathea Soil

Once again we come back to your lovely Calathea’s homeland: a moist and fertile rainforest, burgeoning with life! Recreate that magic by ensuring that your Calathea’s soil is consistently moist. It’s not as hard as it sounds! Regularly delve one to two inches into your Calathea’s soil with your pointer finger. If the topsoil feels dry, water your plant. If it’s still moist, you can wait. For most indoor environments, this means watering about 1-2 times a week.

Too-cold temperatures

Let’s be clear- your Calathea is a tropical plant, and like a Floridian retiree, she prizes a pleasant climate. Keep her away from drafts, heaters or cooling vents. (The rush and push of air circulating through appliances will only irritate your plant.) 

Expect to see the dreaded curling if your Calathea grows cold or excessively dry. Keep your room temperature between 65-80 degrees consistently, and your Calathea’s leaves will practice their graceful nyctinasty in peace! 

Keeping Your Calathea Happy

Indoor plant care can be tricky. Over or under-watering? Too much sun, or not enough of it? When your Calathea exhibits signs of browning, it’s not always easy to pinpoint the cause.

Remember these simple words of wisdom: 

  • Don’t drown your plant. Overwatering is by far the most common cause of ill health in indoor plants, Calatheas included.

  • No sunburns allowed. No plant wants its leaves to burn, and the tropical Calathea prefers indirect light only.

  • Humidity, humidity.  Make sure that this Queen of the Rainforest is receiving… well, her rain. Misting is a gift to your Calathea, and you may find it surprisingly meditative for you, too! 

In the meantime and while you make adjustments for its comfort, don't be afraid to give it a makeover. Trimming is completely safe and allows your plant to redirect more energy to new growth. Here are a few simple tips as you prepare those scissors:

  • Check that the blades are clean or disinfect them with rubbing alcohol.

  • Trim off whole leaves as close to the root as possible.

  • For leaves with just a bit of brown edges, reshape them by following the leaf's natural lines.

Now get out there and give your plant some love!

Ready for more? Read our full guide on Calathea care, including tips for propagation, repotting, and more.


fiddle-bush-white-stand-nude-leather-chair.jpg

Indoor plants, potted & delivered

Premium plants paired with stylish ceramics, plus lifetime plant care support. Order online at leonandgeorge.com

How To Fit Your Plant To Your Pot
Photo via @5thavenueflowers

Photo via @5thavenueflowers

The latest in plant care tips for keeping your foliage happy and healthy, brought to you by premium plant delivery service Léon & George.

One of the great dilemmas of the modern green thumb is the surprising amount of planters whose dimensions are just off. To the naked eye, they seem like the perfect fit, but when you place the plant inside, the nursery pot gets swallowed by the planter, or worse, sticks out like a sore thumb.

Of course, many may choose to plant directly in the pot, whether it’s ceramic, plastic, terracotta or another material. But planting directly inside the planter may not always be an option, especially if there is no drainage.

How to remedy this issue then? In a nutshell it’s called staging, and we’re excited to share some secrets with you for how to optimally (and attractively!) fit your plant to its pot.

Trimming the nursery pot

In order for your plant to fit its pot, you may need to trim the nursery pot an inch or two, cutting around the edge to remove some of its height. Your plant won’t suffer! Keep in mind that this might require a sharp blade or other tool, as many nursery pots are made with tough plastic that won’t easily be cut through with scissors.

fittingplanttopot.jpg

Fitting the width of your planter

Most nursery pots come in standard sizes of 4”, 6”, 8”, 10”, etc widths. If your planter is wider than your nursery pot, you may like to fit it so that there’s no wiggle room in between. Any material will work for this, but the cleanest and easiest solution is by wrapping the nursery pot with a foam collar, as you would fit a hat to your head!

Elevating your plant inside the pot

No drainage hole? Have a heavy hand with watering? You may like to create some elevation to ensure your plant never sits in water for prolonged periods. Our ceramics are 100% water sealed, too, which means any excess water will simply sit at the bottom of the pot. Many plants like to drink from the bottom up, so if you have a good sense of how much water your plant needs, you may like to place your plant directly on the floor of its planter. If you’re afraid of overwatering, though, use a block of styrofoam or similar material to create elevation.

fittingplanttopot2.jpg

Adding the final touch

To keep things looking neat, add decorative moss, rocks, or similar to the top of the soil. Voilà! You’ve perfectly staged your plant, and guess what? Staging has added benefits for indoor greenery, like increased airflow to the soil, less chance of overwatering, and easy, mess-free swapping out if you decide you want to refresh the planter!

Staging your plant, start to finish. Illustration by @kail_bales

Staging your plant, start to finish. Illustration by @kail_bales


howtoarrangeindoorplants1.jpg

Indoor plants, potted & delivered

Premium plants paired with stylish ceramics, plus lifetime plant care support. Order online at leonandgeorge.com

The Best #LeonAndGeorge Moments Of February
greenandgrainstyle.jpg

February’s over already?! That seems to always be the sentiment, year after year. And with spring just around the corner, our days are a bit longer and things feel a bit brighter, especially after the eternity that was January! Before we roll up our sleeves and dig into spring refresh and cleaning, let’s savor the quiet days of winter and the coziness of our favorite people (or pets?!) — we saw a lot of them this month in your favorite #leonandgeorge moments this month at home!

We love to see your before and after photos! Especially when they include a gorgeous Cascading Pothos as the final touch.

@just.paint.it.white

See on Instagram

Basking in that morning light, with the (pet-friendly!) Cast Iron Plant.

@oh_charlyboy

See on Instagram→

If this isn’t a perfect moment then we don’t know what is! Welcoming home a new Monstera Deliciosa, side by side with a Bird of Paradise.

@siegejol

See on Instagram

thenamestesashelves.jpg

A color coordinated plant shelfie with the Jade Pothos.

@thenamestesa

See on Instagram→

We’re not sure what we love best about this. The dreamy mudroom, the perfectly placed Bird of Paradise, or the pup! @greenandgrainstyle

See on Instagram→


Philodendron Brasil Care Guide: Everything You Need To Know

PHILODENDRON BRASIL

AKA variegated heartleaf philodendron

The Philodendron Brasil offers a colorful twist on a classic houseplant and is surprisingly easy to care for. With heart-shaped leaves in different shades of green and yellow, this trailing plant earned its name thanks to the close resemblance to the Brazilian flag. Read on to learn everything you need to know about taking care of your Philodendron Brasil from the amount of water it needs, its light requirements, and how to overcome the common issues you might encounter along the way.

What type of light does the Philodendron Brasil need?

While it can survive in low light conditions your Brasil will show its variegation best in medium to bright indirect light. Be careful not to give them too much sun though, placing them in direct sunlight can cause leaf burn.

How to water your Philodendron Brasil

Water about once a week and allow the topsoil to dry out between waterings. Avoid overwatering, and note that your watering schedule may be less frequent during winter months.

Is the Philodendron Brasil a fast grower?

This plant is indeed considered a fast grower. You can either keep you Brasil in a hanging pot and let its leaves trail down or you can train it to grow upwards by using supports. Fertilize your Philodendron Brasil 1-2 times per month in the spring and summer with indoor plant food, or foliar feed year round.

Common problems with Philodendron Brasils

How to maintain a beautiful and healthy Philodendron Brasil

Philodendrons are known for being easy to care for, read on for tips on how to keep yours looking full and colorful over time.

Pruning Philodendrons

Remove dry or dead leaves all year round, but save any major pruning for the spring and summer months. When pruning your philodendron, use sharp, clean shears and cut any excessive growth at the base of the stem.

Cleaning Your Plant

Take each leaf between two soft tissue cloths and wipe off the top to reveal a healthy shine (also helps the plant soak in more light!).

How to repot your Philodendron

Houseplants grow much slower than they would in the wild. Depending on the size of your plant and the density of the roots, this is nice to do every 2-3 years to provide fresh nutrients and encourage new growth.

  • When to repot - Philodendrons are known for their rapid growth. You’ll know when it’s time to repot yours when its roots are growing our of the pot.

  • Pot sizing - if you want your plant to grow outwards more, find a nursery pot that’s 2” in diameter larger than the current pot. If you want your plant to stay the same height, you can reuse the same pot and simply change the soil.

  • Get your hands dirty - spread out newspaper on the floor, remove the plant from the pot and shake off as much of the old soil as possible so that you have clean roots. Place the plant in the center of the pot, add new soil and pat down firmly. Water the soil thoroughly and place the plant in an area with bright indirect light. Your plant will take 2-4 weeks to settle from the shock and adjust to its new home.

How to propagate a Philodendron Brasil

If you’re interested in making more of your Philodendron Brasil either for yourself or a friend rest assured that propagating this plant is very easy. Though there are many ways to do this, water propagation is generally the easiest way to go about it. Follow these instructions to propagate your Philodendron Brasil:

  • Select a stem to propagate - Using sharp, clean scissors or shears, cut an inch or two below a node(these are the areas where leaves attach to the vines).

  • Place in water - Find a clear glass and fill it with water. Submerge only the stem of the vine, any leaves that are sitting in the water will rot!

  • Place in a bright area and wait! - Avoid any direct sun. You may need to change the water out every few days to keep it fresh. It usually takes just a few days for the root to start growing.

  • Transfer to soil - After a week or so, transfer to indoor potting soil. A small pot is best — no larger than 6” in diameter.

  • Keep hydrated - During the first few weeks, or until your plant feels firmly rooted in its soil, regularly water and drain your Philodendron. The soil should be just barely moist to the touch at all times.


brasil.jpg

Philodendron Brasil

An incredibly resilient tropical plant, this colorful variation of the heart-leaf philodendron is the perfect choice for beginners.

4 Easy Care Flowering Plants For Indoors
Flowering plants for indoors: a few of our favorite picks, and where to buy them online

Flowers or plants? Have both, with these easy care flowering plants for indoors.

There’s no denying the beauty of fresh flowers, but wouldn’t it be nice if they lasted longer than a week or two? Luckily there’s more ways than one to bring nature’s beauty into your home, and flowering plants for indoors are a great way to enjoy both fresh flowers and fresh greenery year round.

With the right care, many flowering plants can last for years and even decades, bringing fresh blooms and beauty without pause. While some flowering plants will only bloom a couple times a year while indoors, others will bloom year round with just minimal care.

At Léon & George, we also know how much you love to send plants to your loved ones near and far; after all, plants are a symbolic and attractive gift for any occasion. But sometimes the occasion calls for flowers, which is why we’re thrilled to introduce our first collection of flowering plants for indoors. Combining the ephemeral beauty of cut flowers with the enduring longevity of potted plants, we’re happy to say that you no longer have to choose!

Whether you’re shopping for yourself or for a gift, here are a few of our favorite flowering plants, potted in our signature handcrafted ceramic planters and acclimated for life indoors.

Queen of Spades Anthurium

Dramatic in looks yet unfussy in character, this Anthurium is a head turner to say the least. Bright light and water once a week are all this plant needs to bloom year round.

Shop now →

Snowdrop Calandiva

As a member of the succulent family, it should be no surprise that the Calandiva is an incredibly hardy houseplant. With small clusters of white flowers that last 6-8 weeks, this plant generally blooms in winter and spring, though it can be easily “tricked” into blooming year round.

Shop now →

Peace Lily

A popular, incredibly resilient indoor plant, the Peace Lily has lush, deep green foliage complimented by delicate white spathes, attractive flower-like leaves that can last for months.

Shop now →

King of Hearts Anthurium

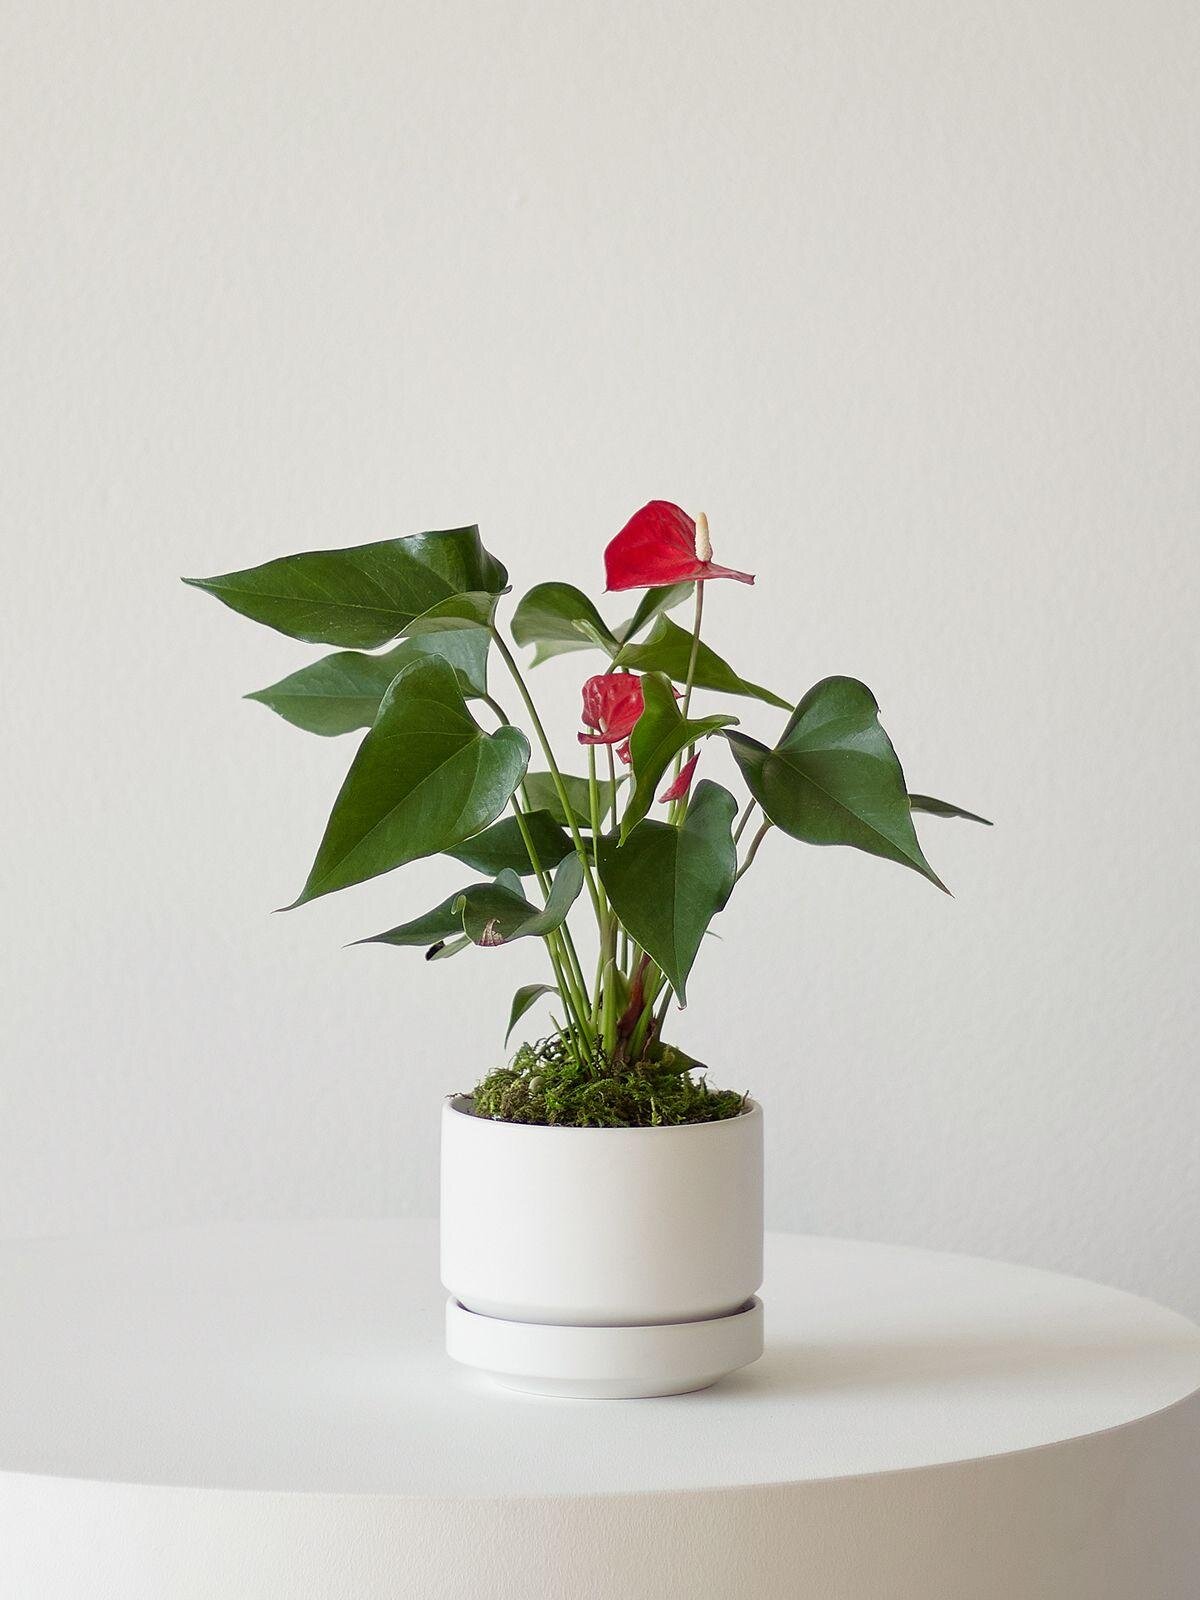
Bright scarlet red flowers are what make this small Anthurium the perfect alternative to a bouquet of roses. Though there is no fragrance, with bright light the plant will continuously produce fresh flowers for years to come.

Shop now →

 
The Best #LeonAndGeorge Moments Of January
IMG_3076 2.JPG

January often gets a bad rap. The holidays are over, New Year’s resolutions are on, and of course, it’s very cold out, yet winter has barely just begun. All the same, it can be a month filled with new beginnings, inspired by our instinct to seek out light and levity and prepare for the year ahead. There’s never a better time than January to bring in a leafy roommate or two: to brighten up the space, to cure the winter blues, or simply to start the year off on the right foot. Here are our favorite #LeonAndGeorge moments of January!

When your Monstera grows like crazy, even in the dead of winter.

@thistleharvest

See on Instagram→

It’s all about the details, like this lovely console moment with a Jade Pothos.

@thenamestesa

See on Instagram→

A perfect pop of green in this subtle yet colorful living room set up, featuring the Bird of Paradise.

@kirankhabradesign

See on Instagram→

Just one Monstera Deliciosa is all it takes to complete this bright bedroom sanctuary.

@theworldvillageproject


See on Instagram→

A large Snake Plant in good, colorful company!

@sheroames

See on Instagram→


How to Care For and Grow Your Anthurium
anthuriumscandiwhite.jpeg

The Anthurium

AKA Laceleaf Anthurium

AKA Flamingo Flower

With bright, long-lasting “flowers” that bloom from large, heart-shaped foliage, it’s no wonder that the Anthurium is a popular houseplant to bring a splash of color and vibrancy to any surface it adorns. Read on for simple tips on how to care for this gorgeous flowering plant, a plant with many names and varieties and also commonly known as flamingo flower, laceleaf, queen of spades, and king of hearts anthurium.

How much light do Anthuriums need?

Anthuriums prefer bright indirect light, but they can also tolerate medium levels of light. Brighter light will produce more and larger flowers. Avoid harsh direct sunlight.

How to water your Anthurium

Water your plant about once a week when the top inch of soil feels dry. This plant can be resistant to the occasional drought.

How fast do Anthuriums grow?

This plant is a slow to moderate grower; more light will promote faster growth. Anthuriums do not need a lot of fertilizer. Fertilize your plant once a month in the spring and summer, using 1/2 the recommended dose.

Natural leaf shine, pest repellent, and fungicide, all in one with our Organic Black Soap Spray.

loriginal-soap-main-photo.jpg

Organic Black Soap Spray

Made with organic black olive oil and containing just four ingredients, an essential tool to keep your plants thriving and glowing over time.

$24

Common problems with the Anthurium

No or very few new flowers

First of all, did you know the “flowers” on the Anthurium are not actually flowers? In fact, they are “spathes”, which is a type of modified leaf that surrounds a spike of miniature flowers. So your plant does have flowers, but what appears to be a big petal is actually a leaf! When plants with spathes show little “flowering”, it is usually attributed to the plant not getting enough light. Try placing your plant in a brighter area and it should produce more flowers. If you’ve found your plant showing no flowers for months, read below for an easy trick to promote a new cycle of flowers for your plant.

Small or misshapen flowers

While Anthuriums will slow flower growth in low light, small flowers can ironically be caused by too much light. This plant will sometimes also show small or deformed flowers when they are consistently not getting enough water. Be sure to follow a regular watering routine, and give your plant a drink when the top inch of soil feels dry.

Yellow or brown leaves

The most common cause of yellow or brown leaves on Anthuriums is improper watering, and specifically, overwatering. Excessive light may also cause your plant to develop yellow leaves. Simply remove the yellow stems with sharp, clean scissors, and adjust either light levels or watering routine.

Shop Anthuriums at leonandgeorge.com

How to care for Anthurium plant

How to maintain a beautiful and healthy Anthurium

Take care of your Anthurium and it will take care of you! Below are simple tips to continue caring for and growing your plant over time.

  • Pruning - remove old, unattractive or damaged leaves from the base of the plant; if they don’t come out easily with a tug, cut them off with a clean blade. Regularly remove spent flowers as well, so that the plant can focus its energy on producing new ones.

  • Trimming - if there is just a small portion of a leaf that was damaged such as the edges or tips, trim off any discoloration or blemishes by following the natural lines and shape of the leaf.

  • Cleaning - regularly mist your Anthurium to keep it clean. If a lot of dust has accumulated on its large leaves, use a damp cloth to wipe each one clean.

How to grow and repot the Anthurium

  • Growing - Anthuriums are slow to moderate growers that do not need a lot of fertilizer to thrive. During spring and summer, fertilize once a month, using about half the recommended dose.

  • Repotting - Léon & George Anthuriums come in 4” or 6” grow pots and only need to be repotted every few years and only if the plant is unhappy (i.e. has been overwatered) or to refresh the soil and give it new nutrients. If you’d like your plant to grow larger, find a new grow pot that is 2” larger than its current pot. If you’re happy with the current size, you can reuse the same pot and simply change the soil.

    • Getting your hands dirty with or without a yard - spread out newspaper on the floor, remove the plant from the pot and shake off as much of the old soil as possible so that you have clean roots. At the bottom of the grow pot, and a layer of soil, then place the plant in the center of the pot and cover with new soil. Pat down firmly and water thoroughly. Place the plant in an area with bright indirect light. Your plant will take 2-4 weeks to settle from the shock and adjust to its new home.

Shop Anthuriums at leonandgeorge.com

How to promote flowering on your Anthurium

With the right light, water, and love, Anthuriums will produce flowers all year round. However, generally there are cycles of flowering, where the plant will produce flowers for a few months, and then take a rest for another few months. Because the flowers last so long, it’s possible you will “have” flowers at all times.

However, if you notice your plant is not producing new flowers, here are simple steps to encourage that it does:

  • Make sure your plant is in a bright area with plenty of indirect light and receiving adequate water.

  • In the late winter or early spring, slow your watering routine and water sparingly or less than you normally would for 6-8 weeks.

  • After this period, return to your regular watering routine and begin fertilizing. You should see new growth over the following weeks and months, followed by flowers!

Shop Anthuriums at leonandgeorge.com

How to propagate the Anthurium

There are a few different ways to propagate an Anthurium. You can either divide your Anthurium, or, more easily and without getting your hands too dirty, take cuttings and propagate in water:

  1. Select a stem to propagate - Find a stem with at least two nodes (the part of a plant stem from which one or more leaves emerge). Using a clean blade, cut the stem at the base.

  2. Place in water - Find a clear glass and fill with water. Make sure only the stem is submerged, and no leaves or flowers are sitting in the water.

  3. Place in a bright area and wait! - Avoid any direct sun. It usually takes just a week or so for roots to start growing.

  4. Transfer to soil - After 3-4 weeks, transfer to indoor potting soil. A small pot is best — no larger than 4-6” in diameter.

  5. Keep hydrated - During the first few weeks, or until your plant feels firmly rooted in its soil, regularly water and drain your new Anthurium. The soil should be just barely moist to the touch at all times until the plant is thoroughly rooted in the soil, at which point you can water every time the top inch of soil feels dry, generally about once a week.


queenanthuriumblack.jpeg

Queen of Spades Anthurium

A beautiful, long-lasting alternative to the traditional bouquet, with spade-like foliage and plentiful white blooms year round.

The Top 4 Office Plants To Inspire Creativity

Keeping your work environment fresh and energized can be a challenge, but did you know that nature has a leafy, green solution to workplace lulls? That’s right, in addition to the list of mental and physical health benefits of indoor greenery, studies have shown that plants can promote innovation, spark ideas, and help us focus. Who knew that natural, beautiful plants could have even more benefits in store? But it’s true! Read on to learn about the plants that inspire creativity, and then add some greenery to your workplace to try for yourself!

The Fiddle Leaf Fig

What’s not to love about the gorgeously structural Fiddle Leaf Fig (ficus lyrata)? It’s no wonder why this luxurious, leafy plant is incredibly popular for homes and offices — its enormous, dramatic foliage and pencil-thin trunk bring us a sense of wonder, calm, and happiness simply by gazing at it.


The Magenta Triostar

The Magenta Triostar (stromanthe sanguinea triostar) is a true work of art by Mother Nature herself. With beautiful foliage that appears hand-painted, it’s no surprise that this plant inspires feelings of creativity and growth.


The Dracaena Compacta

A unique plant reminiscent of the truffula trees appearing in Dr. Seuss’s The Lorax, the Dracaena Compacta (dracaena fragans ‘Janet Craig’), sometimes referred to as the JC Compacta has ample, emerald foliage, and a stylish laddered structure that sparks our creativity, all while it cleans our air. That’s right! This stunning plant is a natural air purifier.


The Pilea Peperomiodes

The Chinese Money Plant (pilea peperomiodes) is one of the best desktop plants for your office or workspace. Not only is it incredibly easy to grow, but it also inspires us with the unique, globe-like shape it takes on as it matures. It may look like this plant is straight from Mars, but it actually hails from the Chinese Himalayan mountains, and apart from growing like a weed, is very easy to propagate and pass on to friends!


Of course, plants don’t only inspire creativity. They also clean our air, promote feelings of well-being and happiness, and beautify just about any space: offices and workspaces included! What are your favorite plants to have in your workspace? Let us know by commenting below!


Easy Care Office Bundle

A curated set of office plants, delivered straight to your door. Our Easy Care Office Bundle was designed with workspaces in mind and is an easy way to bring instant, thriving life into your place of work.

Songs To Grow With: Grow Towards The Light
isaac-leon-and-george-12-9-205X4A9672-Edit-web.jpg

Life is filled with uncertainties, but if there’s one thing we can all collectively rely on, it’s the sun coming up each morning, and the possibilities it brings with each new day. That’s why we’re throwing open the curtains, we’re finding the sunny spots at home, and, like our houseplants, we’re choosing to grow towards the light.

And guess what? We made a playlist to listen to while doing it. Enjoy!

A playlist featuring Generationals, The Black Keys, Electric Light Orchestra, and others


Indoor plants, potted & delivered

Premium plants paired with stylish ceramics, plus lifetime plant doctor support. Order online at leonandgeorge.com

How to Care For and Grow Your Red Congo Philodendron

Red Congo

AKA philodendron congo rojo

With stunning green and crimson leaves sprouting from a single central stem, the Red Congo is at once as elegant as it is lush. Learn the basics of Red Congo plant care including light requirements, watering frequency, and how to troubleshoot common problems you may encounter along the way.

What type of light do Red Congos need?

As members of the philodendron family, Red Congos prefer bright indirect light, though they can adjust to medium levels of light as well.

Keep them out of harsh direct sunlight, as too much of it can burn their leaves.

How to water your Red Congo

Let your Red Congo dry out between waterings. Water thoroughly when topsoil is dry, usually once a week.

Avoid overwatering, and note that your watering schedule may be less frequent during winter months.

Are Red Congos fast growers?

Red Congos, unlike other philodendrons, are not climbers but instead “self-heading” plants, meaning they grow new foliage in layers from a single stalk.

They are relatively slow growers and can reach up to four feet tall indoors.

Fertilize your Red Congo 1-2 times per month in the spring and summer with indoor plant food, or foliar feed year round.

Common problems with Red Congos

Leaves turning yellow or brown

Yellow or brown leaves on the Red Congo philodendron is most likely a sign of imbalance between water and light, and usually it is an issue of too much water and not enough light. Make sure your plant is getting the right ratio of each. Keep in mind that if your plant does not get lots of bright indirect light, you will water it less than if it does.

Remember that overwatering can lead to more severe ailments and that may eventually require you change the soil.  

Leaves or stems wilting

When philodendrons like the Red Congo wilt, it is again most likely a sign of imbalance between water and light (i.e. too much water, not enough light). However, it could also be a sign of dehydration — if you check the soil and it is bone dry (or you know the plant hasn’t been watered in a long, long time), try giving it a thorough shower: water it in a dish or bathtub so that it may sit in water and “drink” for a couple hours or up to a day.

Dropping leaves

The Red Congo can sometimes mysteriously begin to drop its leaves. In most cases, this is usually a sign of an environment that is too cold for this warm-loving philodendron! Make sure the Red Congo lives in a room that does not drop much below room temperature (~68 degrees Fahrenheit) , or that the plant is not too close to any air conditioning units or vents.

Leaves and stems becoming leggy

When plants lose their fullness or bushiness and grow long, spindly stems (they become “leggy"), this is a clear sign that the plant needs more light. While philodendrons can adjust to medium levels of light, if they are placed in a very low light area they may become leggy as they literally reach for more light. If you aren’t sure about the light you have in your home, check our lighting guide for more details.

How to maintain a beautiful and healthy Red Congo

Take care of your Red Congo and it will take care of you! Below are simple tips to continue caring for your Red Congo over time.

Pruning Philodendrons

Remove dry or dead leaves all year round but save any major pruning for the spring and summer months. Red Congos generally shed old leaves every month or two, so when you see a single leaf looking sad, simply remove it and move on! When pruning your Red Congo, use sharp, clean shears and cut any excessive growth at the base of the stem.

Reshaping Your Plant

If your Red Congo gets a few minor brown spots on the leaves (from overwatering, for example), you can easily reshape the leaf using scissors to cut away the unattractive areas, following the natural shape of the leaf.

Cleaning

Take each leaf between two soft tissue cloths and wipe off the top to reveal a healthy shine (also helps the plant soak in more light!).

How to Repot the Red Congo

Houseplants grow much slower than they would in the wild. Depending on the size of your plant and the density of the roots, this is nice to do every two to three years to provide fresh nutrients and encourage new growth.

  • When to repot - As they are slow growers, Red Congos do not need frequent repotting. Repot once every two to three years to give your plant fresh nutrients.

  • Pot sizing - if you want your plant to grow taller, find a nursery pot that’s 2” in diameter larger than the current pot. If you want your plant to stay the same height, you can reuse the same pot and simply change the soil.

  • Get your hands dirty - spread out newspaper on the floor, remove the plant from the pot and shake off as much of the old soil as possible so that you have clean roots. Place the plant in the center of the pot, add new soil and pat down firmly. Water the soil thoroughly and place the plant in an area with bright indirect light. Your plant will take two to four weeks to settle from the shock and adjust to its new home.

How to propagate a Red Congo

Propagating the Red Congo requires some patience, but like most propagations, is fairly simple and straightforward! Follow these instructions to propagate your Red Congo:

  • Select a stem to propagate - Using sharp, clean scissors or shears, cut a stem from the very base of the central stalk.

  • Place in water - Find a clear glass and fill with water. Make sure only the stem is submerged, and no leaves are sitting in the water. You may also choose to first dip the cutting in rooting hormone, as this will increase the chances and speed of the cutting forming its own roots.

  • Place in a bright area and wait! - Avoid direct sun, and be patient! New roots may take a few weeks to begin forming.

  • Transfer to soil - After the roots are at least two inches long, transfer to indoor potting soil. A small pot is best — no larger than 6” in diameter.

  • Keep hydrated - During the first few weeks, or until your plant feels firmly rooted in its soil, regularly water and drain your Red Congo. The soil should be just barely moist to the touch at all times.

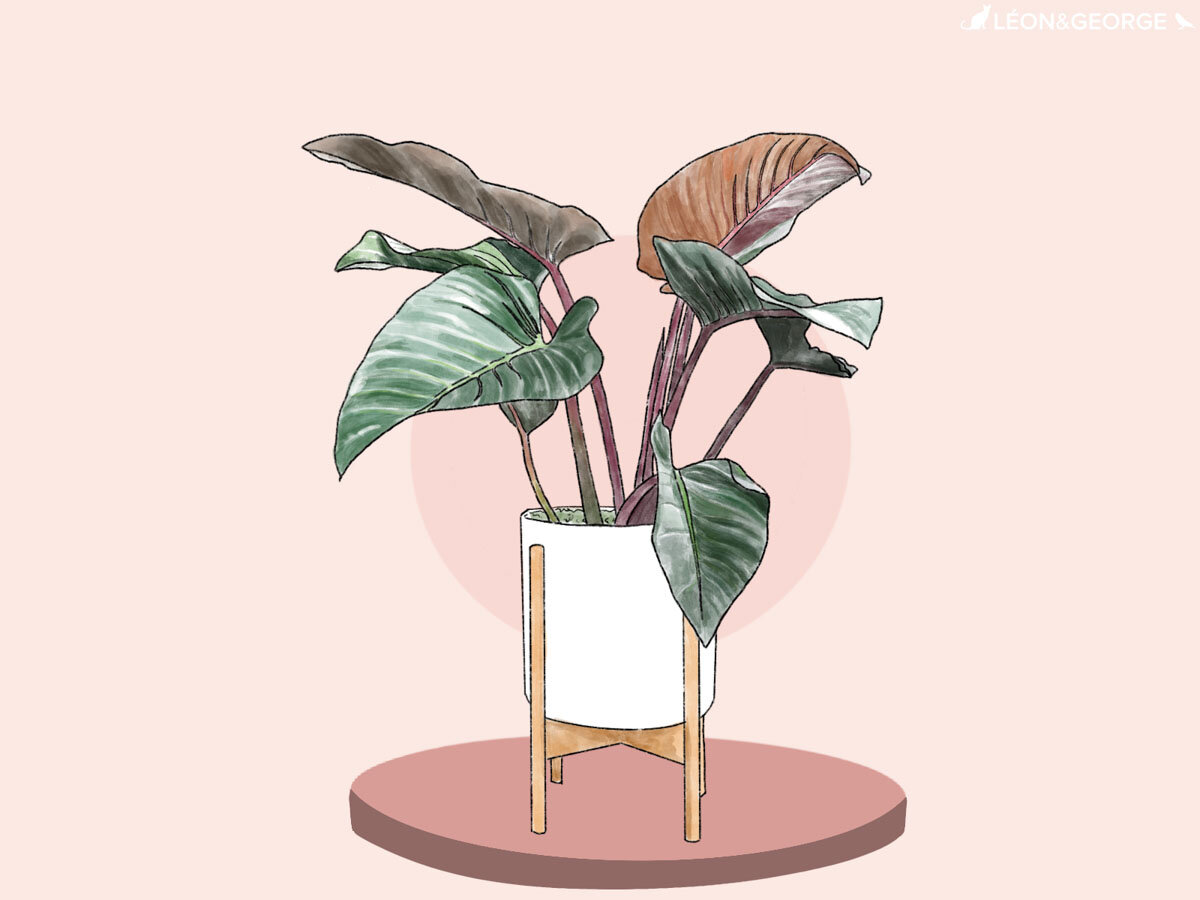
Illustrations by our talented plant stylist, Kailie Barnes.


Ex-Red-Congo-Coral-Light.jpg

RED CONGO

With wide, oval-shaped leaves and deep scarlet stems, the Red Congo is one of the more unique and elegant members of the philodendron family.

Our 2020 Best Sellers
Our 2020 best sellers

For better or for worse, 2020 will be a year for the books. And while we’re more than ready to move on to 2021, there’s no denying that this year brought us memories that will last a lifetime. From DIY quarantine projects to countless Zoom calls, investing in our homes to find new sources of comfort and discovering unconventional ways to connect with loved ones near and far, this year has been unlike any other.

For us at Léon & George, we were honored to be able to bring you closer to nature, even when stuck at home, and we loved seeing how you cared for one another with countless gifts of love, friendship, loss, and of course, “just because”. After all, who doesn’t love plants? Before we move on to the next year, here’s a look back at some of nature’s beauties that got you through 2020.

Golden Petra

The newest member of the Léon & George family, the colorful Golden Petra was a favorite gift for the people in your lives. With brightly painted leaves that turn deep orange, yellow, and crimson with sun, it’s no wonder why!

Learn more →

Silver Evergreen

One of your most common requests are more plants for low light settings, so we added this voluptuous, low light beauty to our large plant collection. With her unique variegated foliage, she’s been a hit ever since!

Learn more →

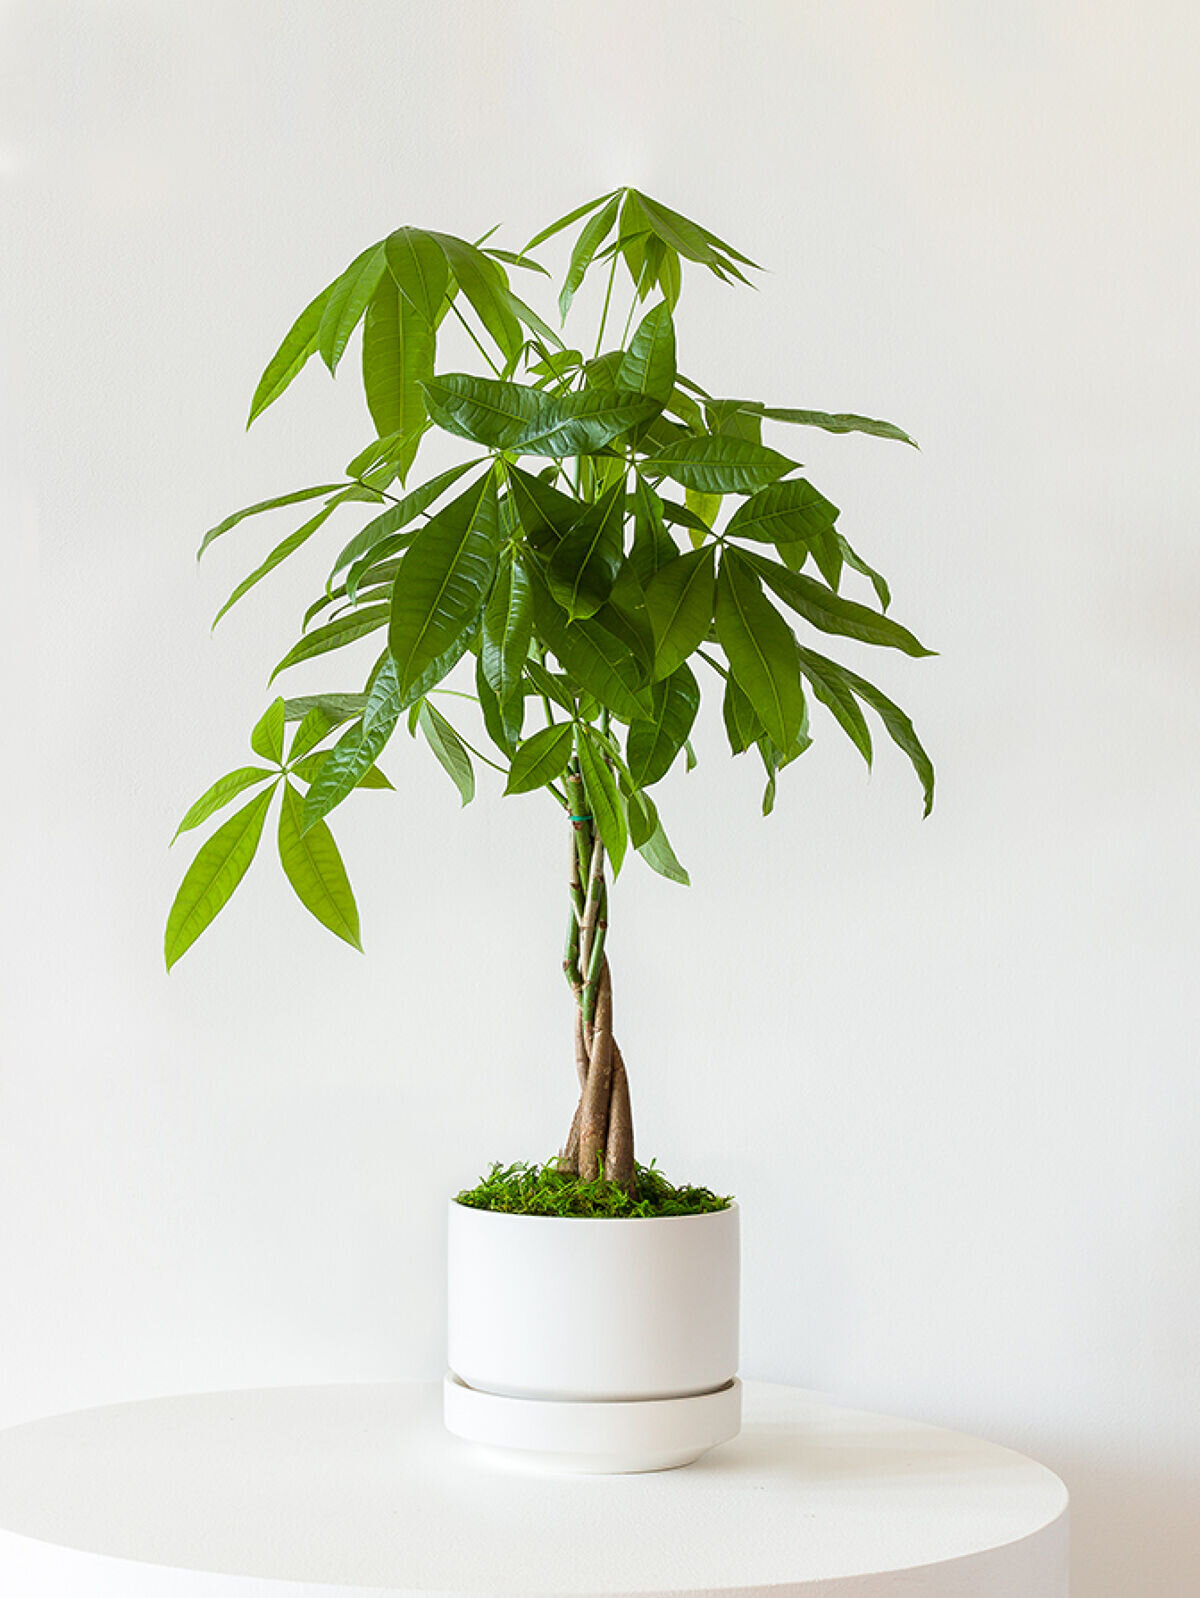
Braided Money Tree

If one word could describe the prevailing feeling of 2020, it would be hope. With its symbolism of good luck, the Braided Money Tree was more popular than ever as we wished and hoped for a better future.

Learn more →

Snake Plant

For many of us, creating a sanctuary at home this year has meant improving places where we rest and recharge, like the bedroom. Because it releases oxygen at night, the Snake Plant has unsurprisingly been one of our best-sellers this year.

Learn more →

Kentia Palm

Escapism has also been on our minds, which probably explains why the dramatic Kentia Palm has become a hit for home offices, living rooms, and more. Bringing a touch of vacation vibes anywhere she graces, the Kentia Palm is possibly the next Fiddle Leaf Fig!

Learn more →

Good riddance, 2020! And may 2021 bring brighter days for us all. And if one of your resolutions is to bring more nature into your life, head this way to find some inspiration!