Posts tagged Plant Care
Fiddle Leaf Figs And Their Brown Spots
Fiddle-brown-edges.jpg

It's no surprise that the the Fiddle Leaf Fig has risen to the top of the most wanted indoor plant list, with its structural leaves and ability to transform almost any space into the likes of a magazine shoot. These big bold beauties can be picky though, and most owners experience brown spots despite perfect maintenance routines and all the sweet talking they can muster. Read on for the three most common causes.

  • Overwatering - Darker brown spots around leaf edges and centers will form from getting too much water. Overwatering and keeping the soil moist will cause the roots to rot and can lead to fungal infections. Check under your plant for drainage and standing water ASAP. Allow soil to dry completely through between waterings. In extreme cases, change out the soil. Read our full article on this topic if you are not sure if you’ve overwatered or underwatered your Fiddle.

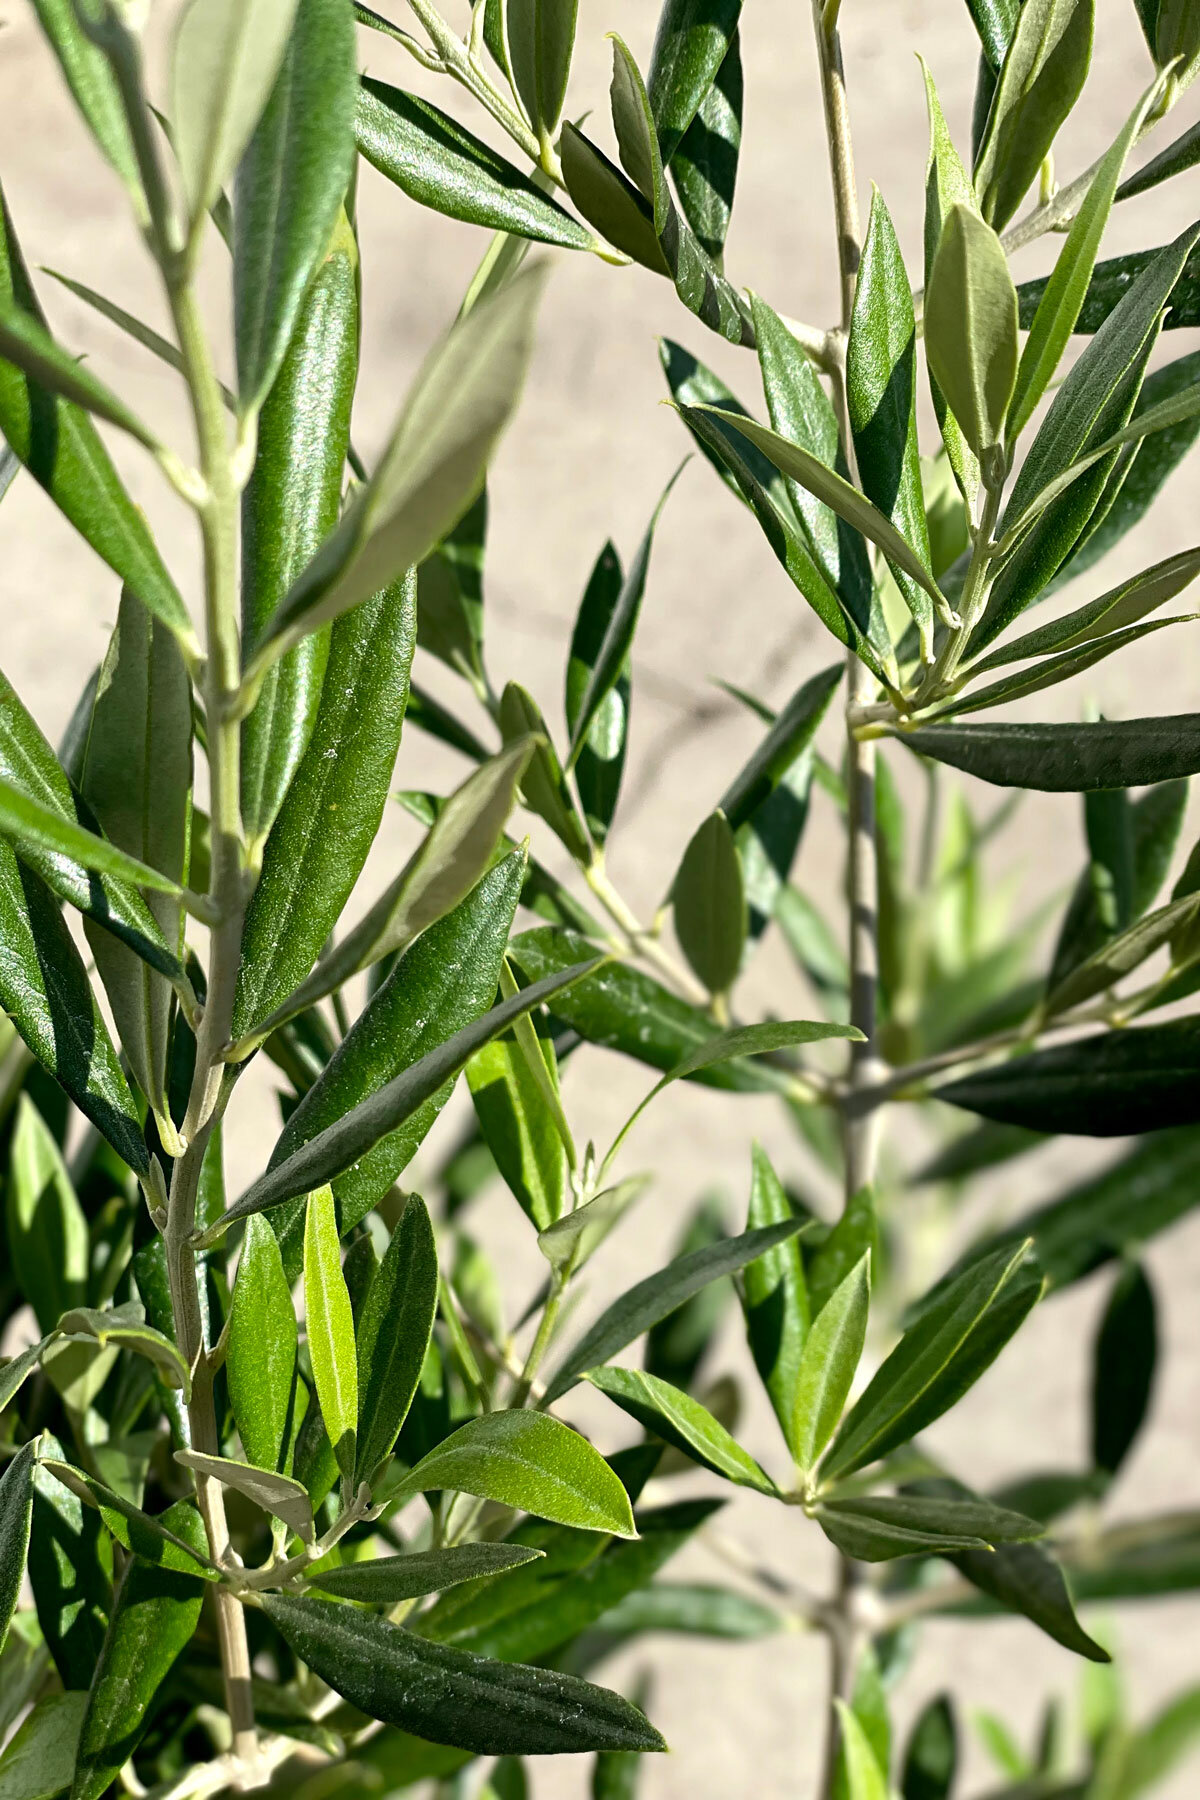
  • Dryness - Light brown spots (as pictured) will form around the edges of leaves from a lack of water, or too much direct light. A bright spot next to the window, but not in the path of harsh direct sunlight or any heat source is best. Refresh your tree by giving it a thorough shower, letting the water run through the drainage holes. When time to water again, add 1/2 cup to your typical amount and check every 5-7 days to see how fast your plant is drinking and drying.

  • Insect Damage - small dark spots that eventually turn into holes, this type of browning can often be found on new growth. Luckily, this isn't very common and is easy to treat. Look out for insects or webs on the undersides of the leaves. Spray both sides of the leaves and along the stem with Neem Oil, a natural fungicide that kills bugs, larvae, and eggs. Wait two weeks, inspect for further evidence of insects, and repeat if necessary.


fiddle-black-stand.jpg

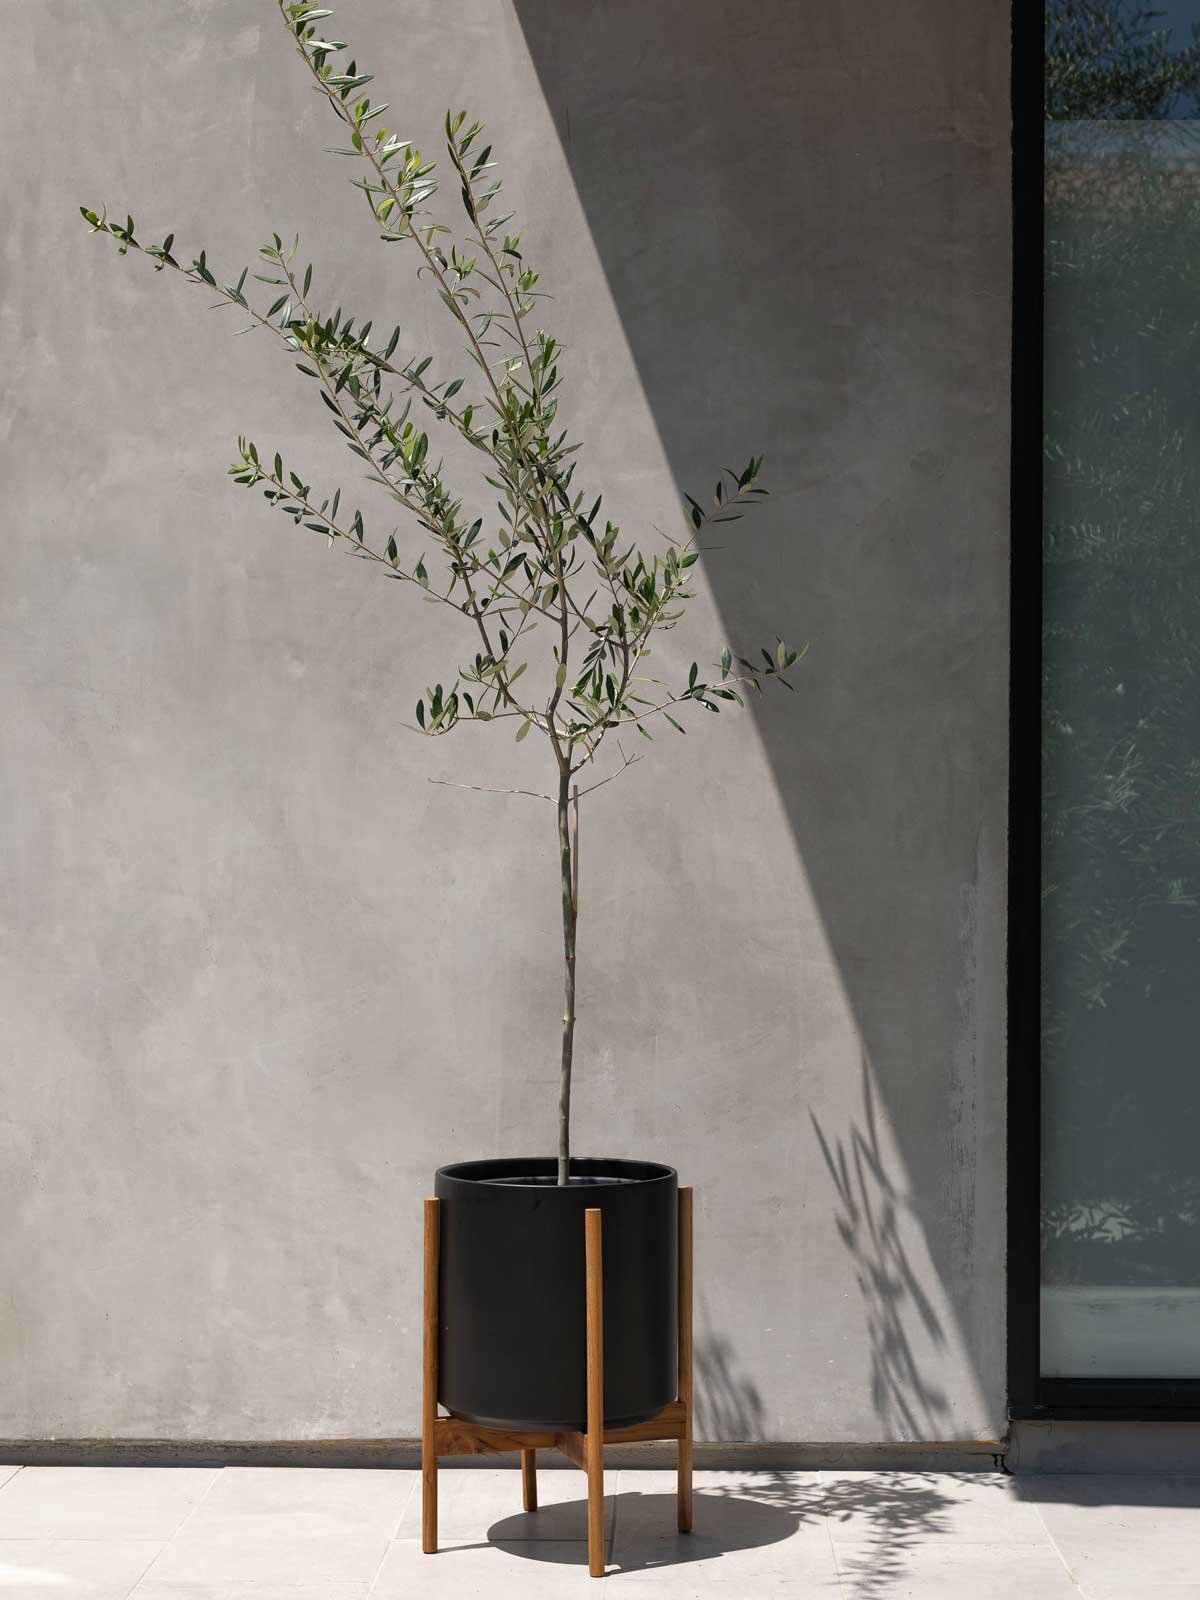
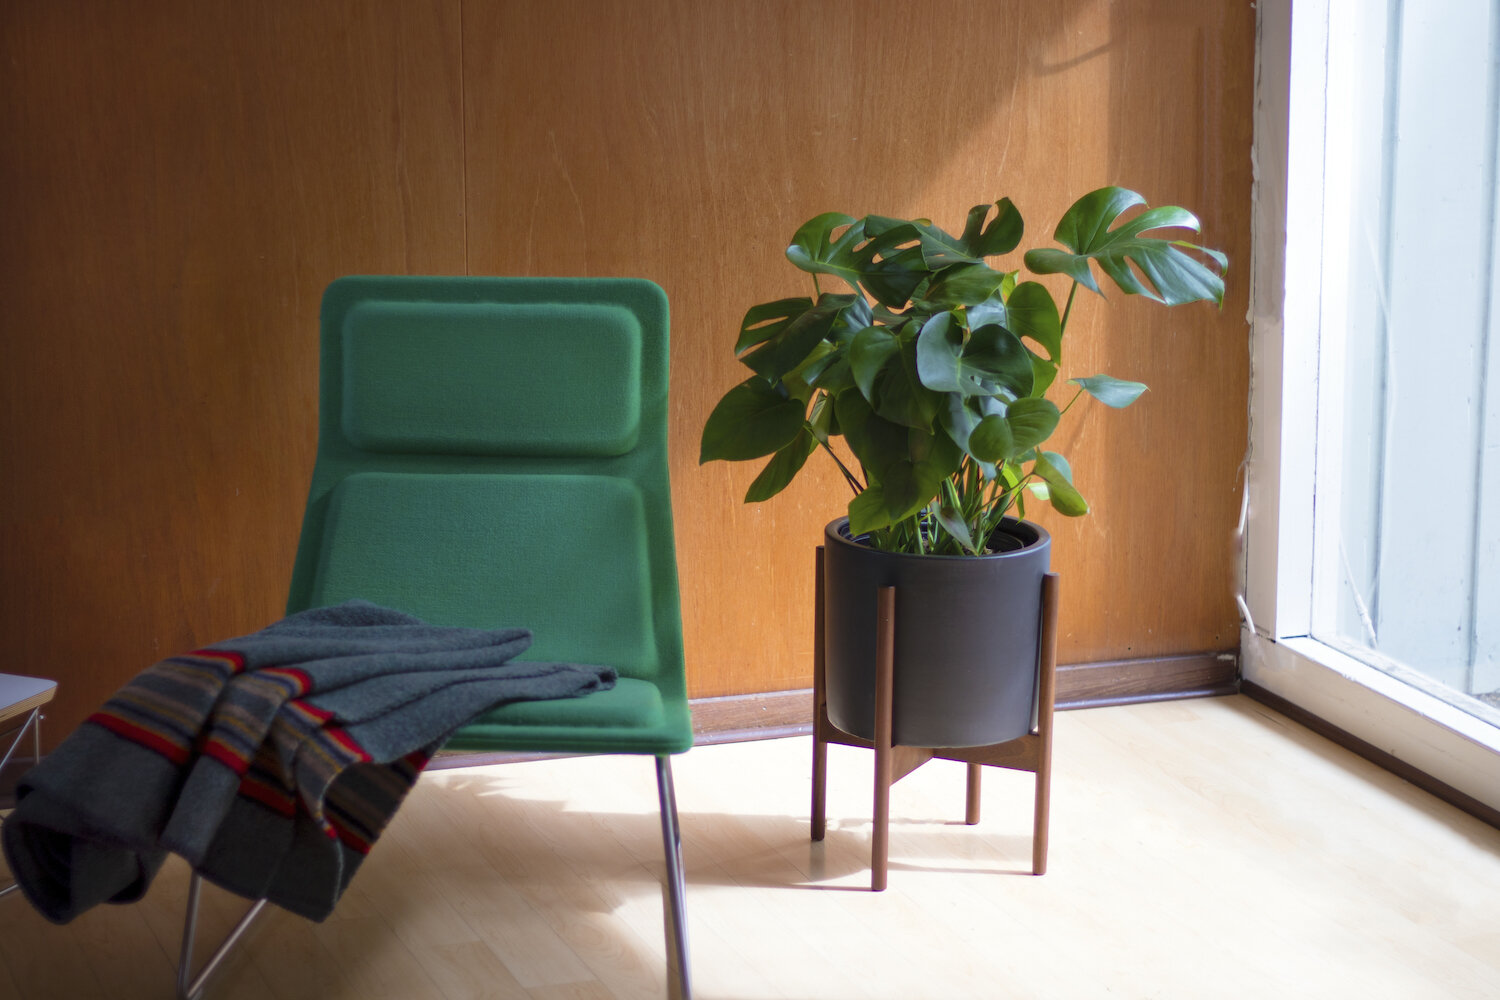
THE NEW STANDARD FOR PLANTS

Premium plants paired with stylish ceramics, plus lifetime Plant Doctor support. Order online at leonandgeorge.com

5 Easy Steps To Propagating Pilea Peperomiodes AKA The Chinese Money Plant

Propagation with cuttings is a simple way to multiply your plant, and the Pilea, also known as the Chinese Money Plant or the Friendship Plant, is the perfect candidate! In fact, it gets the nickname “Friendship Plant” because it was traditionally passed on from one friend to another via cuttings. As such, for a long time, it was a hard plant to find on the shelves of local plant shops and nurseries. Luckily, that’s no longer the case, which makes it the perfect gift to send to a friend (even the New York Times agrees it’s the perfect gift!), or get for yourself and pass along cuttings!

If you’re wondering how to care for your Pilea, check out our complete care guide including light recommendations, watering tips and troubleshooting when things go awry.

How to propagate the Pilea

Propagating the Pilea Peperomiodes is incredibly simple:

The “mother plant” is the central stalk of your plant, while the “pups” are smaller offshoots growing in the surrounding soil.

Cut at the base of a pup, and place in water while it roots.

  1. Locate small offsets, or baby Pileas (AKA “pups”), at the base of the plant. You will find these below the main stalk— if your plant doesn’t have any, hold off! They will sprout up soon.

  2. Using a clean blade, cut an offset at the base or closest to the soil as possible.

  3. Place the stem of the offset in a small glass or jar with water. Make sure only the stem or shoot is submerged — do not submerge any leaves, as they will rot (you may need to remove some leaves).

  4. Place in an area with bright, indirect light and wait. You may like to change the water every few days to keep it fresh. After a week or two, you should see roots begin to sprout.

  5. Once the roots have grown to about an inch long, carefully place them in a small pot with fresh soil, gently pressing down on the soil once it’s potted. Keep the soil just moist to the touch for the first few weeks until the plant has taken root.

Good luck and happy propagating! Don’t forget to fertilize your plant once it’s taken root— a gentle fertilizer like Boost Vitaminé natural plant food will help it grow into a healthier and stronger mature plant!


Book a call with a Plant Doctor

1 TO 1 VIDEO CALL WITH AN EXPERT

Yellow leaves? Worried about watering or struggling with incorrect lighting? Book a call and get truly personalized support for all your plant-related needs.

Mealybugs: A Definitive Guide on How to Deter and Treat Them

Mealybugs look like cottony masses on the leaves or stems of plants.

How to get rid of mealybugs on houseplants

Mealybugs are no joke. They seemingly sprout up overnight, and can spread like wildfire in a matter of days. Wondering what these pests look like? If you see white, snowy patches on the stems or leaves of your plant, you’ve got a case of mealybugs.

What are mealybugs?

Mealybugs are wingless insects found in warm, humid environments. They often appear as white fluffy growth on the leaves, stems and fruit of plants. They feed on plants by sucking out sap and other fluids from the tissue of the plant. Though mealybugs don’t usually cause heavy damage, they can cause leaf yellowing and a generally sad-looking plant if an infestation arises.

What causes mealybugs on indoor plants?

mealybugs houseplants

Mealybugs can be caused by so many different things. You might see them on your plants due to one of the following sources:

  • Taking your plants outside

  • Bringing in fresh flowers or produce from the garden or grocery store

  • Using contaminated potting soil when repotting your plants

  • Bringing in a new plant unknowing that it has mealybugs (the most common!)

As mentioned, they love warm environments, so it’s not uncommon to see them during the warmer months of the year.

Three ways to get rid of mealybugs

Getting rid of mealybugs can be tough, but not impossible. Above all it is tedious and will require some patience. As always with any pest sighting, first quarantine the plant(s) so that you can prevent the mealybugs from spreading to others. Here are simple ways to get rid of mealybugs:

  • Neem oil or insecticidal spray - Neem oil is a non-toxic, all-natural oil derived from the neem tree. It disrupts the growth and development of pests and has repellant properties as well. L’Alchimie Botanique’s Super Neem Oil is an excellent solution, with a pleasant lemon-eucalyptus scent to boot!

  • Rubbing alcohol - Soak a cotton ball or q-tip with rubbing alcohol and gently clean all affected areas of your plant. Mealybugs like to hide so make sure to inspect your plant carefully to ensure you have cleaned all the affected areas. Repeat every few days as needed.

  • Homemade dish soap spray - Soap will suffocate mealybugs. Combine 1 tablespoon of dish soap with a quart of water and spray down your plant. Test the spray on one leaf before applying to the rest, and repeat every few days as needed.

How to prevent mealybugs

One of the best ways to keep mealybugs and other pests off your plants is to keep them clean. That means regularly (once a month or so) cleaning the tops and bottoms of their leaves, and of course acting quick if you see any signs of pests.

We recommend using L’Original Black Olive Oil Soap as an all-natural plant cleaner, pest deterrent and leaf shine. Potion Magique, a natural foliar food, also has essential oils that keep pests at bay.

Another easy way to prevent mealybug problems is to avoid purchasing your plant from big box hardware stores and garden centers. Plants in stores like these are often not cared for properly and overcrowded, which can lead to weaker plants that are susceptible to disease and infestation.


CHECK US OUT ON YOUTUBE!

Watch the full tutorial on getting rid of major pest infestations on your precious houseplants.

When and how often should you fertilize indoor plants?

Plants need light, water, and nutrients. Most plants get their nutrients from the soil, but over time a soil’s nutrients can get depleted, especially with potted plants. This is when fertilizer comes in handy. But there are a few things you should know about fertilizer before feeding your plant.

When to fertilize indoor plants

The general guideline is to fertilize during the growing season, which is usually spring and summer. The extra warmth and light during these seasons stimulates plant growth that pauses during the cold and dark of winter. This is also why plants need less water during the winter. Adding nutrients at the right time helps spur that growth.

What type of fertilizer to use

Most commercial fertilizers include three main nutrients: nitrogen, phosphorus and potassium (NPK for short). These are often listed as numbers on a fertilizer’s packaging, in the form of 10-20-15 or 15-15-15. The numbers correspond to the percentages of N-P-K in the fertilizer. All purpose fertilizer usually has them in equal proportions, but the labeling should be clear. There are special fertilizers for plants like orchids or roses that have different proportions of NPK and other micronutrients the plants might need, and there are even fertilizers for stages of growth (ex: younger plants often need more phosphorous). A fertilizer’s label should tell you all you need to know about what it’s meant to be used for.

Liquid Fertilizer

A water soluble fertilizer that you add directly to your watering can every 2 weeks. Any brand will do, just follow label instructions closely for proper measurements. Overdoing it can scorch the plant’s leaves.

Benefits:

  • gives you more precise control over the amount of nutrients your plants are getting

  • allows you to see results faster, observe how your plants are reacting, and adjust future feedings (amount & length of time in between) accordingly

Slow Release

At the beginning of the growing season add slow release fertilizer directly to your plants’ soil. Any brand will do, but follow label instructions closely.

Benefits:

  • you'll only have to feed your plants once during this growth season as these fertilizers release a small amount of nutrients into the soil intermittently over 2-3 months

  • if vacationing is on your agenda, you can leave knowing your plants have the food they need to flourish in your absence

Recommended fertilizers for indoor plants

Any indoor plant food is suitable, but here are some recommended products worth checking out:

Boost Vitaminé Natural Plant Food

This natural plant food contains only four ingredients and is designed to be used with any indoor plant. We love it because unlike harsher, chemical-based fertilizers, it’s gentle enough to use sparingly even in the winter!

Potion Magique Foliar Feed

Ever tried foliar feeding? While it won’t be as effective in boosting new growth on your plant, it will increase nutrient intake through the plant’s leaves, and also works as a wonderful rescue remedy for sad or neglected plants. Try Potion Magique, a potent, all-natural foliar feed that you use in your misting routine (and also smells divine!).

How to fertilize indoor plants

Always follow the guidelines that come with the fertilizer you’ve purchased. Some fertilizer is liquid that you mix in when you water the plant, and some comes in solid form you stick in the soil or sprinkle above it. Generally speaking, fertilize your plants 1-2 times per month in the spring and summer, and reduce to one time per month or no fertilizing during the winter (depending on the strength of your plant food).

Something to note is that it’s very possible to give a plant too much fertilizer. It’s possible to “burn” a plant with too much fertilizer at once, and you’ll notice this if the tips of the leaves turn yellow/brown.

Also note that new commercial potting mix generally already has fertilizer in it, so you wouldn’t want to fertilize a freshly potted plant right away – wait about a month or so.

That’s about it. Now go forth and feed your hungry plants!


fiddlebush.jpg

Indoor plants, potted & delivered

Premium plants paired with stylish ceramics, plus lifetime plant care support. Order online at leonandgeorge.com

5 Spring Plant Care Tips For A Greener Thumb
Extra tall plants

The XL Plant Collection, ready for spring.

Spring is a time of change and growth, and it’s the favorite time of year for living plants! If you are worried that their needs have changed with the season (hello, fertilizer routine) be at ease! The spring season is all about enjoying your plants as they flourish, promoting their new growth, and saying goodbye to the dormancy of winter. Taking care of your plants during the spring is simple. We mean it: even fertilizing them is not the mystery it may seem! Read on, and learn all you need to know about providing your plants with the best care this spring.

  1. Feed your plants

During the winter, many plants go dormant and do not exhibit a lot of growth. But once spring arrives, the days start to get longer and the sun shines abundantly. Plants just love it: they come out of their dormant stage ready to grow, and hungry for nutrients! Now is a great time to fertilize and give them a bit of extra energy. And we promise, fertilizing may sound scientific, but it truly a simple process. Follow the instructions on the bottle to dilute the fertilizer, and err on the side of under-fertilizing if you’re nervous. The spring sun accomplishes a lot on its own.

2. Consider repotting

Springtime is also a great time to repot your plant, considering that its roots will begin to grow again and may benefit from the extra nutrients in fresh soil. This only needs to happen once every 1-2 years, or when your plant looks to be outgrowing its pot. For refreshing nutrients, you can simply change out the soil and keep the plant in the same pot. You can also replace just one third of the soil at a time to add fresh nourishment without risking plant shock. To help your plant grow taller, you can move it into a pot that’s one size bigger than its original (usually about 2” larger) to give it room to grow. Remember that most plants like to have tightly compressed roots, so you don’t want the new pot to have too much extra space.

3. Give your plants a trim

After the long months of winter, your plants might need a haircut. Many indoor plants come from warm, tropical climates, and winter can be rough on them causing them to go through natural shedding. Trim any brown or yellowing foliage, and don’t be afraid to prune back funky growth (especially if your plant has been growing towards the light!). Both trimming and pruning will help your plant focus on all the new growth it is about to produce.

4. Do some spring cleaning

When it comes to plant care, cleaning leaves is a little like flossing: we should be doing it often, but how many of us actually follow through? If it’s been a while since you’ve cleaned your plant’s leaves, now is the perfect time to get a little spring cleaning in. Even a few minutes of dusting goes a long way, revealing a beautiful shine while helping your plant to photosynthesize. From dust to sap to calcium buildup, you can’t go wrong with a soft cloth and a natural, gentle soap.

5. Watch for new growth!

Spring and summer are the most rewarding times of year to own and care for plants! Enjoy watching your plant grow and “blossom” into its best self over the coming months, whether that’s unfurling leaves or even flowering, and remember that the recipe to great plant care is simple: a light touch, combined with a curious eye.

Looking to add some fast growers to your collection this spring? Some of our favorite easy-care plants that are perfect for spring include the Cascading Pothos, Monstera Deliciosa, and Ponytail Palm.


spring plant care tips

SPRING-READY PLANTS

Premium plants paired with stylish ceramics, plus lifetime plant care support.

3 Ways To Pot A Plant With No Drainage Hole

Snake Plant and Zanzibar Gem in Mid-Century pots

As most people know, owning and maintaining beautiful indoor plants requires just a few basic necessities. But beyond light and water, what many don’t realize is that there’s a third extremely important factor when it comes to plant care: drainage. Without proper drainage, no plant can thrive—especially if it’s receiving regular watering. For this reason, potting your plant with adequate drainage in mind is crucial to your success. This article will look at three methods for repotting your plants. We'll provide detailed instructions and tips for each method to help you give your plants the best care possible.

  1. Layer rocks at the Bottom of Your Pot

  2. Drill a Drainage Hole (not recommended - read why)

  3. Staging (the BEST way!)

Why is drainage important for plants?

Drainage allows for the plant’s roots to aerate and “breathe” in between waterings. Much like excess water is absorbed into the ground in their natural environment, you should always make sure your plant has somewhere to drain after each watering, as accumulated moisture or standing water can lead to serious health issues like root rot.

The most common way to provide drainage for potted plants is with a drainage hole in the pot and a saucer below to catch the water. A typical terracotta pot has this set up, for example. When you repot any houseplant, ensuring proper drainage is vital. If your pot has a drainage hole, we recommend using a saucer or dish below so as not to damage any floor or surface when you water. But what happens if you have a pot with no drainage hole?

Scandinavian pot with drainage hole

Our Scandinavian planters have a drainage hole and deep overflow saucer.

Best Practices for Pots Without Drainage Holes

Not all planters have drainage holes, and that’s okay, too! There are plenty of ways around a pot without a drainage hole. In fact, some of the most stylish planters do not have drainage holes, as they sit atop sleek wooden stands (and this would be a big mess if there were a drainage hole!). Our Mid-Century planters, for example, do not have drainage holes and are designed to sit directly on wooden stands or other surfaces.

For our pots with no drainage hole, we use a method called “staging”, which we’ll explain in more detail below. Here are some other ways you can create some drainage in a pot with no drainage hole:

1. Layer rocks at the Bottom of Your Pot

Placing rocks or gravel at the bottom of your pot is a common practice to create some separation between your plant’s soil and any excess water. However, this does not in a literal sense help with drainage, and as your plant grows, its roots can stretch into this bottom area and be exposed to the sitting water. It's essential that houseplants should be thoroughly watered, but with proper drainage to prevent root rot.

2. Drill a Drainage Hole

Some people like to go the DIY route and drill a hole in their favorite planter with no drainage. This is do-able, but keep in mind that you risk breaking the pot altogether.

Staging is the best way to pot plants in planters without drainage holes. All Léon & George plants are staged as seen in the diagram.

Staging is the best way to pot plants in planters without drainage holes. All Léon & George plants are staged as seen in the diagram.

3. Staging (the BEST way!)

The simplest and easiest way to set your plant up with proper drainage when there’s no drainage hole is to stage it. Staging simply implies that the plant does not actually live inside the decorative planter, but rather in its plastic nursery pot (i.e. the one it came in). When you repot in fresh potting soil that drains well, this further ensures optimal moisture levels for the plant. Plastic nursery pots generally have several small drainage holes at the bottom (even better!), and can simply be placed inside the ceramic pot.

The ideal soil cover for indoor greenery, this 100% natural forest moss is green, clean and ready to bring that extra polished look to your indoor plants.

PRESERVED FOREST MOSS

The ideal soil cover for indoor greenery, this 100% natural forest moss is green, clean and ready to bring that extra polished look to your indoor plants after staging.

If you tend to have a heavy hand with watering, we recommend slightly elevating your plant inside the pot, either with a wood plank, styrofoam block, or any other material that won’t mind the occasional douse of water. This ensures that no matter how much you water, your plant will never “sit” in standing water for long periods of time.

There are actually quite a few benefits to staging your plants, beyond just drainage:

  • Swapping plants from one pot to another is easy and mess-free.

  • You can take your plant out of its decorative container without any fuss to give it a shower in the sink or bathtub (plants love this type of watering!).

  • You can easily tell when your plant is ready for repotting, as the roots will begin to come out of the plastic nursery pot (simply lift the nursery pot to have a look!).

For those passionate about choosing the correct house plant to grow indoors, we offer a comprehensive list to guide your green journey. Dive into our collection at this link and enjoy year-round gardening. Discover plants that are well suited to growing in containers, ensuring they thrive and bloom beautifully within your space. So have at it and start staging your plants! If you’re still on the hunt for the perfect ceramic, keep in mind that our ceramics are sized to fit most nursery pots and are 100% water-sealed, which means they'll never damage your floors or surfaces. Handcrafted with high-fired stoneware, the simple and elegant design was created to stand the test of time! Find the perfect size for your plants, or better yet, order a fully-potted plant set from Léon & George and let us do the work for you!

1 TO 1 VIDEO CALL WITH AN EXPERT

Yellow leaves? Worried about watering or struggling with incorrect lighting? Book a call and get truly personalized support for all your plant-related needs.


What To Do About Yellow-Brown Leaves
yellow brown leaves on plant

Is your plant showing some yellowing and/or browning on its leaves or tips? Plants are living things just like us, and far from perfect! Before you begin to worry if something may be wrong, read on for reasons why your plant might be doing this, and what can be done about it.

Why do plants get yellow-brown leaves?

As plants age, it’s natural for them to have occasional yellow-brown leaves or tips. While sad-looking leaves can sometimes mean there’s something off with its care, it doesn’t always mean the plant is in distress. Here are a few reasons why your plant might be showing yellow or brown leaves or tips:

  • It’s just that leaf’s time to go. If you see just one or two leaves that are yellow and brown, but the rest of the plant looks perfectly healthy— rest assured that absolutely nothing is wrong! It’s just the end of that leaf’s life cycle.

  • Overwatering or underwatering. If you see multiple brown or yellow leaves or a pattern, it’s possible your watering routine needs some tweaking. Make sure to read the instructions carefully for your plant (all Léon & George plants come with simple instructions) and water accordingly.

  • More or less light is needed. Brown or yellow leaves could also mean that your plant needs more or less light. This can often go hand in hand with watering, and striking the right balance for your specific plant is an art that we are certain you will master, even if it takes a little trial and error. Remember that plants are resilient, so don’t be afraid to try out new things!

  • Nutrient deficiency or overdose. If it’s been a long time since you repotted or fertilized your plant, it’s possible that it’s time to give your plant a little bit of extra nutrients either by repotting or feeding it natural plant food. As for an overdose, fertilizing your plants too much can lead to fertilizer burn either on your plants leaves or tips.

What to do about yellow-brown leaves

Here are some ways you can improve the appearance of your plant. Note that it doesn’t always mean cutting the leaf off entirely!

Shape: maintain the ideal size and shape for your space by trimming off unruly stems and yellow-brown leaves. Cut close to the base of the stem, or remove completely if possible. Maintaining a lean and balanced structure also prevents future tilting.

Shave: Shave off imperfect edges and re-shape the tips to match the other leaves. Make sure to leave a sliver of brown just before the green. Plants don’t like to be nicked while shaving and cutting into a healthy part of the leaf can create an open wound.

Shed: like any diet, it’s important not to go overboard. When pruning your plants, be careful not to shed more than ¼ of its foliage at any given time. Over pruning can be detrimental to future growth.

*Pro-tip* While pruning off yellow and brown leaves can make your plant simply look nicer, it’s also beneficial for their health: well-kept and well-pruned plants attract less pests, and also have more energy to spend on their new growth.


isaac-leon-and-george-09-2019-0546 (1).jpg

Indoor plants, potted & delivered

Premium plants paired with stylish ceramics, plus lifetime plant care support. Order online at leonandgeorge.com

How to Care For and Grow Your Olive Tree

Olive Tree

AKA Olea europaea

With their elegant, silver-green foliage and graceful silhouettes, the Olive Tree or Olea europaea is a time-tested, infinitely elegant legacy tree and indoor plant for outdoor and indoor spaces that receive plenty of bright light. This plant variety is naturally both pest and drought resistant and easy to care for. But like all living things in the gardening realm, they have their own requirements and preferences for care. So read on and explore tips on optimal planters and dive into the horticulture of the Olea europaea. 

How Much light do Olive Trees need?

The Olive Tree needs ample direct sunlight to thrive and produce fruit — ideally at least six hours a day or more of direct sunlight. Generally speaking, it is best if Olive Trees are placed outdoors. Refrain from placing in low light or medium light areas.

Water

Check moisture of topsoil weekly and give plant four cups of water when top two inches of soil are dry to the touch. Avoid overwatering and too much damp soil to prevent root-rot. Occasionally mist your Olive Tree to increase the humid climate. Prevent the soil from drying out.

Growth

It can take several months to years for Olive Trees to begin blooming fruit. Remember that light and full sun = fruit, and fertilize every two weeks during spring, summer and fall. Ensure your Olive Tree is receiving the right humidity,

MOISTURE METERS

Finally, a moisture meter that actually works.

Common problems with Olive Trees

Weeds

Symptom: Other plants growing in your Olive Tree’s pot and soil. 

Cause: Particularly young Olive Trees can experience competition from opportunistic weeds.

Remedy: Pluck the weeds out as soon as you see them and make sure to get the roots out. Gentle herbicides can be used but are usually not required.

Yellow Leaves: Not Enough Light

Symptom: A large amount of yellow leaves in the tree’s canopy.

Cause: Too much shade, not enough direct light.

Remedy: Ensure that your tree is in a space that receives ample direct sunlight for at least 8 hours/day.

Yellow Leaves: Needs Fertilizer

Symptom: Majority of canopy exhibiting yellow leaves.

Cause: The tree needs more nitrogen, which is available through fertilizer.

Remedy: Give your tree a balanced fertilizer every two weeks from spring through fall. 

Shop the Olive Tree at leonandgeorge.com

How to care for and grow olive tree

Can I keep an Olive Tree indoors?

One of the most common question our Plant Stylists receive is whether or not Olive Trees can survive indoors, and while we don’t necessarily recommend it, this plant can be kept indoors if that area receives enough light and humidity—at least four hours a day of direct sun minimum. However, it is unlikely to bloom or produce fruit indoors.

If you’re interested in this look for your home, try the Black Olive Tree, a similar variety of plant that does better indoors. Read more about the differences between the Olive Tree and the Black Olive Tree aka Shady Lady.

How to maintain a beautiful and healthy Olive Tree

Care for your plant and it will thrive for years to come. See these simple tips to keep your tree flourishing. 

  • Pruning: your tree will not need to be pruned for the first 2+ years of its life with you. When it is time, prune off any yellow or dying leaves from your tree with clean, sharp shears. Limited pruning to the fall and winter months. 

  • Fertilizing: fertilize your tree twice monthly during the warmer months including spring, summer and fall with a balanced slow-release fertilizer. During these months, your Olive Tree may need to be watered more frequently.

  • Pests: To keep your olive trees thriving, regular inspections are crucial to catch signs of pests such as mealybugs, aphids, or spider mites early. Consider introducing neem oil as organic pest control methods

Shop the Olive Tree at leonandgeorge.com

How to propagate an Olive Tree

Beautiful plants are wonderful gifts to share and easy to grow, some Olive Tree varieties can be propagated from cuttings. Only propagate during summer with this one, when your tree experiences its highest rate of growth.

  • Prepare a rooting container or grower pot: a small nursery pot with drainage, and fill it with fruit tree potting soil and watch your planted roots grow

  • Select an eight-inch long, hardwood tip from one of your tree’s branches.

  • Trim the branch with clean, sharp shears. Be sure to sever it directly below a leaf “node or bud.”

  • Remove all but six or seven leaves from the branch.

  • Coat the cut end of the branch in 0.2-percent IBA rooting talc.

  • Plant the branch in the rooting container and place it outdoors in a spot that receives partial shade.

  • Mist the branch and its foliage regularly. 

  • Check for roots after three months. Allow it to grow within the rooting container until sturdy, then transplant to a new pot, preferably during autumn.

Incorporating Olive trees into your collection of house plants can be a rewarding experience for any gardener. Their resilient and tolerant nature makes them an excellent choice for outdoor and indoor spaces, thriving in high light exposure. The lush foliage not only enhances your living environment but also contributes to improved air quality as they purify the indoor air. As you embark on this green journey, consider exploring our nursery for Olive Trees. Happy gardening!


olivetreeblackstand.jpg

Olive Tree

A classic and elegant addition to any brightly lit space, plus naturally pest and drought resistant.

How to Care For and Grow Your Calandiva
calandivaemail.jpg

The Calandiva

AKA Snowdrop Calandiva

AKA Florist’s Kalanchoe

AKA Flaming Katy

With dainty clusters of rose-like flowers, the Calandiva is a popular cultivar (variety) of the Kalanchoe succulent family. Though this plant’s buds typically appear in the fall, followed by flowers in late winter and spring, with a bit of patience it can be “tricked” to blooming at its owner’s desire. Read on for simple tips on how to care for the beautiful Calandiva.

How much light does the Calandiva need?

As a succulent, this plant does best with plenty of bright indirect light. Avoid harsh direct sunlight. In the winter or once their flowers have bloomed, they can withstand medium levels of light.

How to water a Calandiva

Water your plant sparingly and keep in mind that it is best to err on the side of under-watering. Water the base of the soil once every one to two weeks, or when it feels completely dry to the touch. You may water a bit more when the plant is in bloom.

Are Calandivas fast growers?

The Calandiva is a relatively slow grower that will reach approximately 12-18” tall. Fertilize your plant once a month in the spring and summer.

Common problems with the Calandiva

Yellow or brown edges

If you see yellow or brown edges on just one or two leaves of your Calandiva, odds are it’s just those leaves’ time to go (nothing is wrong with your plant!). Simply remove them at the base of the stem so the plant does not waste any more energy on these leaves. However, if you see yellow or brown edges all over the plant, it’s most likely due to either overwatering or not enough light, or a combination of both.

No flowers

The Calandivas’ flowers have seasons: during the fall as the days get shorter, the plant prepares to bloom, and will show flowers in the winter and spring. As such, short days and long nights are what make the Calandiva naturally bloom. While this may happen naturally indoors, it’s also possible it won’t. That’s because your plant may be receiving too much artificial light once the sun goes down (yes, plants notice artificial light!). If possible, place your Calandiva in an area that is dark for at least 14 hours a day. This may require moving it in the early evening as you begin to turn lights on in your home, or placing it in an area of your home that you do not use at night. Once your plant’s buds have formed, the plant can remain anywhere in bright indirect light.

Once the buds open up, flowers will last generally around six weeks. Read more detailed, step-by-step instructions on how to make your Calandiva flower below.

How to maintain a beautiful and healthy Calandiva

Take care of your Calandiva and it will take care of you! Below are simple tips to continue caring for and growing your plant over time.

Pinching

Trim or pinch off (with your fingers) spent flowers about six weeks after they’ve bloomed, or once they shown signs of withering, and cut back the tall stem that rises from the flowers after this period.

Pruning

Minor pruning goes a long way with the Calandiva. After the flowering period, cut back the taller leaves of the plant, cutting below the second or third new leaf of each stem. Take a step back to take note of the plant’s overall shape, and remove leaves as necessary to maintain the full and bushy appearance.

How to grow and repot the Calandiva

  • Growing - Calandivas are slow growers. During spring and summer, fertilize once a month. As detailed above, minor pruning and pinching will help maintain its full shape and appearance.

  • Repotting - Léon & George Calandivas come in 6” grow pots and only need to be repotted every few years and only if the plant is unhappy (i.e. has been overwatered) or to refresh the soil and give it new nutrients. If you’d like your plant to grow larger, find a new grow pot that is 2” larger than its current pot. If you’re happy with the current size, you can reuse the same pot and simply change the soil. Make sure to use well-draining or succulent soil for the Calandiva.

    • Getting your hands dirty with or without a yard - spread out newspaper on the floor, remove the plant from the pot and shake off as much of the old soil as possible so that you have clean roots. At the bottom of the grow pot, and a layer of soil, then place the plant in the center of the pot and cover with new soil. Pat down firmly and water thoroughly. Place the plant in an area with bright indirect light. Your plant will take 2-4 weeks to settle into its new home.

How to promote flowering on your Calandiva

As mentioned above, Calandivas flower typically in the winter and spring, encouraged by the short days and long nights that begin in the fall. In order to ensure your plant flowers to its full potential each year, you may need to take a few extra steps to meet its needs:

  • Come fall, place your plant in an area that is dark at least 14 hours a day (no artificial light). This could be a room in your home that you do not use at night, or if you must, move the plant to a closet in the late afternoon as you begin to turn lights on in your home.

  • Make sure your plant receives “long nights” (~14 hours) for about six weeks. Water sparingly or less than you normally would during this time.

  • After about six weeks, you should start to see buds form. At this time, you can place your plant anywhere you like so that it receives bright indirect light. Your flowers should bloom shortly thereafter!

How to propagate the Calandiva

There are a few different ways to propagate the Calandiva. You can either divide your Calandiva, or, more easily and without making a mess, take cuttings from your plant:

  1. Select a leaf to cut or snap off - Ideally you can use some of the cuttings after pruning! Make sure the cutting has at least two leaves, and do not to take any stems that are flowering.

  2. Cut it off - Using a clean blade, cut the stem off, or snap it off with your fingers.

  3. Let it heal - Let the leaf dry out for a few days. It should “heal”, forming a callus over where it was cut off.

  4. Place in soil- Put the calloused end into moist, well-draining soil (succulent mix). Keep the soil just damp to the touch until the plant is rooted, usually within two to three weeks.


1 TO 1 VIDEO CALL WITH AN EXPERT

Yellow leaves? Worried about watering or struggling with incorrect lighting? Book a call and get truly personalized support for all your plant-related needs.

Winter Plant Care: Tips To Keep Your Plants Thriving This Season
The Monstera Deliciosa, prepared for winter!

The Monstera Deliciosa, prepared for winter!

Winter is here, and your plants know it.

Just like us humans, plants also notice the changing of the seasons and winter is no exception. During this time, plants go into dormancy and are often not actively growing. Shorter days mean less sunlight, and less sunlight means less energy to use for growing. Read our tips on how to care for your plant in the winter and successfully make it to spring.

Adjust your watering schedule

Shorter days in winter translates to plants grow more slowly, and this also means they often tend to take longer to dry out between waterings. That means you should water less frequently, making sure to always check the soil before watering. Depending on where you live, you may have already adjusted your watering schedule in the fall.

Let there be light

Another adjustment you may have already made in the fall, make sure your plant is getting enough sunlight during the short and sometimes dreary days of winter. Plants that do well in one area of your home may not be as happy as they were before. Signs that your plant is not getting enough light may include pale, yellow, or brown leaves, leggy branches, or leaning towards the light. If this might be an issue for you, there are a few things you can do to mitigate during these darker months of the year: move the plant closer to a light source for the fall and winter, rotate it every few weeks, or install an artificial (grow) light.

Cut back fertilizing

The best time to regularly fertilize your plant is when it’s actively growing in the spring and summer. That said, you may try using gentle fertilizers like Boost Vitaminé natural plant food once a month during the winter to help keep your plant nourished. Do not use more than once a month during this time, though, as you may risk fertilizer burn on the leaves of your plant.

Put away the pruners

You may remove dry, old, or unattractive leaves all year round, but save any major pruning for the spring or summer. While it is healthy to periodically prune indoor plants, pruning during the winter may come as a shock to a plant whose resources are already limited.

Up the humidity

Similar to air conditioning, strong heaters can have a negative effect on our plants in the winter as they dry out the air. To combat dry atmospheres, mist your plant here and there (daily is great, but once or twice a week works too!).

Keep them warm

Like us our plants don’t like air that is too cold. This may be hard to avoid in the middle of winter, but aim to keep your plants at a temp that would be comfortable for you, somewhere between 65º-75ºF.

Move plants away from icy windowpanes

Depending on where you live and the type of window in your home, your plant may not like to be close or touching a window. If the window feels cold to you, it probably feels cold to your plant, which may cause leaf damage or shock.

Feel prepared for the long winter ahead? You got this! Head back to our blog for more simple plant care tips for your indoor greenery.


IMG_0689.jpg

INDOOR PLANTS, potted & DELIVERED

Premium plants paired with stylish ceramics, plus lifetime plant care support. Order online at leonandgeorge.com

Is Rainwater Good for Houseplants?

Is watering your plants with rainwater a good idea?

When it comes to watering our houseplants, tap water is most people’s go-to. But did you know that using natural sources like rainwater can be beneficial for your plants? Here are three key reasons why catching those raindrops for your houseplants is worth the extra effort:

  1. Rainwater is naturally soft, meaning it is free of many salts, minerals, and chemicals that can build up in soil, stems and leaves over time. Not only is it gentler on our plants, but it can also help flush out excess salts and chemicals in the soil, bringing your plant back to a healthier state.

  2. Rainwater also has a slightly acidic pH, which is beneficial for most plants as it tends to be more in line with the pH levels they prefer, helping to balance out the soil's pH.

  3. Rainwater contains nitrates, a form of nitrogen essential for plant growth and function, that can be easily absorbed by plants. All fertilizers contain varying levels of three macronutrients— potassium, phosphorous, and nitrogen—so see this as a way of naturally giving your plants a little vitamin boost!

Photo credit: @milivigerova


PLANT ACCESSORIES AND POTTED PLANTS

Premium plants paired with stylish ceramics and luxurious plant care accessories. Order online at leonandgeorge.com

What's The Ideal Temperature For Houseplants?
a9e81245-68dd-466c-a4fb-019e76870419.jpg

Wondering how your climate control affects your plants? Houseplants, like us, can feel too cold, or too warm, and do best in mild temperatures that fall somewhere between 65-75 degrees farhenheit. As the seasons change, consider how reaching for the thermostat may affect your houseplants:

  • Many common indoor plants enjoy balmier temps and thrive in warmer and sunnier conditions. Think Money Trees, Calatheas, Cacti, some Palm varieties and Philodendrons. If you have any of these in your collection, make sure things don’t get too chilly inside (particularly if you’re away and the heating is turned off).

  • Others can survive just fine in colder temps if needed - think Sansevieria, Cast Irons, Zanzibar Gems, and Silver Evergreens. They do fine with winter temps, but you may need to water less if they regularly live in a chilly environment. 

  • Most indoor plants are happiest in temperatures that falls somewhere in between hot and cold. *Cue Miss Rhode Island from Miss Congeniality and her idea of a perfect date: "April 25th. Because it's not too hot, not too cold, all you need is a light jacket." Our plant babies don't have a huge selection when it comes to jackets though, so we recommend keeping them happy with indoor temps somewhere between 65º-75º F. 

  • *Pro tip*: Whether you're adjusting temps up or down in your space, make sure you don't sacrifice humidity! Blasting the heat or the AC will dry out the air, and that will cause most plants to wilt, dry out, or drop leaves.


zz.jpg

INDOOR PLANTS, POTTED AND DELIVERED

Premium plants paired with stylish ceramics, plus lifetime Plant Doctor support. Order online at leonandgeorge.com