Posts tagged Plant Care
Money Trees Leaf and Trunk Health
Money Tree leaf and trunk health

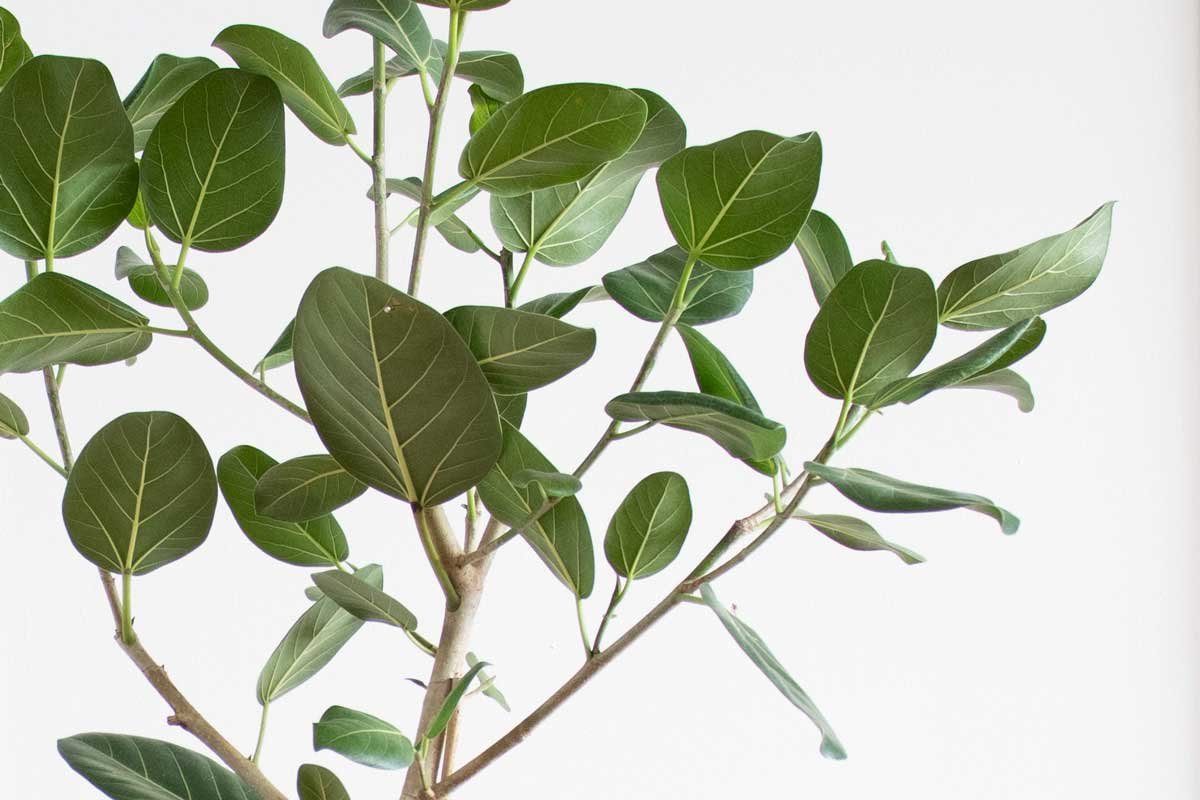
House plants like the tropical Money Tree, known for its lush foliage and impressive canopy, are believed to bring good luck and fortune according to the teachings of Feng Shui. These are easy to grow and typically require simple care, making them a favorite in many greenhouses and homes. However, even these favored plants have their challenges (in addition to not making it rain 💵). Here are the most common ailments and solutions to make your Money Tree blooming:
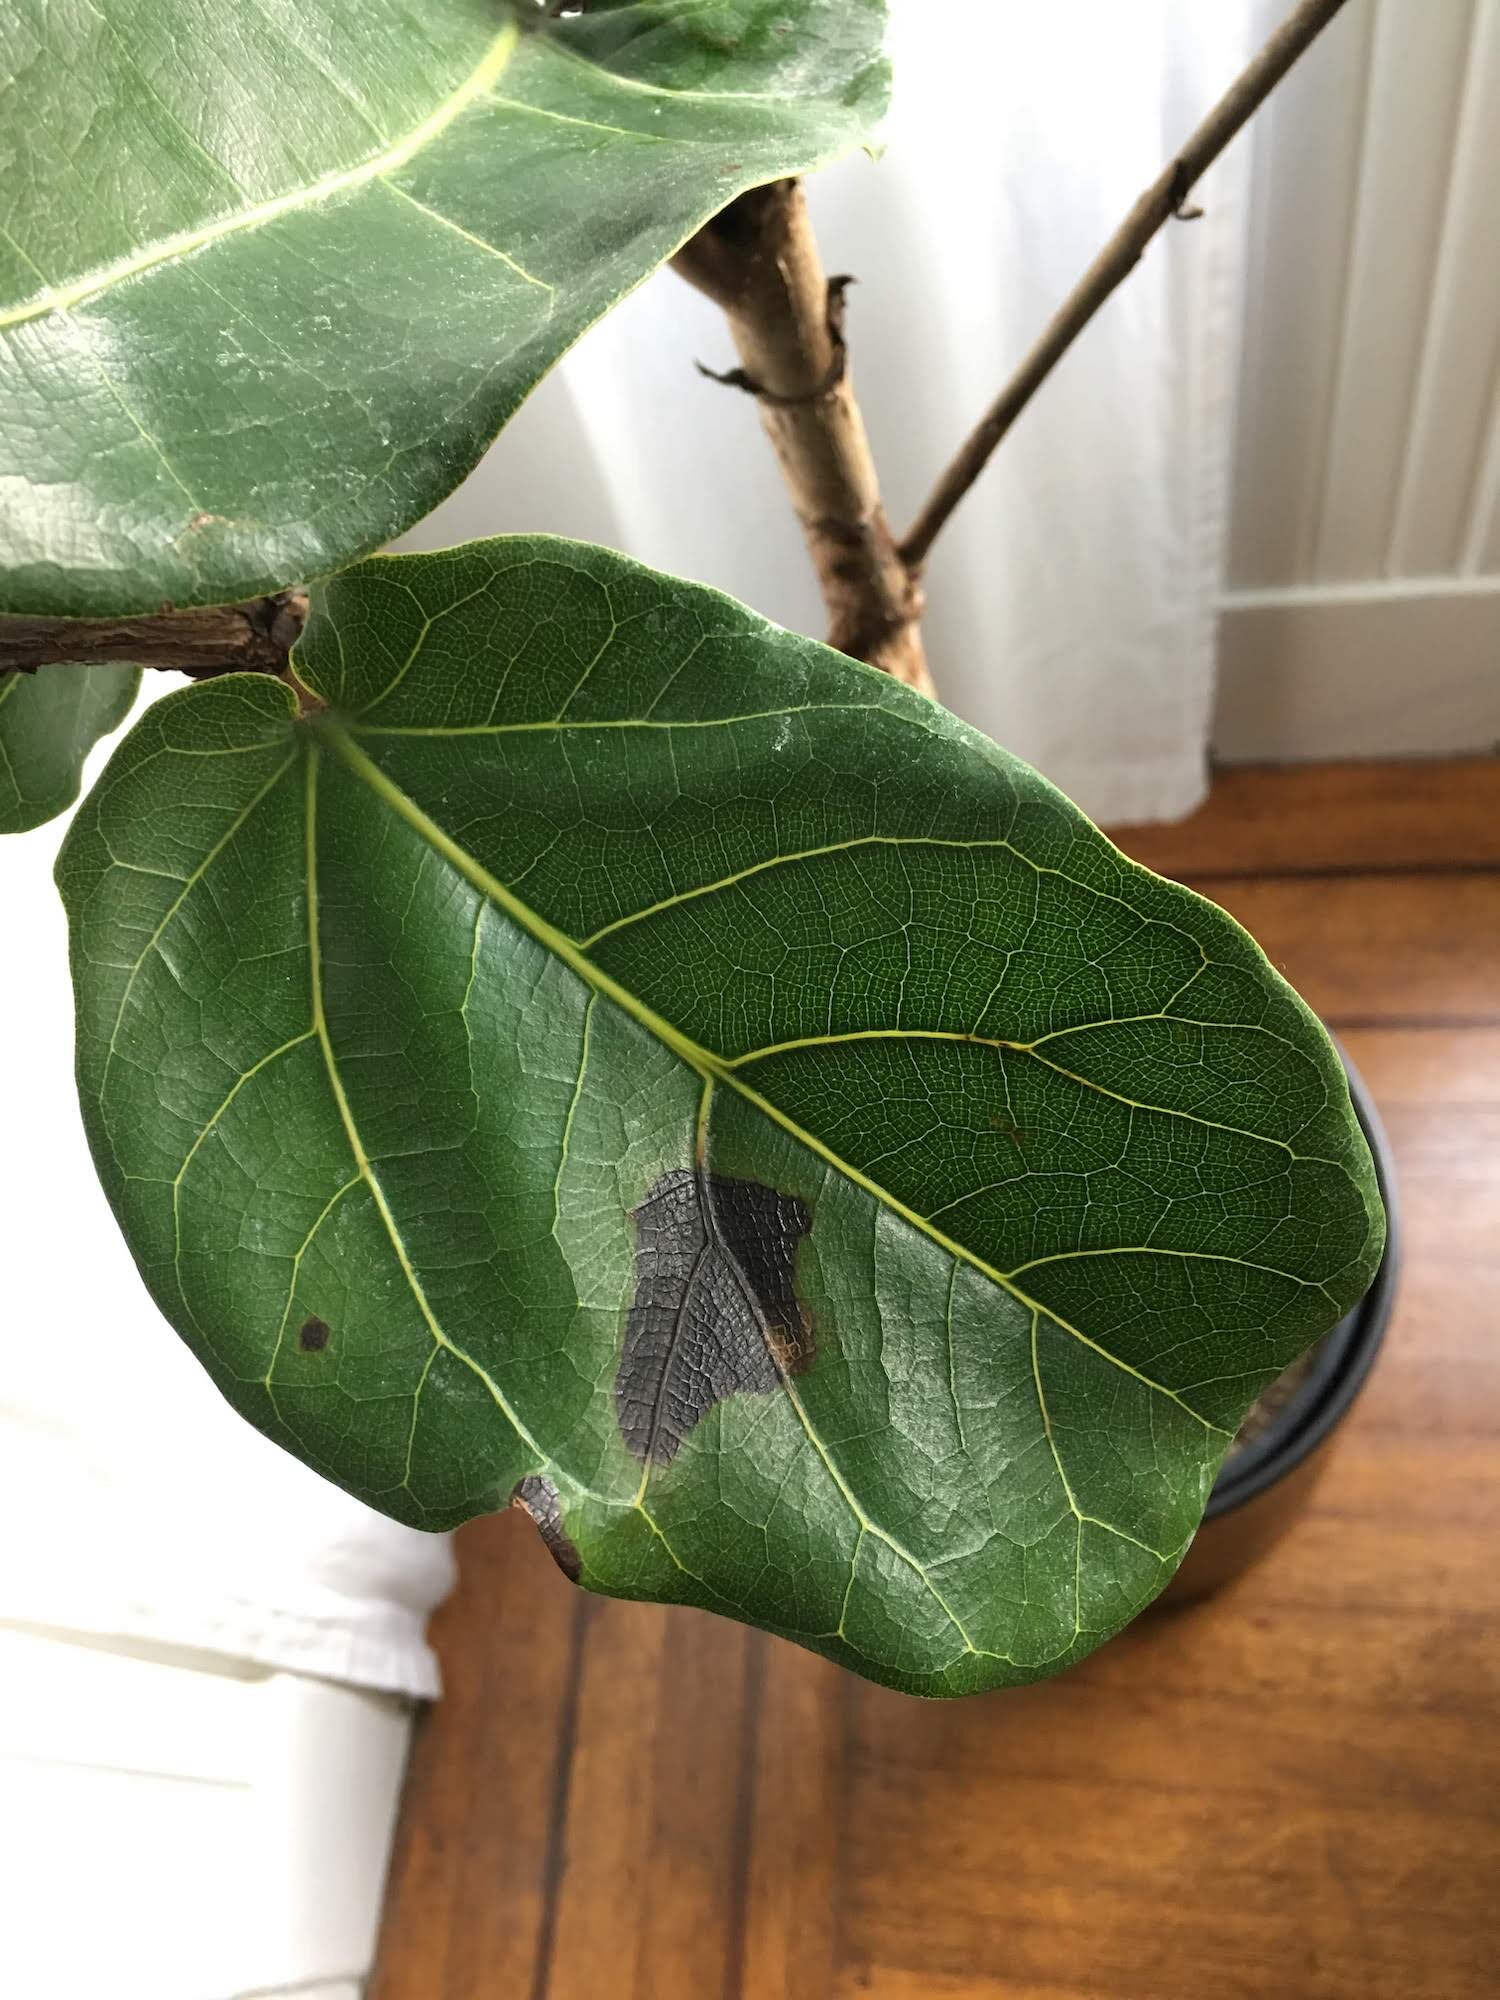
Leaf Discoloration

Yellow leaves are a sign that your plant needs more light. White spots or browning leaves could mean that your plant is being burnt in direct light. Money Trees prefer bright, indirect light - somewhere near a window but not in the path of direct sun, nestled inside suitable pots. Check out our illustrated light guide for more information on assessing your light, or take a deeper dive into Money Trees and yellow leaves.

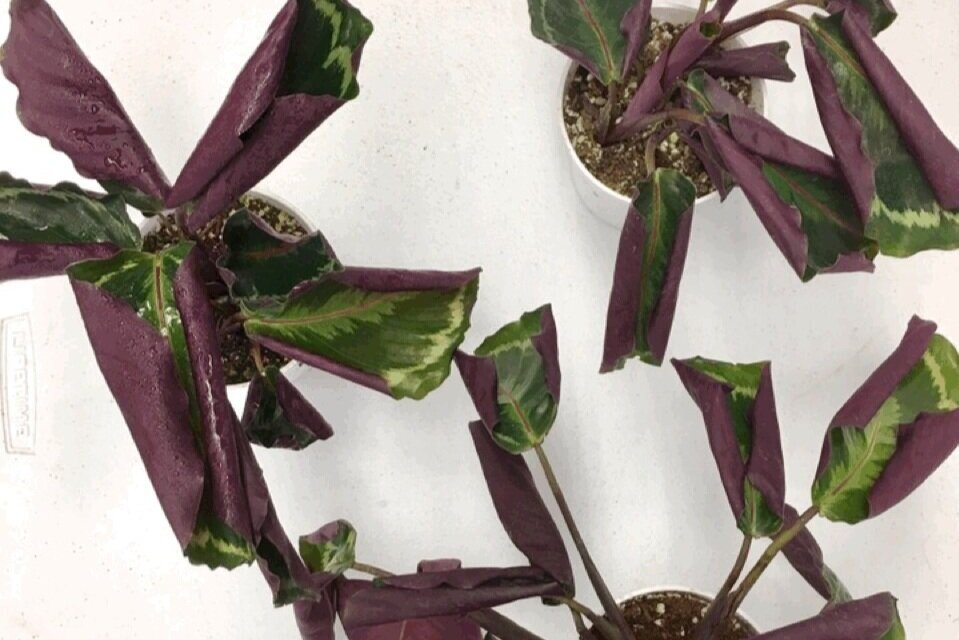
Leaf Drop and Wrinkles

The culprit? Temperature fluctuations! Native to the tropics of Central and South America, this gardening favorite thrives in warm and humidity-rich environments, ideally somewhere between 55F to 75F. To mimic its native greenhouse environment, consider adding misting to your routine between waterings. Read our complete guide on Money Trees’ wrinkled leaves.
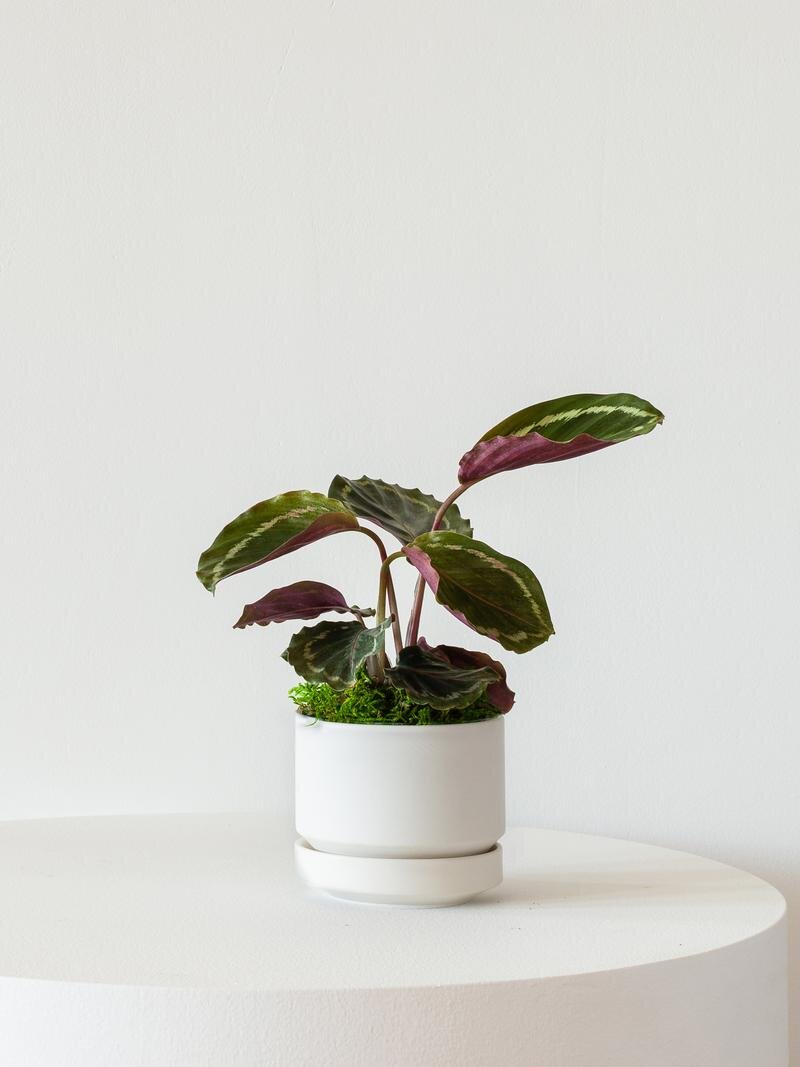
Trunk Health

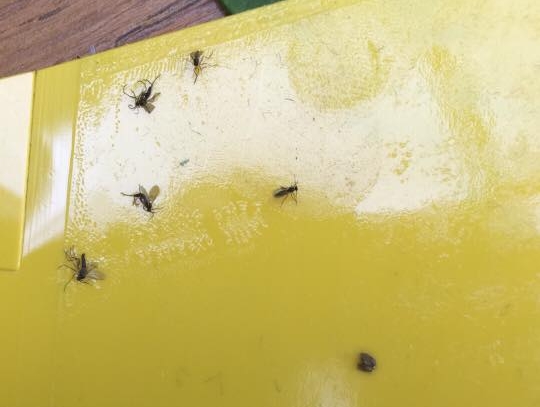
Arguably the most impressive part of the tree, the trunk can suffer from root rot due to overwatering and become soft, soggy or wrinkly. The trunk may also dry out if not watered enough (though this usually only happens in extreme cases of underwatering). A general gardening tip for these plants: Money trees like their soil on the drier side with good drainage. Always ensure the soil feels dry before you water again. And don't forget to repot and fertilize periodically, as well as carry out occasional pruning. Be on the lookout for pests, and if you notice any, address them promptly to maintain your plant's health.


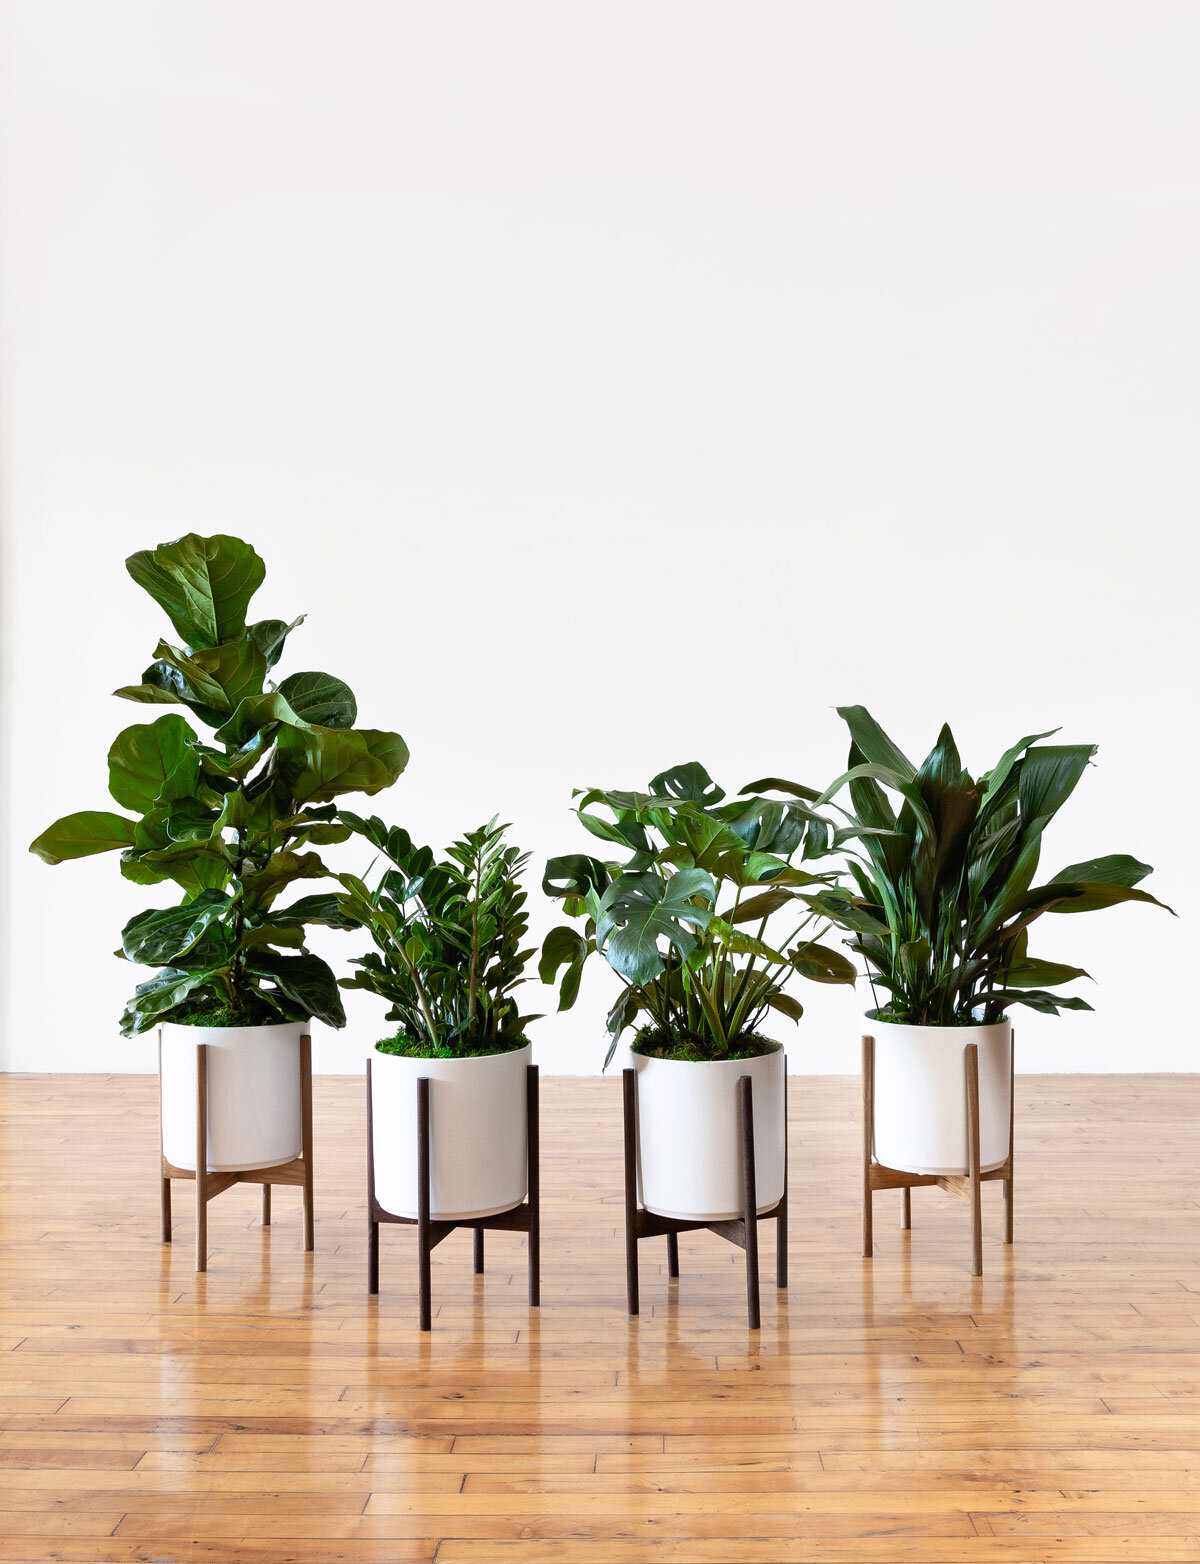
The Money Tree Collection

Considered a powerful symbol of good luck and prosperity, The Braided Money Tree has a meticulously-braided trunk under a beautiful canopy of leaves which expand with time. Explore our full collection of Braided Money Trees in various shapes and sizes.

What You Need To Know Before You Repot Your Plant

So you've decided it's time to give your leafy friend a new home. Well, hold onto your gardening gloves because before you get started, there are a few things you should know…

Whether you're a seasoned green thumb or a newbie plant parent, repotting can be a bit like transplanting your plant to a new city. You want to make sure it settles in comfortably and flourishes. So, let's dive into what you need to know before you repot your plant and make this experience a rootin' tootin' good time!

  1. Timing is Everything

  2. The Right Pot is a Game-Changer

  3. Soil Matters

  4. Mind Those Roots

  5. One Size Doesn’t Fit All

  6. Watering Wisdom

  7. Post-Repotting TLC

Timing is Everything

Before you get your hands dirty, consider when to repot your plant. Spring and summer are like the plant equivalent of a beach vacation – the ideal time for relocation. Your plant will have the energy to adapt to its new pot and grow like it's on a tropical getaway. That said, if you have to repot in the fall or even dead of winter, it won’t be the end of the world.

The Right Pot is a Game-Changer

Picking the right pot is crucial. Think of it as finding the perfect-sized shoes for your feet. You want a pot that's just a tad larger than your plant's current one (or, you may decide to repot back into its original pot, simply refreshing the soil). If it's too big, your plant might feel like it's swimming in a sea of soil, and most plants like to have their roots tightly compacted within their soil and pot. Too small, and it's a suffocating shoe that'll cramp its growth.

Soil Matters

Imagine moving to a new city and having to adapt to a different climate. Your plant goes through something similar when you change its soil. Choose a high-quality potting mix that suits your plant's needs. Some like it dry, while others prefer to be constantly moist. Check your plant's preferences and cater to them like a plant concierge!

Mind Those Roots

When you're repotting, don't just yank your plant out like you're trying to win a tug-of-war. Be gentle and tease out those roots. If they've circled the old pot, give them a little massage to encourage them to explore their new territory. If you must, you can trim them, particularly if your plant experienced root rot (in which case, definitely trim them), or if they are too difficult to untangle from their grow pot.

repotting plants

Choosing the right pot size is essential— you can either pot back into the same size planter with fresh soil, or something just slightly larger than its current size.

One Size Doesn't Fit All

Not all plants need repotting at the same frequency. Some are like party animals and want to upgrade their space every year, while others are introverts and can go for years without needing a change. Get to know your plant's personality and repot accordingly. Some signs that your plant is ready for repotting is if the roots are circling the top or bottom of the soil surface, or if your plant generally seems to look a bit sad despite receiving adequate light, water and love.

Watering Wisdom

After repotting, your plant might be a bit stressed, just like you would be after a move. Be mindful of watering – don't drown it in sympathy water. Give it a drink, then let it settle in. Gradually increase the watering as it starts to adapt.

Post-Repotting TLC

Finally, show your plant some love after the big move. Give it some time to adjust to its new surroundings, and maybe even play some soothing tunes (okay, not really, but plants do respond positively to music!).

Remember, repotting is like redecorating your plant's home – it's a chance for a fresh start and a new lease on life. So, embrace the dirt, get your hands a little muddy, and watch your leafy companion thrive in its revamped abode.

With these friendly and funny tips, you're ready to embark on your plant-potting adventure. Happy repotting, and may your plant grow taller and greener than ever before!


repotting kit

Designed to Thrive

Upgrade your gardening game with our Repotting Kit, complete with everything you need for successful repotting, and enjoy the confidence of 24/7 Plant Doctor support.

The 10 Commandments of ZZ Care

Discover the timeless charm of the Zanzibar Gem, a symbol of natural beauty that graces any environment with elegance.

10 Commandments of ZZ Care

With its glossy, dark green leaves and air-purifying qualities, the ZZ plant has captured the hearts of plant lovers worldwide. To ensure your Zanzibar plant thrives and becomes a centerpiece of natural beauty, follow these 10 Commandments of ZZ Care.

Embrace lower light

Welcome your ZZ plant into your home's low-light areas with open arms. This hardy plant excels in low light conditions, making it a perfect fit for corners and rooms with minimal natural light. It also will happily grow (and grow fast!) in bright, indirect light, but avoid direct sunlight, as it can scorch the leaves and hinder growth.

light guide

Embrace the beauty of the no-fuss Zanzibar Gem, thriving gracefully in low light and illuminating even the dimmest corners.

With watering, less is more

Adopt a minimalist approach to watering your ZZ plant. These drought-tolerant wonders prefer to dry out between waterings as they store water in their bulbous roots. Allow the top inch of soil to become dry before giving a moderate drink. We’ll say it once and we’ll say it again: overwatering can lead to root rot, so err on the side of underwatering, especially with this plant!

Use well-draining soil

Plant your ZZ in a well-draining potting mix to ensure proper aeration and prevent waterlogging. Because the Zanzibar Gem is actually a succulent, a mix designed for succulents or cacti is ideal. This helps maintain a healthy root system and prevents moisture-related issues.

A cozy pot size

Choose a pot that provides a snug fit for your ZZ plant's roots. A slightly tight space encourages healthy growth and prevents excessive soil moisture. Repotting every few years into a slightly larger pot is sufficient.

Fertilizer, please!

Feed your ZZ plant with a well balanced fertilizer during the growing season (spring and summer) 1-2 times per month. If you use our natural plant food, you may continue to fertilize your plant but reduce to just one time per month or every other month. Avoid over-fertilizing, as ZZ plants are light feeders. 

fertilizer

Nourish your Zanzibar Gem to new heights of beauty with our specialized fertilizer and watch as your ZZ flourishes for years to come!

Prune lightly

Trim brown or yellowing leaves close to the base to encourage new growth. Pruning promotes a tidy appearance and redirects energy to healthy foliage. Remember, less is more; ZZ plants have a slow growth rate, so don't be too eager with the shears.

Toxicity: handle with care

While ZZ plants are stunning, they contain compounds that can be harmful if ingested. Keep them out of reach of curious pets and children. If nibbled on, they may cause discomfort, so ensure proper placement, out of reach from curious children or pets!

Keep things temperate

Provide gentle air circulation by placing your ZZ plant in a well-ventilated area. Avoid exposing it to strong drafts, which can stress the plant. As with all plants, good airflow prevents pests and promotes overall plant health.

Give your Zanzibar Gem a spa day by gently trimming away any yellow or brown leaves to promote a healthier appearance.

Shine that foliage

The Zanzibar Gem is not an easy plant to clean, but it will love you so much more for regularly doing it! Dust off your ZZ plant's leaves every few months or so to keep them glossy and vibrant. Wipe gently with a damp cloth to remove dust and improve its ability to photosynthesize–bonus points if you use a soap specially crafted to clean plants and naturally repel pests. 

Patience for growth

Patience is key when it comes to caring for plants, and above all with the Zanzibar Gem! ZZ plants are slow growers, so be patient and allow them to thrive at their own pace. With time and care, your plant will reward you with its striking presence and air-purifying prowess!


Designed to Thrive

Elevate your space with our premium plants like the stunning Zanzibar Gem, meticulously potted and expertly delivered.

Get Perky: The Ultimate Droopy Plant Revival Guide
Before and after of Cascading Pothos getting a good watering. This plant is nearly indestructible!

Before and after of Cascading Pothos getting a good watering.

Why is my plant so droopy?

Noticed your plant’s leaves and vines looking extra droopy? Your plant is most likely very thirsty! Plants tend to droop when they’re thirsty due to the way they distribute water from roots to leaves. If the roots aren’t getting enough water, maintaining the ideal water pressure in the rest of the plant becomes very difficult, and the leaves droop or wilt.

While this is a common occurrence in many different plant varities, some of the most notable are Calatheas (who’s leaves will also curl when underwatered), Pothos (pictured above), Fiddle Leaf Figs and Peace Lilies.

How to revive droopy plants

The good news about droopy plants is that they are generally very easy to fix (and much easier to fix than a plant that has been overwatered). Here's how to get it looking perky and happy within hours:

  1. Remove plant from its decorative planter and submerge the bottom of the nursery pot in a bucket filled with 2 inches of water. If your plant is potted directly in a planter with drainage hole, you can skip this step and place your plant with its pot in water.

  2. Leave the plant for a few hours or up to a full day to soak up the water. It will either drink all the water from the bottom-up, or if there’s still water remaining, remove it and let it drain out before returning to its decorative planter.

  3. Within 2 to 24 hours, come back and see your plant lush and full of life!

This method of watering is called bottom watering, and you can read our full guide on how to deeply water here.

Which plants will benefit from this technique?

Literally any thirsty plant! But you will find some are much more showy about it than others. Plants like Fiddle Leaf Figs, Calatheas, Peace Lilies, Rubber Trees, Pothos tend to droop more than others when thirsty, and their rebound will undoubtedly be very dramatic. Try it at home to bring life and lushness back to your thirsty plants!


Cascading Pothos

A popular, attractive, and truly easy-care plant, the Cascading Pothos has smooth and leathery heart-shaped leaves. They adapt easily to all environments and will grow quickly with minimal care, a perfect addition to refine any desk or shelf.

The 10 Commandments of Succulent Care

With their captivating charm and remarkable resilience, succulents have captured the hearts of plant enthusiasts worldwide—and it’s no wonder why! With over 10,000 different succulent varieties in a plethora of different shapes and vibrant colors, these easy care plants are unique to say the least. Though generally quite easy to care for, your succulent deserves nothing less than the utmost care and admiration! To ensure your plants flourish and bring you years of joy and new growth, follow these 10 commandments of succulent care.

  1. The perfect sunlight for succulents

  2. Reccommended watering routines

  3. The importance of proper drainage with succulents

  4. Growth expectations with succulents

  5. Wintertime tips

  6. Propagating, explained

  7. Pruning your succulent

  8. Guide to fertilizing succulents

  9. Pairing multiple succulents

  10. Providing ideal humidity

Basking in the Sunlight

Picture these desert dwellers in their natural habitat, basking under the gentle warmth of the sun: succulents are light-loving plants and most varieties thrive in bright, direct light— ideally about six hours per day. Some succulents can adapt to shady areas, and some, like the Snake Plant (aka Sansevieria) can even thrive in low light. Check the variety of your succulent to ensure you’re giving it the proper amount of sunlight.

With Watering, Less is More

Water your succulents sparingly and with great care. Succulents have evolved to store water in their leaves and stems, making them drought-resistant. Overwatering is the most common mistake made by succulent caregivers, leading to root rot and other issues. Allow the soil to dry completely between waterings, and water deeply but infrequently. Remember, it is better to under water than to overwater these drought-resistant plants!

Providing Proper Drainage

All plants enjoy proper drainage, and succulents are no exception! Plant your succulents in well-draining soil and containers. Proper drainage prevents waterlogged soil, protecting your succulents from drowning in excess water. Opt for a cactus mix or create your own by adding sand or perlite to regular potting soil. Elevate the containers slightly to allow excess water to escape freely, or consider potting using the staging method, and your succulent will be happy and thriving with their perfectly proper drainage.

Patience - The Virtue of Growth

Be patient with your succulents. Growth in succulents can be slow, especially when compared to other plants. Take heed and resist the temptation to overfeed or overwater in the pursuit of hastened growth! Patience will reward you with healthy and vibrant succulents over time.

Growth During the Winter Months

Many succulents enter a period of dormancy and rest during the colder months, slowing down their growth and sometimes even stopping it. Reduce watering and refrain from fertilizing during this time to allow your succulents to recharge for the upcoming season. Shield them from freezing temperatures and protect them from frost damage–sun-loving succulents do not like to freeze!

Propagating Your succulents

Propagating succulents is a fascinating and rewarding process that allows you to expand your collection—for free! One of the most common methods is leaf propagation, which can be done by gently removing a healthy leaf from the parent plant (simply twist and snap off!) and allowing it to callus over for a day or two before placing it on damp, well-draining soil. With time and care, tiny roots will emerge, followed by a new baby succulent sprouting from the base of the leaf, which can then be potted into its own container. It’s really that simple, and incredibly rewarding.

Prune Unhealthy Leaves

Do not fear pruning, for it brings rejuvenation to your growing succulent! Remove dead or decaying leaves to promote new growth, improve your plant’s appearance and maintain the plant's health. Pruning encourages your plant to put out new leaves, resulting in fuller, more beautiful succulents.

Fertilizer for the Best Nutrition

Feed your succulents with care— as with any plant, overfertilizing can cause fertilizer burn or damage to the foliage. During their active growing season (typically spring and summer), offer a diluted, balanced fertilizer no more than once a month. Refrain from fertilizing during winter dormancy when the plants are not actively growing. Over-fertilizing can lead to nutrient imbalances and harm your succulents.

Pairing Your succulents

Arranging your succulents in captivating groupings creates a mini-desert oasis, and is one of the most popular ways to enjoy these beautiful plants. Consider succulent compatibility and water requirements when choosing companions for a harmonious display. Groupings of three or more succulents in one space not only look aesthetically pleasing but also create a mini-biome of moisture that benefits them all!

Keep Your succulent Away From Dry Breezes And Appliances

Succulents, originating from arid regions, have adapted to thrive in low-humidity conditions, but they still require a degree of moisture in the air to remain healthy. Avoid placing your succulents near air conditioners, heaters, or vents, as the dry air from these appliances can quickly dehydrate their leaves and stems. Instead, opt for a spot with consistent air circulation that avoids direct exposure to drafts.

Remember, each succulent is a unique adventure waiting to unfold, and with a sprinkle of patience and a dash of love, you'll cultivate a thriving succulent haven that brings endless joy and serenity to your life. So, let the succulent caregiving fun begin! Happy growing!


Designed to Thrive

Premium plants paired with styled ceramics, plus lifetime access to 24/7 Plant Doctor support. Order online at leonandgeorge.com

A Post-Vacation Happy Plant Checklist

When summer travels come to a close and you make your way home, you may find yourself experiencing some anxiety in regard to your plants. How have they done in your absence? Did they get enough water? Are they dead?! Whether you had the help of a plant-sitter or simply left them to fend for themselves during your travels, you’ll likely find them exhibiting some new features, or perhaps signs of stress.

Don’t fret! Plants are flexible and forgiving, and all but the most dire cases of neglect can usually be turned around with a little T.L.C. Use this handy checklist as you reconnect with your plants and pick up your plant care routine. 

Post-Vacation Plant Checkup Checklist

  1. Clean things up

  2. Check for uninvited visitors (bugs)

  3. Gauge the watering situation

  4. Rotate for even light access

  5. Wait and see


Clean Things Up

You may come home to yellow or brown foliage that wasn’t there before -- worry not, this is par for the course! You may have been out of town, but your plants were still doing their thing while you were away, which means growing, adapting, and yes, sometimes shedding or losing foliage. Foliage that has significantly yellowed or brown is simply ready to be trimmed.

Feel confident in trimming off severely yellow or browning foliage with clean, sharp scissors or shears. When possible, make your cut in the direction in which your plant is naturally growing. For a handy How-To on pruning, check here.

Beyond trimming away dead leaves, it also might be a good time for a routine dusting. Soak a soft cloth with plain water (or spray water directly on foliage, then wipe with a cloth) or, if you like the one-two convenience of natural soap and insecticide, you can use an organic black soap, like our L’Original.

BLACK SOAP & PREMIUM SHINING MITT

BLACK SOAP & PREMIUM SHINING MITT

Gift your plants the ultimate pampering experience. Our premium shining mitt, specially crafted for indoor greenery, ensures a radiant and healthy glow, tested and approved by Léon & George plant stylists. Paired with L’Original, a tribute to the age-old tradition of olive-oil based black soaps from Southern France, it not only offers a natural leaf shine but also functions as an insecticide and fungicide. This indispensable combo, enriched with only four natural ingredients, promises unparalleled care for all living plants.

Check for Visitors

The last thing that anybody wants when they go on vacation is for unwelcome guests to move in. If you’re concerned about a possible insect infestation, visually check your plant thoroughly, inspecting both the tops and bottoms of every leaf. If you notice traces of bugs or cobwebs, it is time to treat your plant and nip the issue in the bud. 

Follow the instructions on treating your plant for pests and you’ll have no issue getting your plant back to baseline. And don’t forget to protect your plant from a possible pest resurgence by cleaning your plant regularly,  applying pesticides as needed, and never let its soil get soaking wet without aeration for any period of time (many common pests thrive in super-wet soil). 

Gauge the Water Situation

Notice how we didn’t just say water your plants. Sure, it’s possible your plants didn’t get a single drink while you were gone. But it’s also possible they received an unusually large deluge, thanks to an overzealous plant sitter! Check what the situation is before blindly (and literally) showering them with love.

Gauge your plant’s moisture level by probing its soil or using a moisture meter. Push aside a bit of the decorative moss layer and insert a finger two inches down into your plant’s soil. If it is dry, your plant is ready to be watered. If it’s moist (or wet, or super-wet!) hold off on watering until it dries fully. 

Has it been quite some time since your plant has been watered? It may be ripe for a bottom-watering, which entails removing it from its decorative container and soaking it in water for a few hours or up to one day. Head to our full post to read more about bottom-watering and its benefits!

If you’re concerned that your plant experienced a major instance of overwatering while you were gone, remove the plant, still within its plastic nursery pot, from its ceramic pot. Look into the ceramic pot- if water has collected inside of it, pour it out. If your plant’s soil is soaked through in its plastic pot, consider leaving it out of the ceramic pot for a few days to allow it to breathe and dry out. Once the excess moisture has dried, you can return it to its ceramic pot and begin your standard watering routine again.  

And finally, don’t be shy to show them some love. Mist or even shower their foliage in water, they will appreciate the extra dose of humidity. You can mist it with plain water, with water that has been left to sit out overnight (this allows some of the chlorine to evaporate and softens the water) or mist your plant with a mixture of water and a gentle foliar feed like Potion Magique, for an additional boost and ultra-quick microdose of nutrients.

Rotate & Fluff

Though we can’t see it, plants are constantly moving and changing in their effort to reach towards the light. Now’s the perfect time to help them out in their mission by giving them a turn and letting their backsides get a little bit of vitamin D.

While you’re there, fluff the decorative moss to aerate the topsoil of your plant.

Be patient—wait and see!

It is not uncommon for plants to look a bit sad after coming home from traveling. Reduced airflow, changes in watering routines and more may cause them to droop, loose leaves, or just simply look abandoned and neglected. 

Follow the checklist and be patient. Within a few weeks, you may be surprised to see your plants glowing as if they, too, just got back from a sun-soaked vacation on the beach!

Plant food

a microdose of nutrients for sad or neglected plants

Is your plant a bit droopy after coming home from vacation? Mist it with a mixture of water and a gentle foliar feed like Potion Magique for a fast-absorbing microdose of nutrients.


monsteranew.jpg

Monstera deliciosa

A popular plant from the art deco era, the Monstera Deliciosa brings style and taste to any indoor space.

Can Air Conditioning Damage Houseplants?
N’Joy Pothos

The N’Joy Pothos enjoying a refreshing summer drink!

While ACs so pleasantly cool down our indoor spaces, they also remove warmth and humidity that our plants need and crave. Most indoor plants prefer temperatures between 65-75ºF, any extremes above or below can affect your plant's happiness and health. In addition to balmy temperatures, many common houseplants hail from tropical regions where humidity is not lacking, and unfortunately, air conditioning is the nemesis of good humidity! Follow these easy steps to keep your plants happy and healthy all summer long!

  • Air drafts - check for chilly air blowing directly on your plant. Consider temporarily moving your plant to a new spot or another room to protect it from the drastic changes in temperature.

  • Humidity - offset the dry air created by air conditioners and bring some humidity back to your plant by regularly misting its leaves when the air feels dry.

  • Watering - dry air also causes your plants to be thirsty and drink more water. Check the soil more frequently for potential changes in its watering schedule.

Look out for fading or wilting leaves as this may be a sign of a plant's unhappiness with its conditions. You can safely remove these leaves by clipping them close to the root, and follow the steps above to re-balance its comfort. Seeing other signs of the summer blues? Check out our full post on what to look out for when temps start to rise.


The Pothos Collection

From the Cascading Pothos to the N’Joy Pothos, discover our full collection of lush and trailing Pothos.

How to get rid of fungus gnats
Yellow sticky traps, photo credit: @j.l.perrone

Yellow sticky traps, photo credit: @j.l.perrone

Having some pesty problems around your plants? Fungus gnats are common pests of indoor plants, and though they are not immediately harmful to your plants (or you— they don’t bite), these flying bugs can be annoying and are generally an indication of overwatering.

There are two lifecycles to cover— adult gnats flying around and larvae finding home in the soil. While gnats flying around your plant or home can be annoying, the latter can cause problems and damage your plant’s roots. Here are different methods to control both stages and get rid of gnats once and for all.

  • Dry out soil - Gnats and their larvae need moisture to survive. Try drying out the soil completely before watering again. 

  • Homemade dish soap spray - combine 1 tablespoon of dish soap with a quart of water. Test the spray on one leaf before applying to the rest. 

  • Potato slices - Cut up 1 inch cubes of potatoes and bury them just below the surface. Wait 4-8 hours as it attracts the larvae, then dispose of the slices.

  • Neem oil - Neem oil is an all-natural pest solution that effectively treats common infestations. Our Super Neem Oil is an ideal blend formulated with lemon-eucalyptus essential oil for extra protection and a delightful aroma.

  • Sticky traps - As pictured above, not the cutest plant decor in the world, but pretty effective if you’ve got an infestation on hand.

  • The strong stuff - if gnats become a recurring issue, find a solution with Bacillus thuringiensis subspecies israelensis or Bti, which you can easily find on Amazon


Indoor plants, potted & delivered

Premium plants paired with stylish ceramics, plus lifetime access to 24/7 Plant Doctor support. Order online at leonandgeorge.com

Sunburn on Plants: What It Looks Like, & How To Avoid It
Photo by @renoplantmom

Photo by @renoplantmom

In most parts of the country, summer means one thing: More sun! While we're typically out playing in it, our plants are sometimes burning in it. With the sun being at its closest to earth during the summer months, be sure to take notice of how your plants are reacting. Here are a few things to know about sunburn with houseplants.

What Sunburn Looks Like on Plants

Look out for white spots or dry brown splotches in random areas of a leaf. This is a clear indicator of sunburn. Sadly, the leaf won't repair itself but you can trim the areas or the entire leaf off, and there’s no reason why your plant should continue suffering or not recover from its sunburn.

Avoiding Sunburn on Plants

While you may consider moving your plants entirely during the summer months so that they aren’t in areas that are too sunny, you may just move them here and there or invest in shades that slightly filter the sun. On long sunny days in the midst of summer, particularly for plants placed in south or west facing windows, move your plants a few feet away from their normal sunny perches or draw the shades to give them a chance to recover and cool.

Read up on all our summer care tips for plants to ensure your greenery has their best season yet!

fiddle-stand.jpg

FIDDLE LEAF FIG TREE

A lush and sculptural plant with elegant violin-shaped leaves.

Fiddle Leaf Figs and Root Rot: The Only Corrective Guide You'll Ever Need
How to diagnose and treat root rot in fiddle leaf figs

Root rot is common issue with indoor plants, and can be a very serious problem with the popular Fiddle Leaf Fig. Though this plant is prone to browning and dropping leaves, if root rot goes untreated it can lead to the quick demise of your plant. So what is root rot? In this article we’ll explain what causes root rot, how to treat it, and what to do to prevent future cases!

What causes root rot?

How to diagnose root rot

How to treat root rot on Fiddle Leaf Fig Trees

What Causes Root Rot?

As the name implies, root rot is caused by an accumulation of moisture or humidity in the plant’s soil due to overwatering. Like most indoor plants, Fiddle Leaf Figs like to dry out a bit in between waterings, and by watering them too frequently or too much, they may develop a nasty rot that will first infect the roots below the soil and later begin to show up top by browning or dropping leaves. Root rot may also be caused by a lack of drainage in the pot, or a combination of less than ideal or no drainage and overwatering.

Fiddle Leaf Fig Fertilizer

Nourish your plants with this specially-formulated organic liquid plant food. Our Boost Vitaminé is made with potent nutrients from nature to help your plants grow and thrive all year long.

$24

How to Diagnose Root Root in a Fiddle Leaf Fig

Root rot can be difficult to diagnose by looking plainly at a potted plant. Even a Fiddle that appears to be relatively dry on the surface of its soil may be in the processing of rooting down below. The only way to truly know is to see the roots below the surface. If you are noticing signs of distress like dropping or browning leaves on your plant, you may want to remove the plant from its pot and have a look.

Here are a few clear signs your Fiddle Leaf Fig has root rot:

  1. Wet, soggy, or mushy brown roots

  2. Dripping, soaked, or waterlogged soil and roots

  3. An unpleasant smell in the soil or around the roots

The beginning signs of root rot: the roots on the left are healthy and strong, whereas the roots on the right are soggy and waterlogged.

The beginning signs of root rot: the roots on the left are healthy and strong, whereas the roots on the right are soggy and waterlogged.

Once a section of the roots begins to rot, this can spread through the rest of the root system and begin to travel up to the leaves of the plant.

How to Save Your Fiddle Leaf Fig from Root Rot

Root rot in Fiddle Leaf Figs does not necessarily mean certain death, though catching it quickly is important if you want to save the plant. At the first sign of distress, remove your plant from its pot and carefully inspect the roots. Is there accumulated moisture around the base of the plants? Do the roots feel mushy or are they turning dark brown?

If so, act immediately by following these steps and repotting your plant:

  1. Rinse all the roots throughly with water. Once they are clean, remove any that are damaged with a pair of clean scissors or pruning shears.

  2. With a new container with good drainage, repot your plant with fresh, fast-draining soil. You may consider adding some gravel or a foam block to the bottom of your container to improve the drainage and help keep your plant dry.

  3. Place your Fiddle in bright, indirect light (these plants are picky about this!) and water once. Do not water again until you’re positive the roots have dried out. This may be anywhere from one to two weeks or more depending on the size of the plant and the temperature it lives in. Erring on the side of underwatering is usually best!

Repot your fiddle leaf fig with fresh potting soil in the well-draining container. Then, water once and make sure the excess water is draining out of the bottom of the container. After that, wait. Do not water again until you’re sure the roots have had a chance to dry out. You can also use a moisture meter to check the bottom of your plant.

Your plant may still lose a few leaves at first, so be patient and wait for the plant to stabilize. You may remove the heavily damaged leaves, and trim some of the slightly damaged ones to remove the brown edges. Make sure not to remove too much of the plant (a good general rule is no more than 30%), as this may throw the plant into further shock. Whatever the case, with a bit of water, light, and love, your Fiddle has a good chance of recovering!

This post was adapted from the Fiddle Leaf Fig Plant Resource by expert Claire Akin. Head to their website to learn more about caring for the Fiddle Leaf Fig.


1 TO 1 VIDEO CALL WITH AN EXPERT

Yellow leaves? Worried about watering or struggling with incorrect lighting? Book a call and get truly personalized support for all your plant-related needs.

The Most Likely Causes Behind Your Dying Plant
A Fiddle Leaf Fig with brown spots and leaves falling left and right. Can it be saved?!

A Fiddle Leaf Fig with brown spots and leaves falling left and right. Can it be saved?!

So you’re dealing with a dying plant

We’ve all been there. Your plant is dying, it’s possibly not the first time, and you are distressed as to why this keeps happening.

Finding the root cause of why our plants die is crucial to becoming a better plant parent, and one who doesn’t make the same mistake twice! Learn about the factors that can cause an indoor plant to go south, and how to save dying plants in the future.

Common causes for dying plants

Let’s be real. There are dozens of different reasons your plant could be dying, but 99% of them fall into just a few categories. Let’s narrow them down:

  • Water. The number one way indoor plants die is by overwatering. While you may love your plant so much and feel inclined to shower it (literally) with love and water, know that most plants need to dry out a bit between waterings in order to thrive. Because overwatering is a quick way to kill your plant, it is always best to err on the side of underwatering, as unlike its opposite, it is pretty difficult to actually kill a plant by simply not watering it. The plant may not look happy, but most will hang on for quite a while with a bit of drought.

  • Light. This may seem obvious, but certain plants need a certain amount of light. If your plant isn’t getting the light it needs, it may lead to other problems like over watering (see above!) or a higher risk of getting pests (see below!). Be realistic when choosing the right plants for your space, and if you suspect your plant is unhappy due to its light conditions, move it to another space.

  • Pests. Pests like spider mites, mealy bugs, or scale can be a real pain when it comes to indoor plants, especially because we may not notice them until it’s too late. Keep a close eye for the following pests:

    • Mealy bugs. They make white cotton-like masses usually on the underside of leaves.

    • Spider mites. Too small for the naked eye to see, these pests will leave thin silky webs around your plants foliage and stems.

    • Scale. These may not look like they’re moving, but you will see them all the same as brown, hard-shelled insects that suck the nutrients from your plant’s leaves.

  • Nutrient deficiency. Though this is the least likely cause of plants dying or starting to die, it can lead to a sad looking plant over time. If your plant has not been repotted in many years, and/or if you do not fertilize regularly, your plant may have a nutrient deficiency. Consider repotting your plant to give it fresh soil (from which it gets lots of nutrients!) or incorporate a regular feeding routine with a gentle fertilizer like Boost Vitaminé.

How to save a dying plant

If you’ve found the cause of your dying plant, there may still be time to fix it.

  • Overwatering. Plants that have been severely overwatered may be suffering from root rot, and the only way to save a plant from root rot is repotting. Remove your plant from its pot, remove all the mushy, black roots, and wash the remaining healthy roots thoroughly with water. You may need to repot your plant in a smaller pot if there are not many roots left. Read our full guide on how to treat root rot here. You may also decide to cut off the healthy stems and propagate, using rooting hormone to encourage the growth of a new plant.

  • Pests. There are several solutions to saving a dying plant plagued with pests, but they may vary depending on what you’re treating for. Spider mites and their larvae can be washed away with a steady stream of water, and scale can be removed (painstakingly, one by one!) with alcohol and a q-tip. Very serious infestations may require insecticidal soap. As always, prevention is the best way to avoid pests, and we recommend using neem oil to keep the bugs at bay!

Becomming a successful plant parent

Successfully growing your indoor plants is all about keeping staying in tune with your plant and its needs. That means regularly checking on them (beyond simply watering!), learning as you go, and catching any issues or missteps before they become a serious problem. Rest assured that even the greenest of thumbs has killed a plant or two in their lives, and that by no means should you ever give up! Now go forth and keep those plants alive and thriving!


fiddle-bush-white-stand-nude-leather-chair.jpg

Indoor plants, potted & delivered

Premium plants paired with stylish ceramics, plus lifetime plant care support. Order online at leonandgeorge.com

Calatheas and their curling leaves
Calathea Medallion Plant Care

Let's be real here. The Calathea is a difficult one in terms of care. It needs constant humidity and warmth. Here are the most common issues you'll experience with plants in the maranta and prayer plant families.

What causes Calatheas’ leaves to curl?

Calatheas are humidity-loving, tropical plants. In fact, while this plant is generally easy to care for, it often requires multiple waterings a week (or more in the summer!) to give it the proper moisture that it craves. In most cases, Calatheas’ leaves curl when their soil is excessively dry, though there could be a few other minor reasons that are causing your plant’s leaves to curl.

How to fix curling leaves on a Calathea

Easy! Give it a good drink of water—but from the bottom up. Soak your plant in water by placing it in a deep dish, bowl, sink or bathtub with a few inches of water. You may leave it soaking anywhere from a few hours to 24 hours. After a day or so, you will see how the leaves magically unfurl!

This method of deep watering is called “bottom watering” and Calatheas aren’t the only plants who love it! Learn more about the benefits of bottom watering here.

Water Quality

If you’ve thoroughly soaked your Calathea but it’s still showing signs of curling leaves, consider using filtered water. Tap water often contains salts, chlorine, minerals, and fluoride, which can accumulate in the soil and lead to leaf tip burning, browning, and curling. To address this, try using filtered water or letting your tap water sit in an open container or sink overnight to reduce chlorine content.

Temperature & Humidity

Since the Calathea is a tropical plant, it thrives in high humidity. If your environment lacks humidity, you can increase it by misting the leaves regularly, using a pebble tray, or placing a humidifier nearby.

Temperature is also essential for your Calathea's well-being. Ensure that it is not placed in a drafty area or exposed to heating and cooling vents. Cold temperatures or excessive dryness from constant warm airflow can also cause the leaves to curl.

Other problems with Calatheas

Calatheas can show a few different signs of distress:

Brown Edges

Brown edges appear when the air is too dry for your plant. Add misting to your watering routine or keep it on a bed of rocks and shallow water to add humidity. You can also trim the leaves, either removing the entire leaf at the stem’s base, or trimming the leaf itself, following the natural shape to get the plant and/or its leaves looking sharp again!

Droopy Leaves

Tour plant is getting too much water. Allow the soil to air out or change the soil completely to decrease chances of root rot. 

Ready for more? Read our full guide on Calathea care, including tips for propagation, repotting, and more.


Calathea Medallion

A stunning prayer plant with a deep color palette of leaves painted by nature.