Posts tagged Overwatering
3 Strategies to Avoid Overwatering Your Plants
overwatering plants

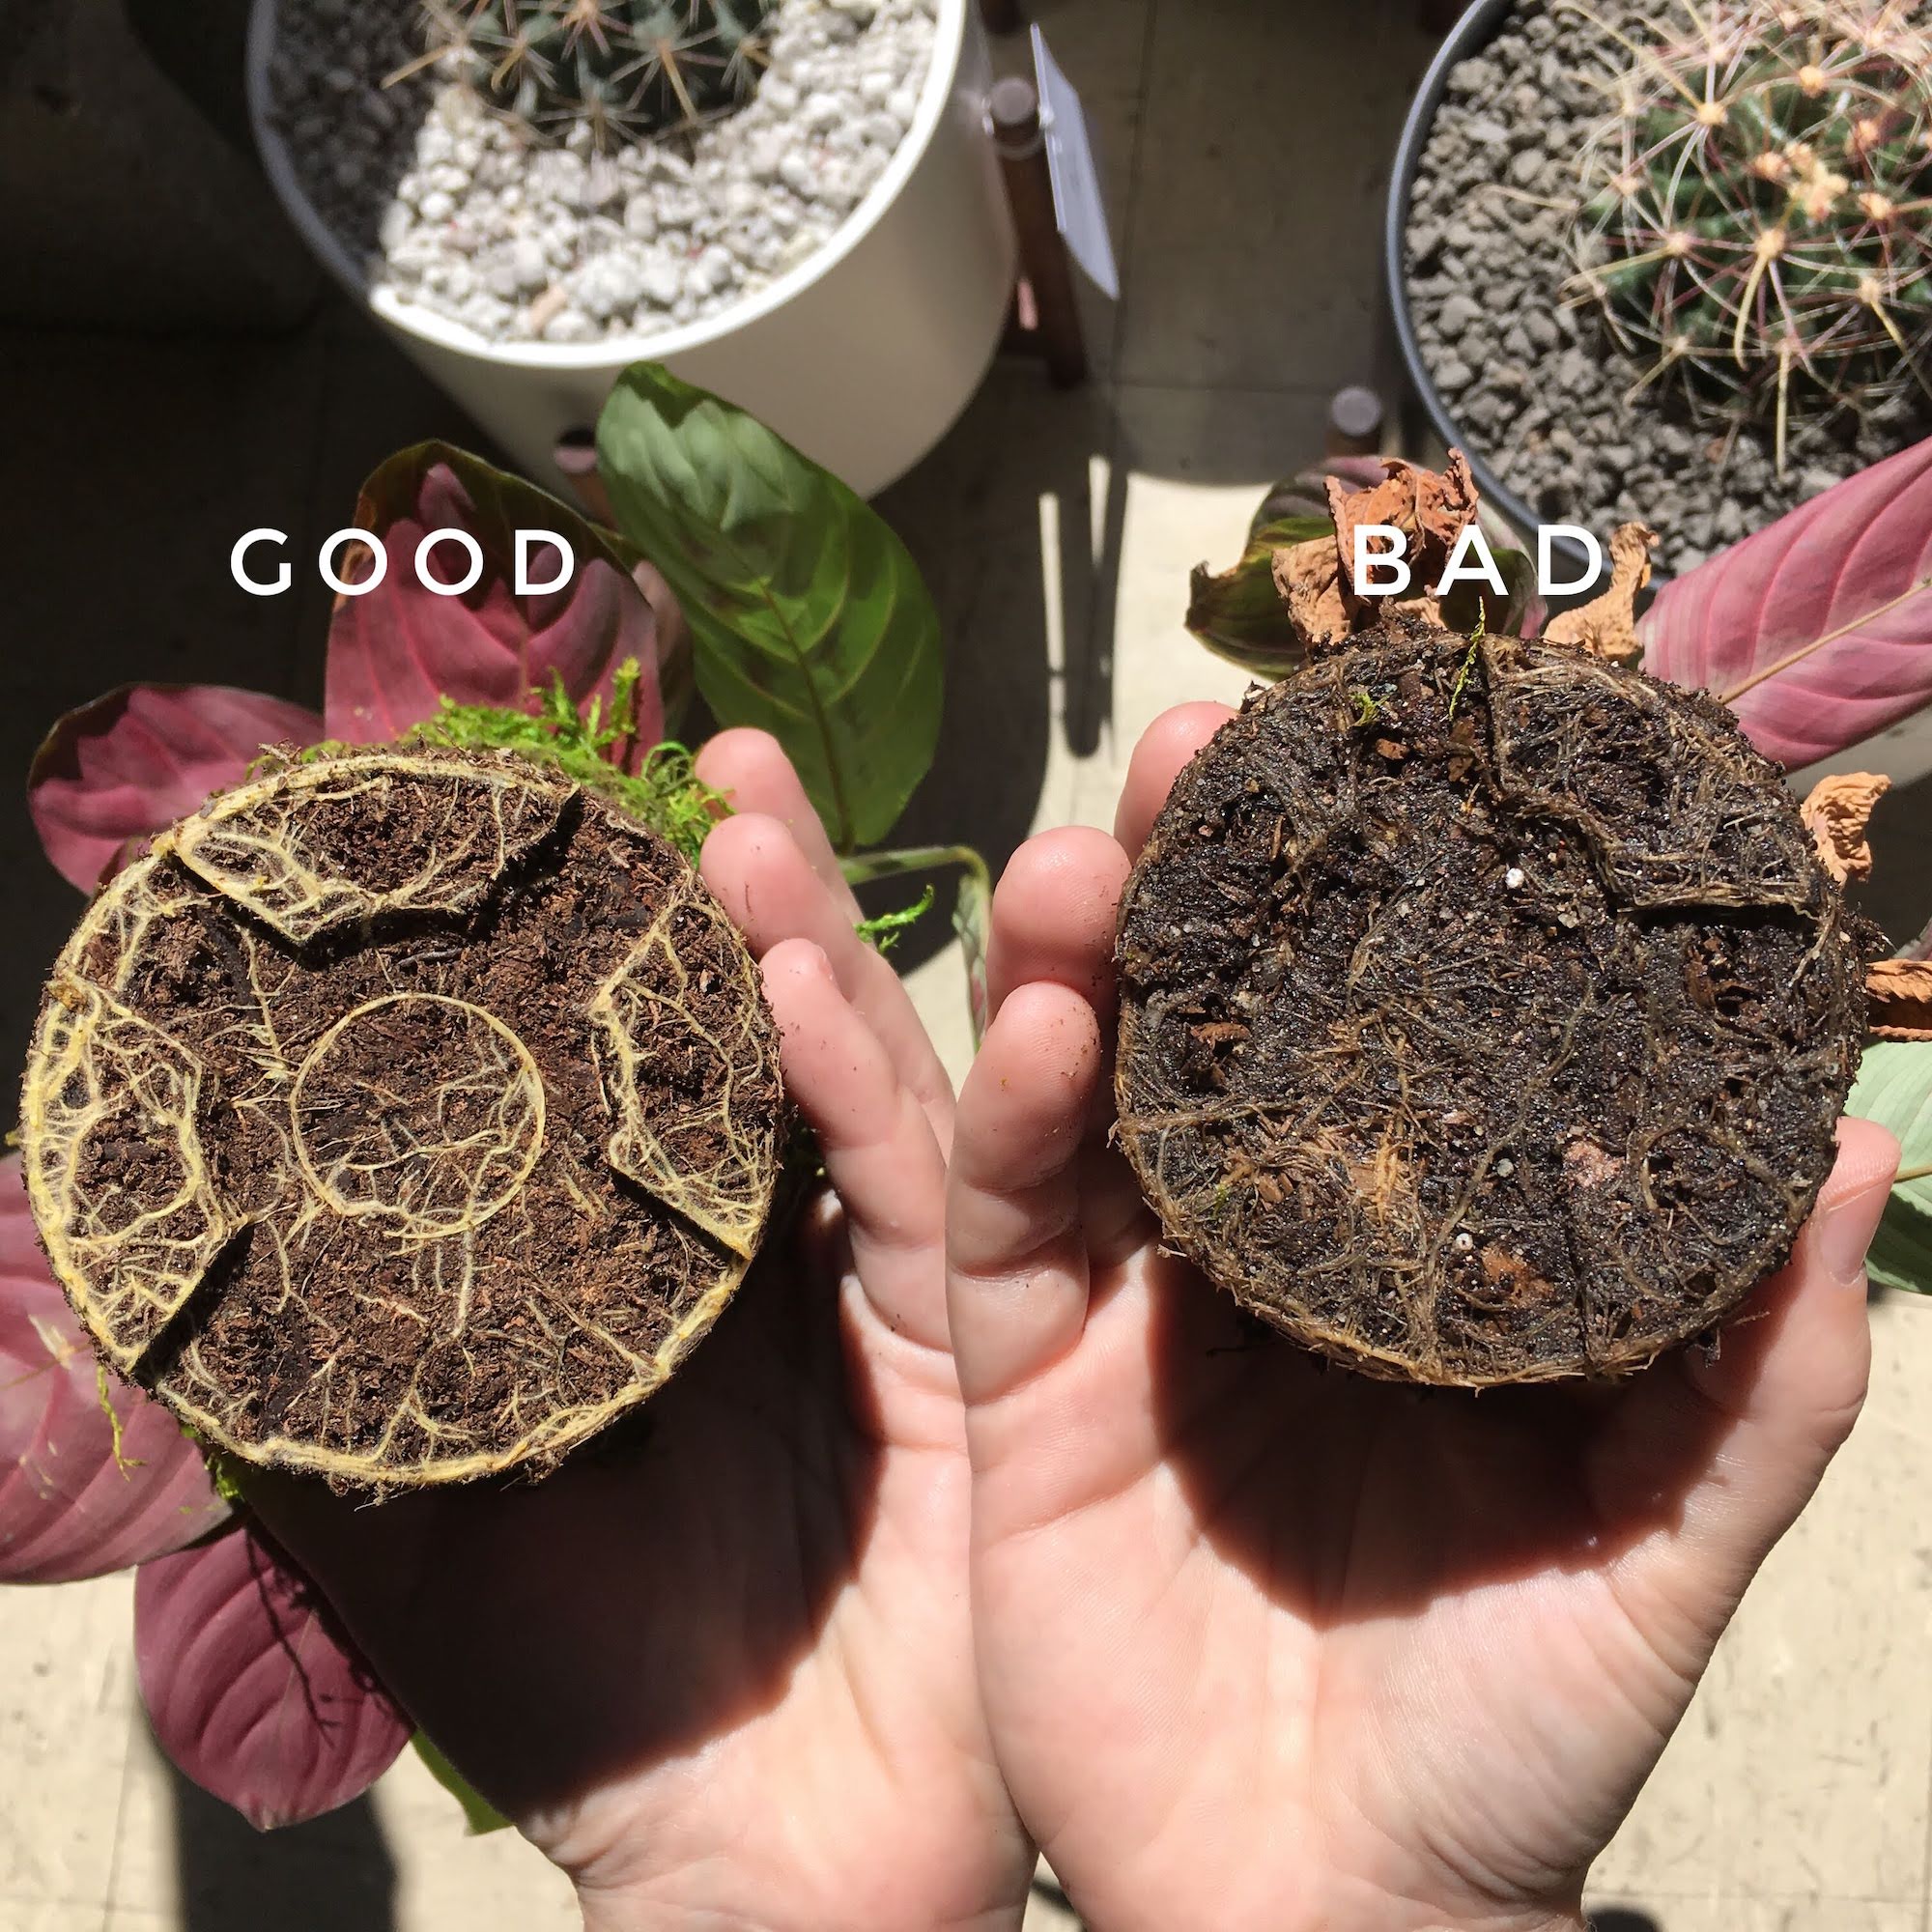
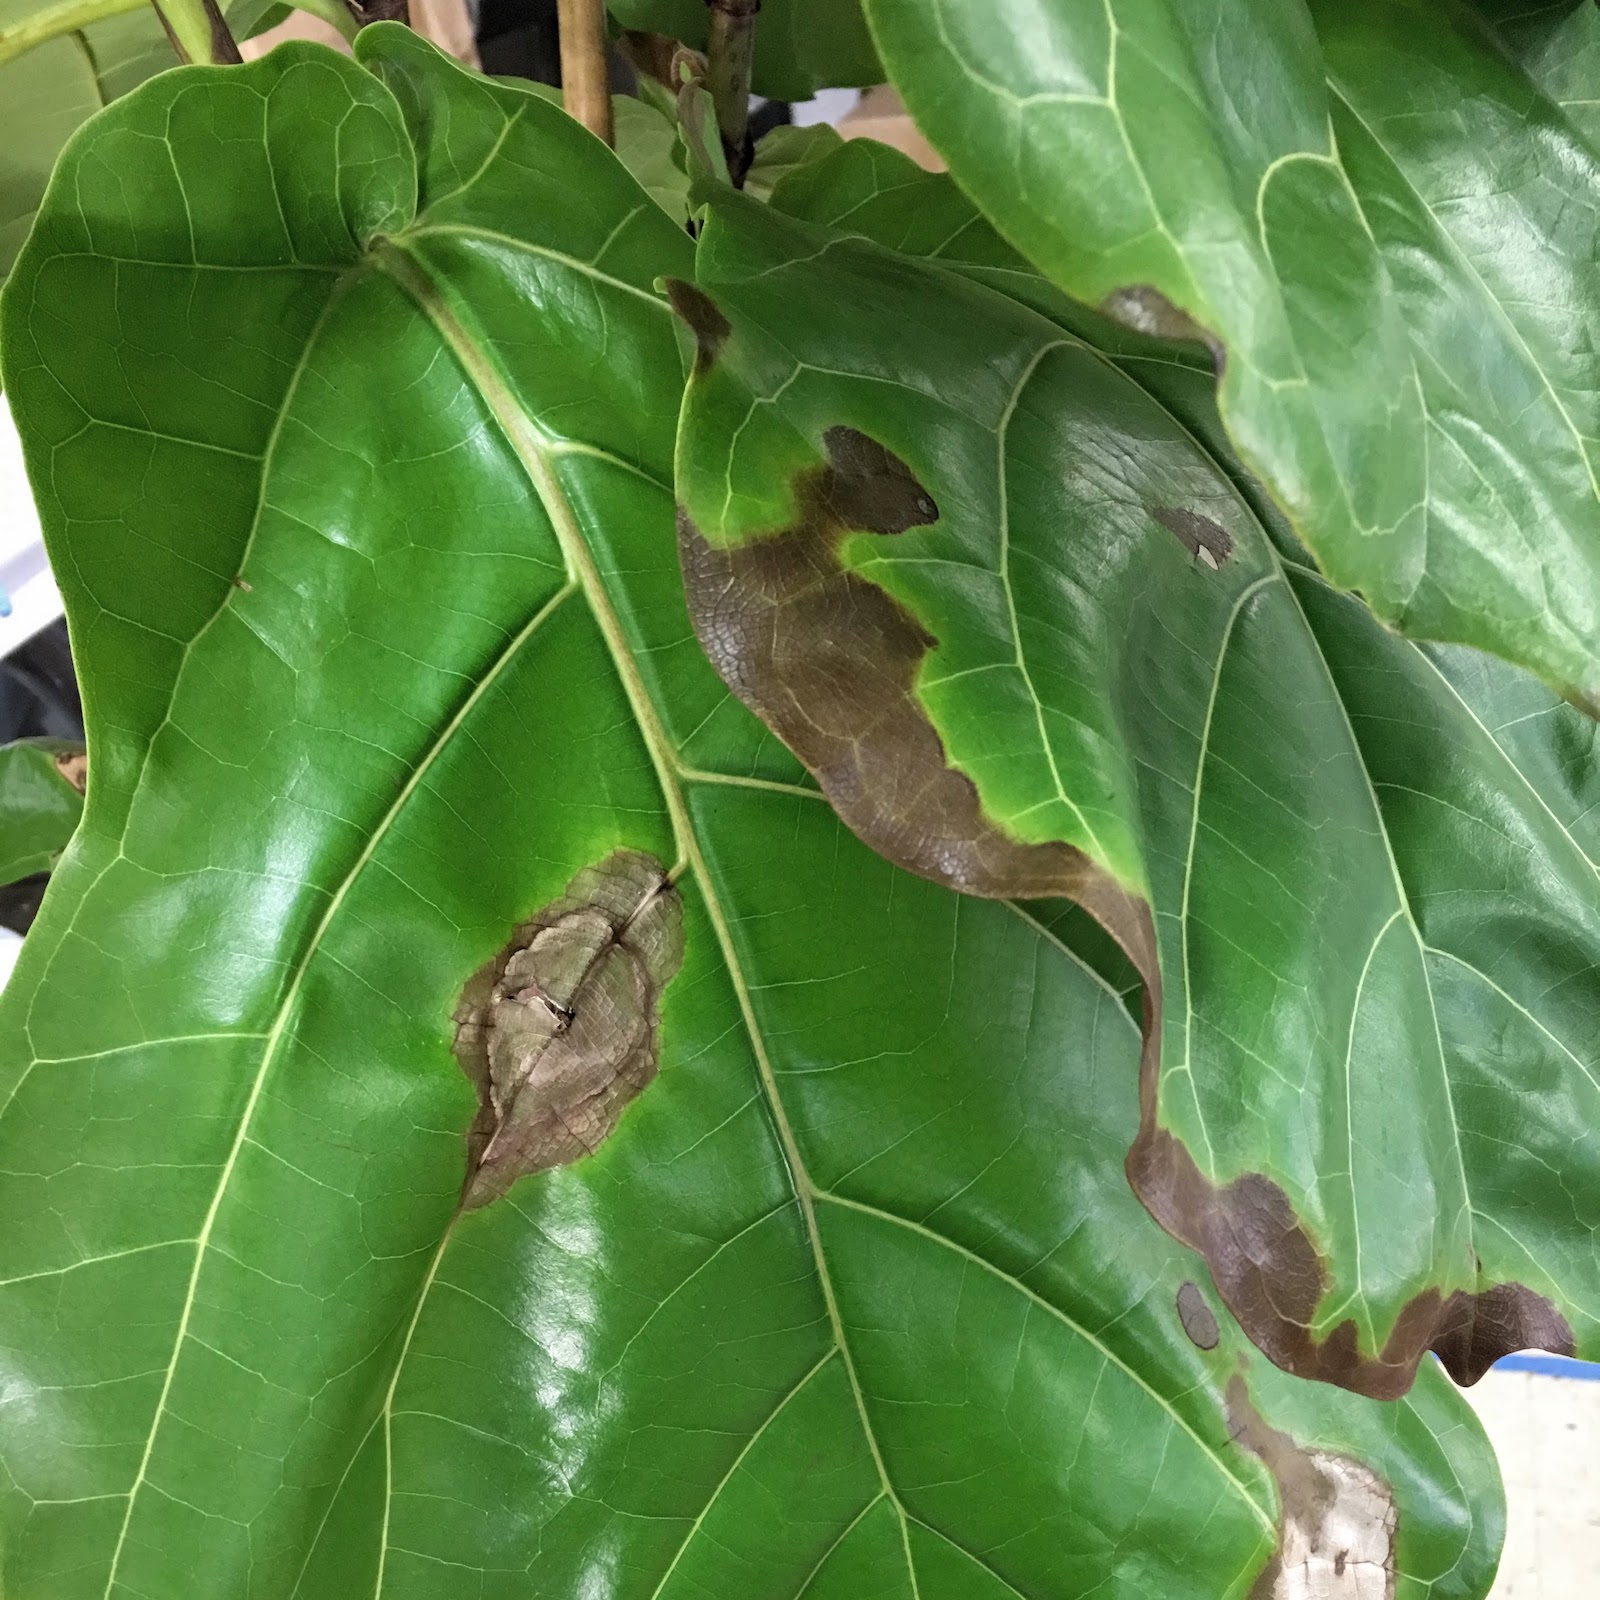
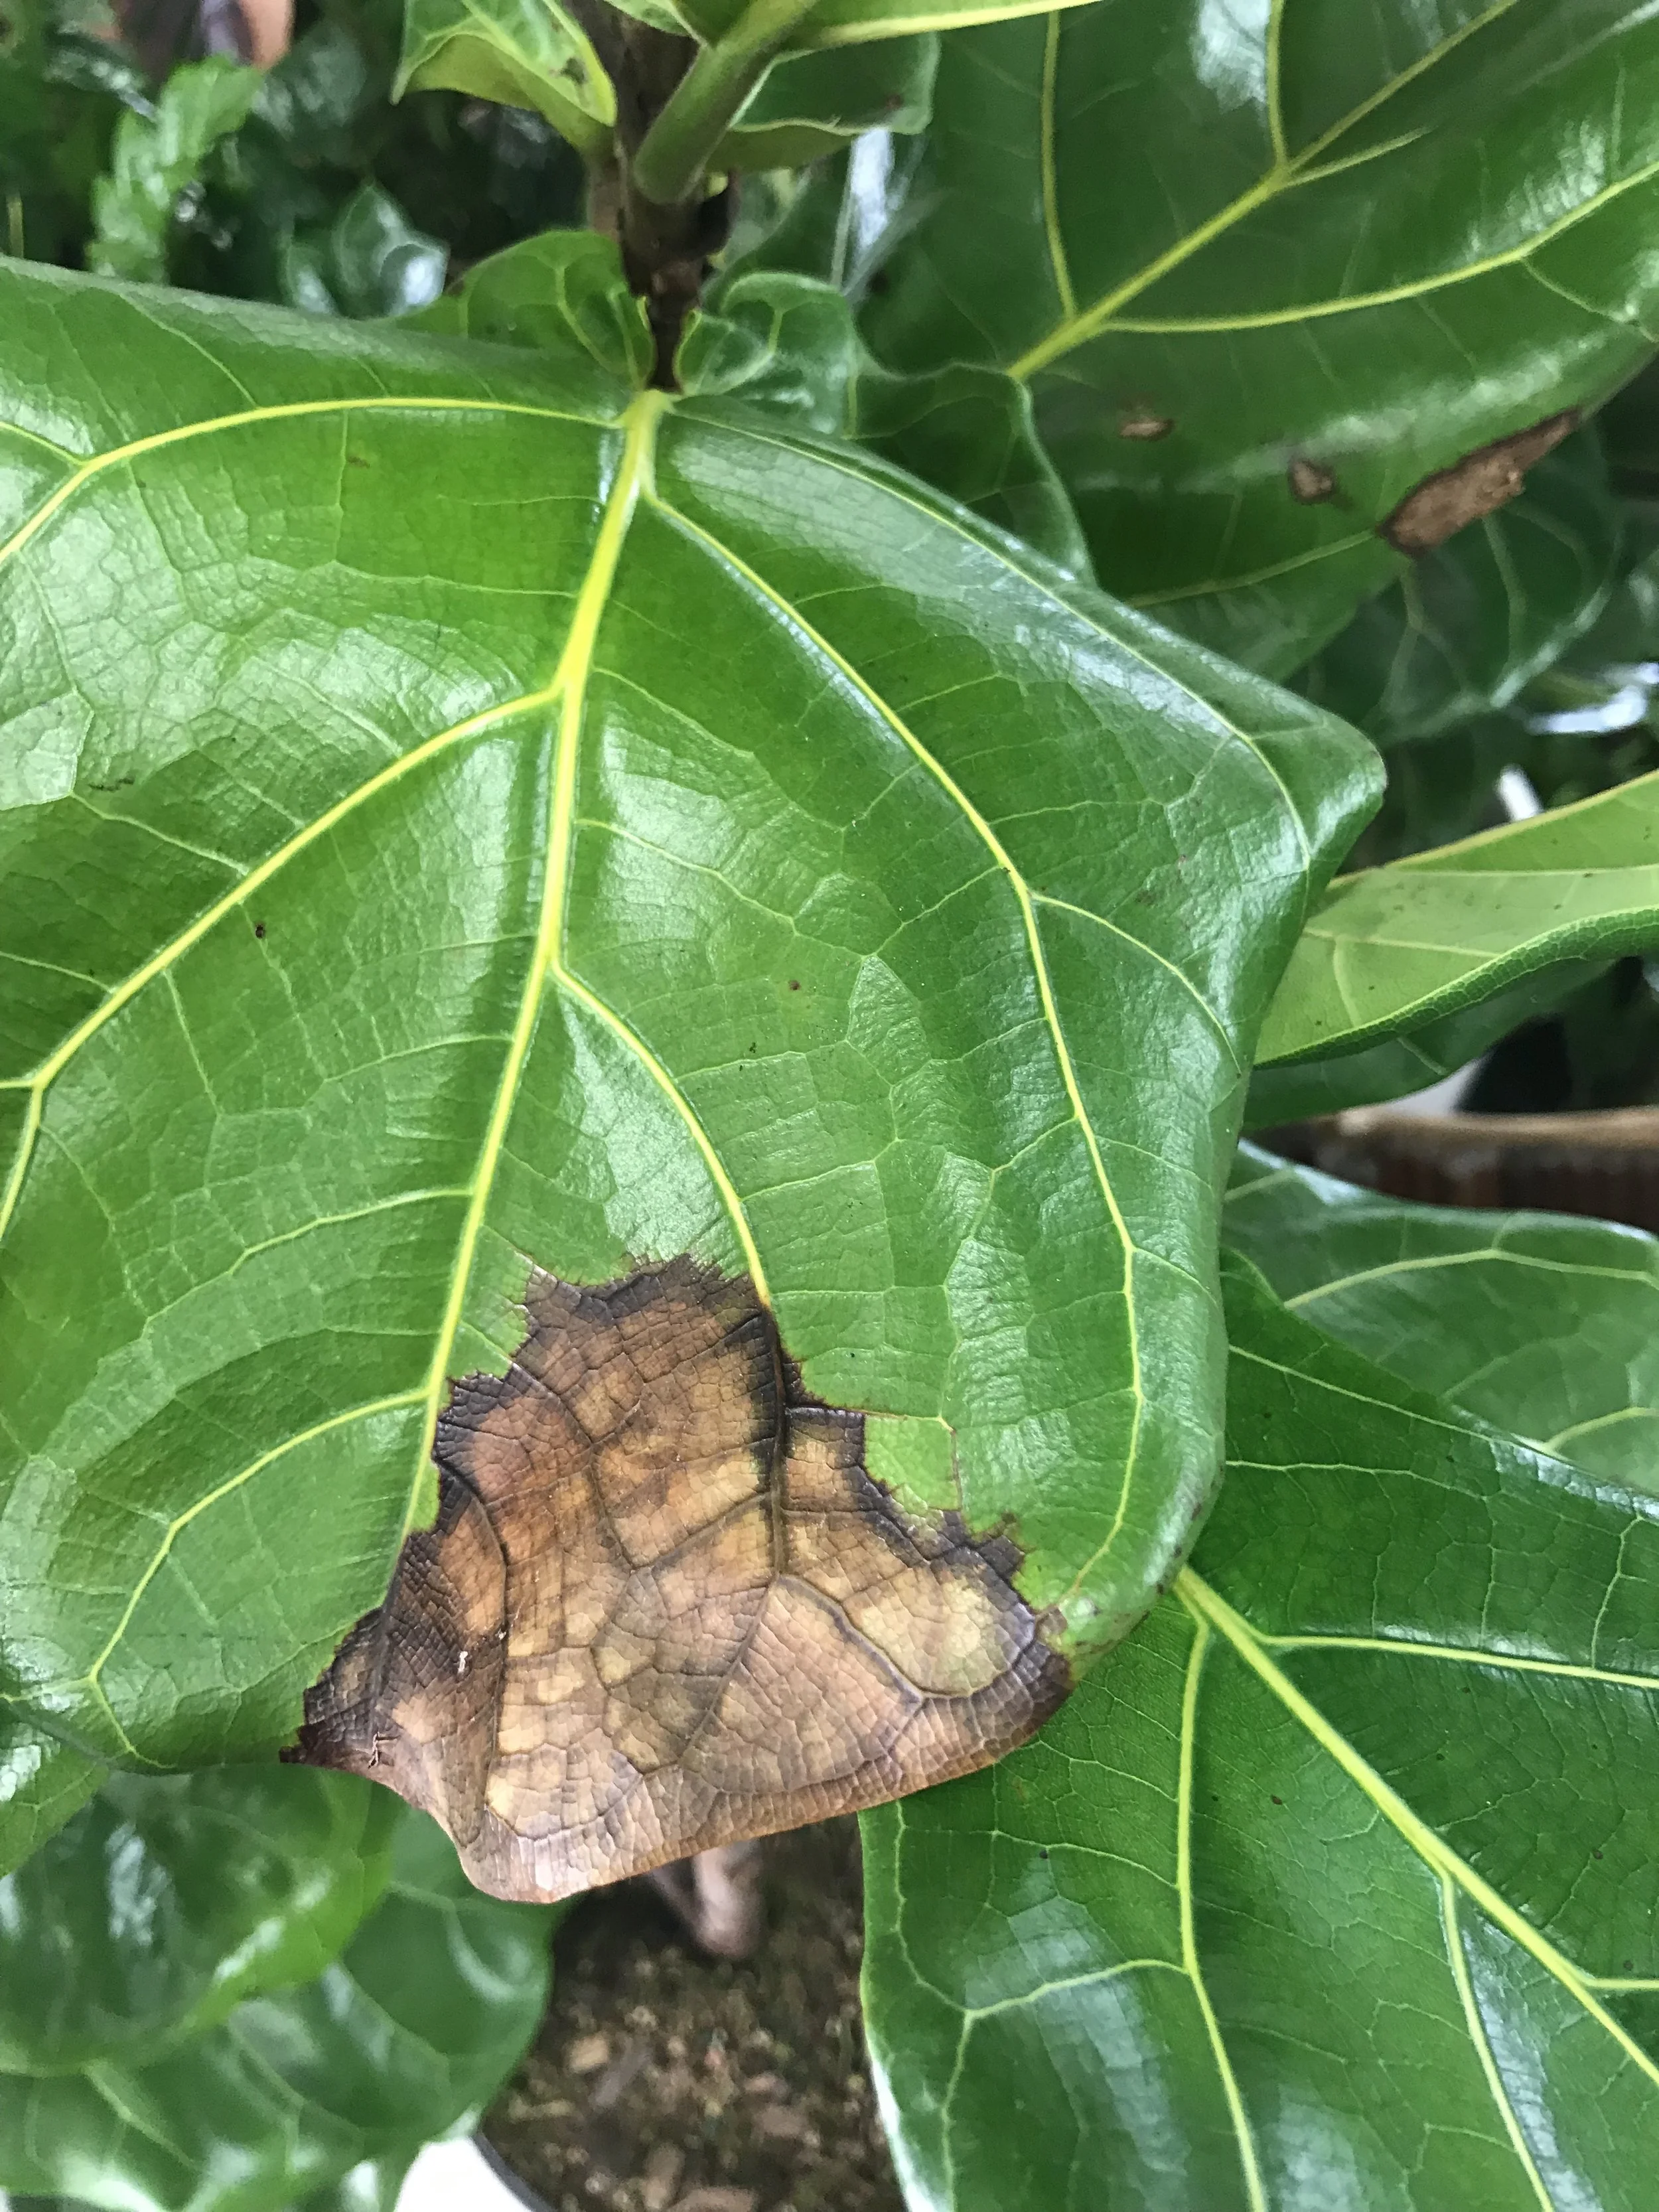
Here's the truth - most houseplants die from being overwatered. Overwatering can also lead to yellow leaves, leaf drop, or root rot, among other symptoms. While finding the right light + water + temperature balance for each plant takes a bit of patience and trial and error, there are a few things you can do as precaution, and remember that an underwatered plant is much easier to fix than an overwatered one.

  1. Check your plant’s soil has dried out

  2. Use a moisture meter

  3. Ensure there’s proper drainage

Check your plant’s soil has dried out

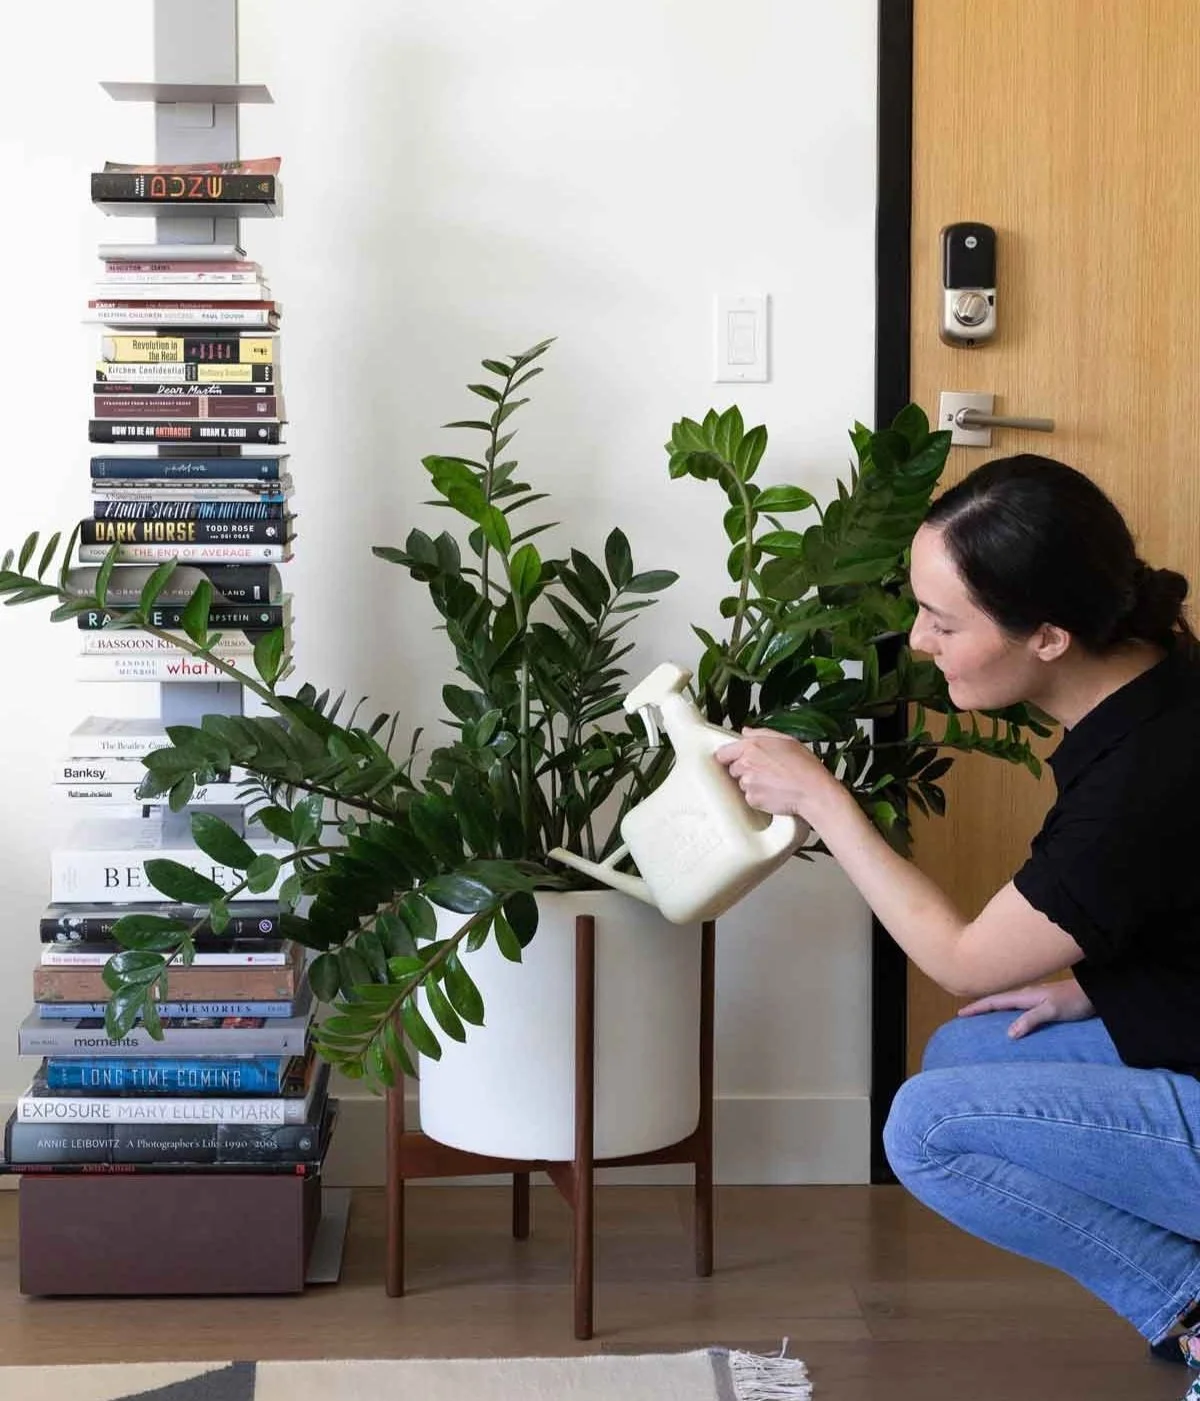
The best way to make sure you don’t overdo it on the watering is to let your plant's soil dry out between waterings. Before watering feel 2 inches deep into the soil with your fingers, or use a wooden bamboo stick to test moisture levels at the bottom of the pot (like when baking, the chopstick will come out completely dry if the plant is ready for more water!). With most plants, if you feel or notice moisture, hold off on watering.

Use a moisture meter

If you want a more accurate idea of the moisture levels in your plant’s soil, try using a moisture meter. This a simple gadget that can provide the most accurate readings of whether or not it's time to water your plant. Read our full guide on how to use your moisture meter for best results.

Ensure there’s proper drainage

Make sure that your plant’s nursery pot or decorative container has a drainage hole. This will protect the roots from sitting in stagnant water. Balance style & function by elevating your plants with 1" of Styrofoam within their decorative pot, this will absorb any excess water that drips from their nursery container.

Have any doubts about your watering schedule? Email us a photo at plantdoctor@leonandgeorge.com and we can help you find the right balance. 


INDOOR PLANTS, POTTED & DELIVERED

Premium plants paired with handcrafted ceramics, plus lifetime Plant Doctor support. Order online at leonandgeorge.com

Root Rot: How to Avoid it, and How to Fix It
How to fix root rot indoor plants

Have you ever dealt with an ugly case of root rot?

Root rot is a common issue with potted plants, and one that’s fairly easy to avoid by simply following a few basic rules of watering and drainage. And if it’s too late? Fret not! There may still be time to save your plant. Below are tips on how to prevent root rot in the first place, and how to fix root rot once it’s too late.

What is root rot?

Root rot is exactly what it sounds like — the rotting of a plant’s roots — and is the consequence of too much watering and/or not enough drainage. Though it can occur in outdoor plants, it is much more common with potted indoor greenery and can lead to the quick demise of your plant.

What are signs of root rot?

Catching root rot early is crucial to saving your plant! Some of the most common signs of root rot are:

  • Significant yellowing and wilting of the leaves

  • Dark brown edges or spots on leaves, particularly common with Fiddle Leaf Figs

  • Stunted growth

  • Mushy roots

  • Heavily dampened soil that does not dry out over time

How can I prevent root rot?

Preventing root rot is simple. It’s all about watering and drainage. Follow these simple rules and you will never see root rot in your plants.

  • Give your plant proper drainage - Make sure your plant is potted in something with drainage hole(s), either a plastic nursery pot or a decorative pot that has a drainage hole. If your decorative pot does not have a drainage hole, simply leave the plant in its plastic pot and place it inside the decorative pot.

  • Keep a regular watering schedule - Most plants appreciate regular watering schedules. Sporadic watering is a quick way to hurt your plant as it often means the plant does not have time to dry out at all between waterings (thus leading to root rot)

  • Check the soil - If you don’t do this already, always check the soil of your plant before watering. Most plants like to dry out a bit, so depending on the plant you have, you may want to hold off on watering until the top two inches of the soil is dry.

  • Aerate the soil - Aerating the soil helps loosen it up, allowing for a more even distribution of water and better flow of oxygen, preventing moisture build up in the roots of your plant.

A sure sign of root rot, particularly in the popular Fiddle Leaf Fig plant, is browning on the edges of the leaves. Read more on how to fix root rot on Fiddle Leaf Figs here.

A sure sign of root rot, particularly in the popular Fiddle Leaf Fig plant, is browning on the edges of the leaves. Read more on how to fix root rot on Fiddle Leaf Figs here.

How do I fix root rot?

If your plant has root rot and you catch it early on, you may be able to save it by acting fast. Follow these steps to fix root rot in most common houseplants.

  • Diagnose the issue - If your plant has been dropping leaves, yellowing, or getting soft, mushy leaves, you may have root rot. Remove the plant from its pot and inspect the roots. If they are soft, wet, brown, and/or mushy, it’s time to roll up your sleeves and treat the roots.

  • Clean the roots - Once your plant is out of its pot, carefully remove as much soil as possible and cut the affected roots off with clean shears or scissors. Under running water, gently wash the remaining roots clean of any soil.

  • Repot - In a pot with proper drainage, repot your plant using fresh soil (and if you’re using the same pot, make sure to clean it thoroughly first!). If it was a serious case and you removed many roots, you may also prune the top of the plant a bit so the plant has less leaves to send its energy to.

  • Place in a bright spot - Water only when the top of the soil is dry. After a few weeks, your plant should take root and return to the healthy specimen it once was!

Good luck, don’t panic, and remember — the more in touch you are with your plants, the more likely they are to thrive. Water them regularly, watch for issues, and enjoy the many benefits they bring to your physical and mental health!


blogsnake.jpg

Indoor plants, potted & delivered.

Beautifully potted plants, delivered directly to your door. Order online at leonandgeorge.com

What's with the Brown Edges on My Rubber Tree?

Why Are The Edges of My Rubber Tree's Leaves Browning?

Rubber Trees are a standout indoor statement plant because they have gorgeous foliage. Glossy, richly colored and burgundy-tinged, the super-shiny leaves of the Rubber Tree (or Ficus Elastica as it’s also known) are its crowning glory, and make it the perfect plant to elevate spaces with minimalist aesthetics. As far as plant care goes, this variety of ficus is very easy to care for. But like any plant, it can exhibit signs of stress in the form of less-than-perfect foliage if its needs are not being met. Read on to learn why your Rubber Tree’s leaves may be experiencing browning and the edges, and what you can do to correct it.

Overwatering

It may sound counterintuitive, but Rubber Trees can exhibit browning foliage as a result of overwatering. We know that this may sound strange, given that these plants appreciate humidity and originate in the Amazon— but your indoor space differs considerably from their natural habitat. When grown indoors, within the confines of a pot, Rubber Trees simply don’t require (or desire!) copious water. You should water your plant only when its topsoil is dry to the touch-- and note that that may mean as seldom as once every three weeks or so. If you probe the soil and find that it is soggy or drenched, allow the soil to dry out entirely before watering again.

Next Steps for Light and Water

Your Rubber Tree utilizes the water it receives in accordance to its environment. The humidity and dryness of the air, as well as the amount of light it receives, have a direct effect on its water consumption, so be mindful that less bright light = water is used up more slowly by the Rubber Tree. This does not necessarily mean you need to move your plant- just that you may need to cut down on your watering. Prepare your plant for a new era of success by trimming off any significantly browning foliage by cutting the leaves off with clean, sharp scissors or shears. You an also manicure the brown areas off of otherwise healthy leaves, by trimming the brown parts off in the direction of the leaf’s growth. Once trimmed, allow your Rubber Tree to dry thoroughly before resuming your watering routine, and measure its moisture before watering by pushing a bit of the preserved reindeer moss out of the way and sticking your finger two inches down into the plant’s soil. If it is dry to the touch, you may water. Plan on using this method of manually gauging its moisture regularly.

Call The Plant Doctor

If you follow all of the instructions above, but your Rubber Tree continues to exhibit a high percentage of troubling brown foliage, reach out to our Plant Doctor team for an assessment and guidance. You can do so by logging into your Leon and George account, selecting the option to “Contact Plant Doctor”, and attaching photos of your Rubber Tree as a whole, as well as close-ups of its leaves’ brown edges. The Plant Doctor support team will respond with their thoughts and instructions for care within 2-3 business days.


Rubber Tree

Lush, glossy emerald and burgundy foliage is the crowning glory of the Rubber Tree, a stunning and low-maintenance statement plant for any space. Adaptable to low light, the Rubber Tree requires watering only sparingly.

Why Are The Leaves of My Rubber Tree Yellowing and Pale?

Why Are The Leaves of My Rubber Tree Yellowing and Pale?

There’s so much to love about the gorgeous Rubber Tree. With richly hued, glossy leaves tinged with shades of burgundy, the Rubber Tree, or Ficus Elastica, is vivid and stunning. It’s also low-maintenance: this ficus variety is easy-care and tolerant of varied light. But as with any plant, its foliage is often the first area through which the plan exhibits stress. And in some cases, this can mean pale, yellowing leaves on your previously verdant and colorful Rubber Tree. There are solutions! Read on to learn the most common causes of yellow, pale Rubber Tree foliage and how to correct the issue.

Overwatering

Far and away the most common culprit of yellowing, pale leaves on Rubber Trees is overwatering. Improper soil moisture is a common problem among all indoor plants, and Rubber Trees are no exception. Although it’s true that they appreciate misting (they are originally from the humid Amazon) indoor spaces are a far cry from their home turf, and overwatering causes systemic stress that often results in pale, yellow leaves, which may droop and fall off entirely.

Rubber Trees do not require, or prefer, copious amounts of water. You should water your plant only when its topsoil is dry to the touch. This may result in watering only every few weeks. Don’t be alarmed! Each plant has its own rhythm. So if you probe the soil with your finger and find it to be thoroughly soggy or drenched, you’ve identified the cause of the yellow, pale leaves: and you need to let your Rubber Tree’s soil dry out entirely before you resume watering.

Inconsistent temperatures

Rubber Trees don’t love sudden changes in temperature. If your plant undergoes very cold (or hot) spells, for example, when you are traveling and not using climate control at home, this may result in your plant feeling stressed due to changes in its environment. A stressed Rubber Tree will either start to show yellow leaves or leaf drop.

How to avoid yellow leaves on your Rubber Tree

The best way to avoid yellow leaves on your Rubber Tree is to water your plant correctly and consistently.

When it comes to how much water your Rubber Tree needs, there are a few things that come into play. The amount of light that it receives, the season and the dryness or humidity of its environment are all factors. utilizes the water it receives in accordance to its environment. That’s why the method of manually probing your Rubber Tree’s soil to gauge moisture is so valuable: it’s foolproof! So if your Rubber Tree has been severely overwatered, allow it to dry out entirely before resuming your watering routine. Then, start fresh by maintaining a routine of measuring its moisture levels before watering by pushing aside a portion of its decorative moss and sticking your finger two inches down into the plant’s soil. When it it dry to the touch, it is time to water. Use this method of manually gauging its moisture regularly, and water only when topsoil is dry.

More Support

If you follow the steps above and your Rubber Tree does not improve and continues to experience pale and yellowing foliage, our Plant Doctor service is here to help. Reach out to them by logging into your Léon & George account, then select the option “Contact Plant Doctor”. Be sure to include photos of your Rubber Tree as a whole, as well as close-ups of any yellowing and pale foliage. Our Plant Doctor team will get back to you with an assessment and guidance within 2-3 business days.


Rubber Tree

With glossy, lush foliage in shades of deep emerald and burgundy, the Rubber Tree is a vibrant, low-maintenance statement plant that is perfect for any space in need of vivid color. Low-light adaptable, the Rubber Tree requires watering only sparingly.

Overwatering vs. Underwatering (and how to treat both)
Overwatering vs. underwatering

How to tell the difference between an overwatered and underwatered plant

Improper watering is the leading killer of houseplants. And if you have a variety of plants in your indoor jungle, understanding what watering techniques work for each plant can be a real challenge - especially since symptoms of overwatering and underwatering can look very similar. Here are some general things to watch out for to determine if your watering needs adjustments.

Overwatering vs underwatering

Signs of Overwatering:

Browning edges can indicate too much water. A plant pushes water through to the edge of its leaves, and if given in excess, this can cause veins at the edges to burst, which leads to browning.   
Wilting can go both ways, plants wilt when they’re thirsty and when they’re overwatered. If you notice wilting, check the moisture of the soil.

Pests are another sign of overwatering as many insects thrive in damp places. Check for pooling water underneath your plant.

How to treat overwatered plants

Severely overwatered plants generally require a soil change. Plants that have been gently overwatered may dry out in the right conditions (think warm and bright space!) but if you at all suspect root rot, then head here and follow these simple instructions for changing your plants soil (and treating root rot, if necessary).

Overwatering vs underwatering

Signs of Underwatering:

Drooping leaves that look completely lifeless can be a sign of underwatering. 

Soil pulling away from the outsides of the pot is another indicator that your plant may be underwatered. If you notice this happening, try shortening the length of time between waterings.

Drying out too quickly could mean that your plant may need to be repotted. If your plants’ pot is too small to support the amount of water it needs to thrive, this can inhibit future growth and be detrimental to your plant in the long run. Consider repotting your plant after the first year of ownership.

To keep things simple, water your plant the same amount each week - about 2 cups for plants 2-3ft tall and 3 cups for plants 3-6ft tall.

Keep plants happy and healthy by observing and listening to what it is they’re trying to tell you. And remember, the amount of water your plants need will change depending on the season and the conditions in their environment.

How to treat underwatered plants

If your plant is severely underwatered, the best the you can do is practice a little “bottom watering”. Bottom watering is allowing the plants to drink from the bottom up, as much as they want, for up to 24 hours. In addition to this, you may also water over the soil. Above all, you want to make sure the plant has plenty of time to drink, as a regular watering for underwatered plants often results in the water quickly running through dry soil, not allowing the roots time to drink up.

Here is a simple guide to bottom watering. If you think your plant is dead or almost dead, rest assured that it most likely will be easily revived!


Indoor plants, potted and delivered

Premium plants paired with stylish ceramics, plus lifetime plant care support. Order online at leonandgeorge.com