Posts tagged Plant care
Fiddle Leaf Fig Care: The 10 Commandments

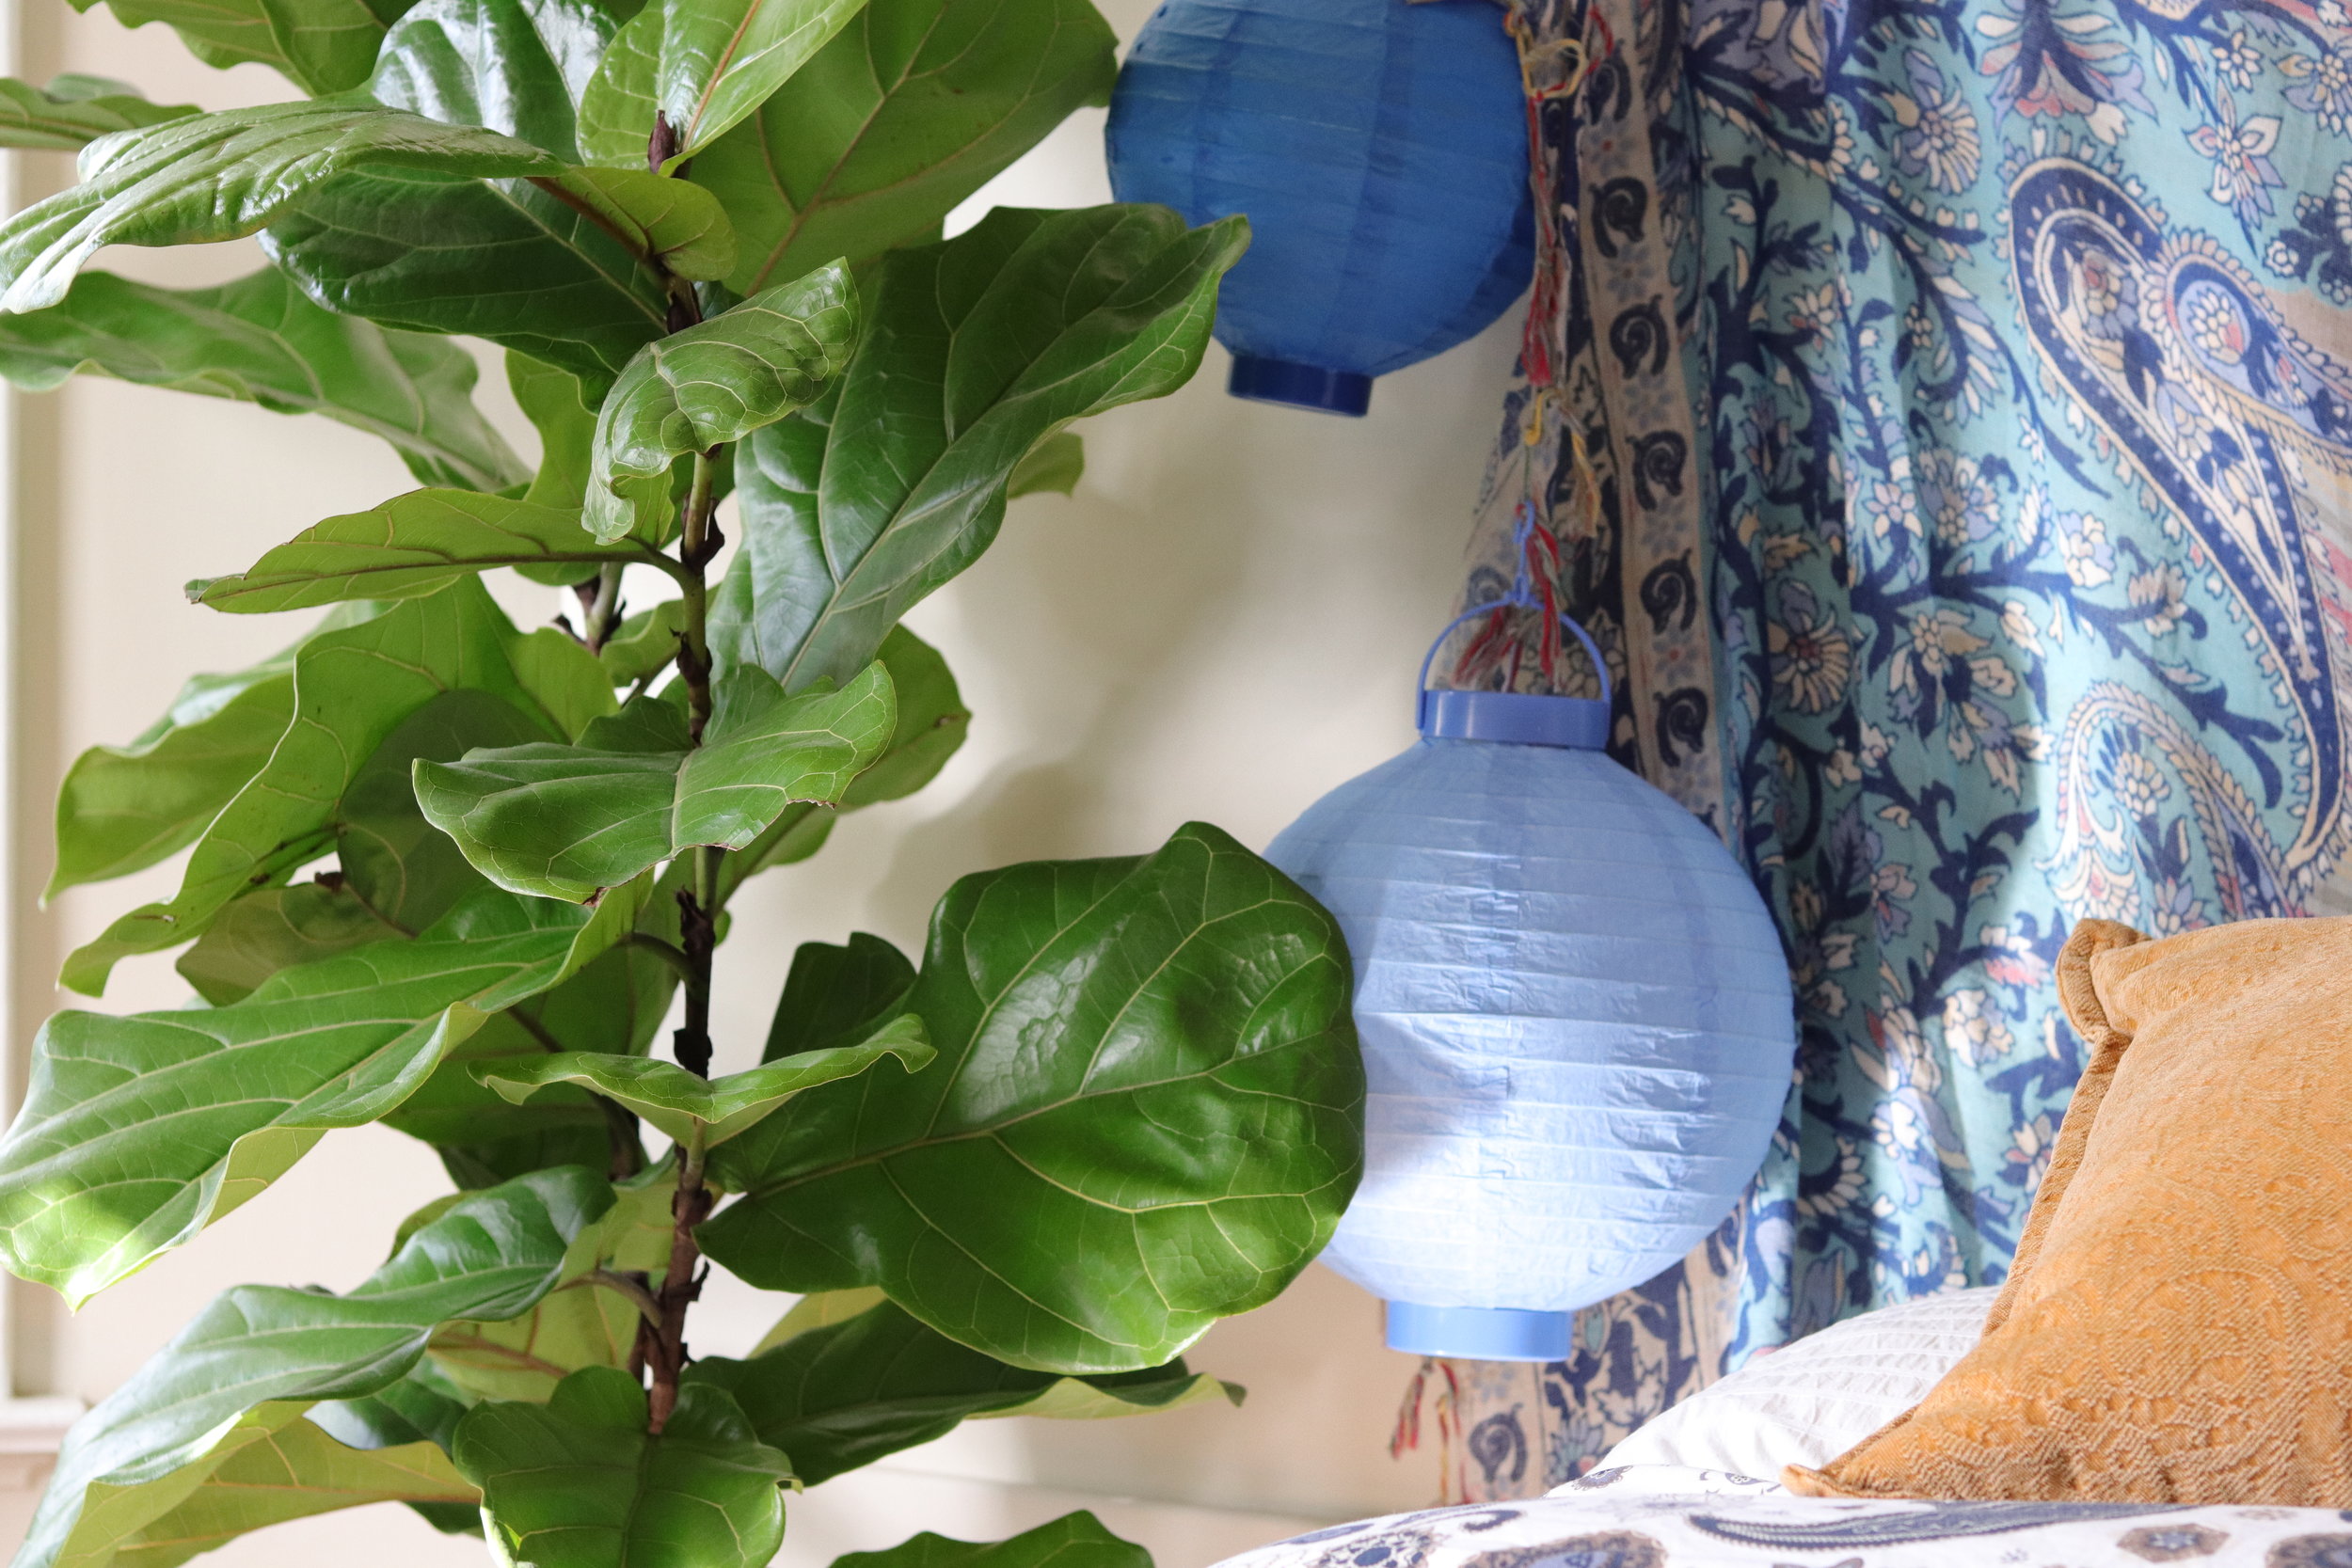
The Fiddle Leaf Fig Tree: a gloriously sculptural plant with fiddle-shaped leaves.

Want your Fiddle Leaf Fig to flourish?

The Fiddle Leaf Fig (Ficus Lyrata) is a stunning houseplant that is known for its finicky nature, and you’ve likely heard of how unforgiving this plant can be towards improper care. This can be intimidating if you have never cared for one before, but rest assured that as one of the most popular indoor plants out there, many newbies have found success in owning and growing a beautiful Fiddle Leaf Fig and its lush, attractive foliage. If you’re new to the game, too, discover invaluable Fiddle-Leaf Fig care insights and techniques shared by our guest writer, Claire Akin, the one and only Fiddle Leaf expert and owner of The Fiddle Leaf Fig Plant Resource Center. As a true authority on this beloved plant variety, Claire's expertise and tips can be of great value to both new and seasoned Fiddle-Leaf owners alike!

1. Provide Proper Drainage

2. How to Water Fiddle Leaf Figs: Don’t Overwater!

3. Give your Fiddle Bright Light

4. Let Them Rest in Winter

5. Leaf Drop: Let Old Leaves Go

6. Create Humidity

7. Repot When Necessary

8. Feed It the Right Plant Food

9. Check-in Regularly & Have the Right Tools at Hand

10. Respond to Issues Right Away

1. Provide Proper Drainage

Your plant’s overall health depends on the health of its root system. Roots need two things to stay happy, water and oxygen. In order for both of these to be in balance your plant needs to be able to breathe properly. As such, one of the first things you need to make sure of when it comes to potted plants, particularly the Fiddle Leaf Fig Tree, is if your planter or pot has a drainage hole. If you have a decorative planter that you wish to use that does not have one simply keep you plant in its plastic nursery pot and slip it inside of the decorative container. At Léon & George, we actually pot all of our plants like this, as it allows us to use sleek and stylish planters and also ensure the root safety and health of our plants.

Apart from drainage, you’ll want to allow a bit of oxygen into the roots. One way to make sure the roots are getting enough oxygen is to aerate the soil every once in a while. All that you need to do this is a chopstick and a moment of spare time.

2. How to Water Fiddle Leaf Figs: Don’t Overwater!

It’s important that you allow your Fiddle-Leaf Fig to dry out a bit between waterings. This simulates the conditions of their native environment and will keep them happy. This may seem like a relatively simple task, but overwatering is where first-time owners of this plant tend to go wrong. Overwatering can lead to more serious issues like root rot, which can cause the quick demise of your plant. Overwatering can also create the perfect habitat for pests like fungus gnats, and lead to weaker root systems that are prone to infestation.

A good rule of thumb is to water your Fiddle Leaf Fig no more than once a week. Always take a moment to check the soil before watering though, your plant may not be as thirsty as you think!

If you want to be certain you’re watering your plant correctly, check out this ultimate guide to watering the Fiddle Leaf Fig, and also consider using a moisture meter!

3. Give your Fiddle Bright Light

Fiddle Leaf Figs absolutely need plenty of bright indirect or filtered light to thrive. These plants will not tolerate low-light areas, and it’s very possible your plant will quickly decline if you try to place it in an area that does not receive much natural light.

The ideal spot for a Fiddle Leaf Fig is near a bright window that receives plenty of indirect light throughout the day, such as a south-facing window. Read our full guide on where to place your Fiddle Leaf Fig to ensure your plant is set up for success!

4. Let Them Rest in Winter

Just like us, our plants notice the changing of the seasons, and will require slight modifications to their care throughout the year. The darker days of winter, for example, result in your plant using less energy. They do not grow as much during this time and therefore need less water. They also do not have the same need for nutrients, so it’s a good idea to fertilize less or stop entirely until the springtime.

However, one thing you will want more of in the winter is sunlight. Depending on the placement of your indoor tree, you may need to change your Fiddle’s location for the winter months if it is no longer getting enough light where you originally placed it.

5. Leaf Drop: Let Old Leaves Go

Your plant is a living being. This means that growth is natural and the loss of old leaves is nothing to mourn. As Fiddle Leaf Figs grow taller and mature, they sometimes drop their lower leaves. So long as you see new shiny new leaves and growth, this is generally not a cause for concern.

That said, if many leaves are dropping rapidly, you could have a problem on your hands. You will have to quickly diagnose the issue to make sure that your Fiddle Leaf Fig is on the right track and does not suffer permanent damage.

6. Create Humidity

Your Fiddle Leaf Fig craves humid conditions. Their ideal range is between 30 to 65 percent humidity. This can be hard to achieve in your home, especially if you run your AC or heater often as they dry out the air. You can try to create these ideal conditions by misting or using a humidifier. Misting every couple of days is a standard practice amongst experienced Fiddle Leaf Fig owners.

7. Repot When Necessary

If you take good care of your Fiddle Leaf Fig, its root system will outgrow its container every few years. It's important to inspect houseplants regularly, and with the Fiddle Leaf Fig, you’ll know it's time to repot if you spot roots peeking out from the bottom or edges of its container. Only repot during its growing season (spring and summer); your plant will not have enough energy in winter to handle such a big change. And don’t forget to always use the appropriate potting soil!

If your Fiddle Leaf Fig is already in the largest planter that your space can accommodate try top dressing the soil. All that you need to do is remove and replace the top four inches of the soil.

Fiddle Leaf Fig Fertilizer

Nourish your plants with this specially-formulated organic liquid plant food. Our Boost Vitaminé is made with potent nutrients from nature to help your plants grow and thrive all year long.

$24

8. Feed It the Right Plant Food

In order to keep new leaves sprouting on your Fiddle Leaf Fig is getting all of the nutrients that it needs. Give them a liquid fertilizer like Fiddle Leaf Fig Plant Food, which has the NPK ratio of 3-1-2 that Fiddles like best. You want to give your plant fertilizer during the growing months, from spring to fall. But be careful not to overdo it! Using too much fertilizer can result in fertilizer burn.

9. Check-in Regularly & Have the Right Tools at Hand

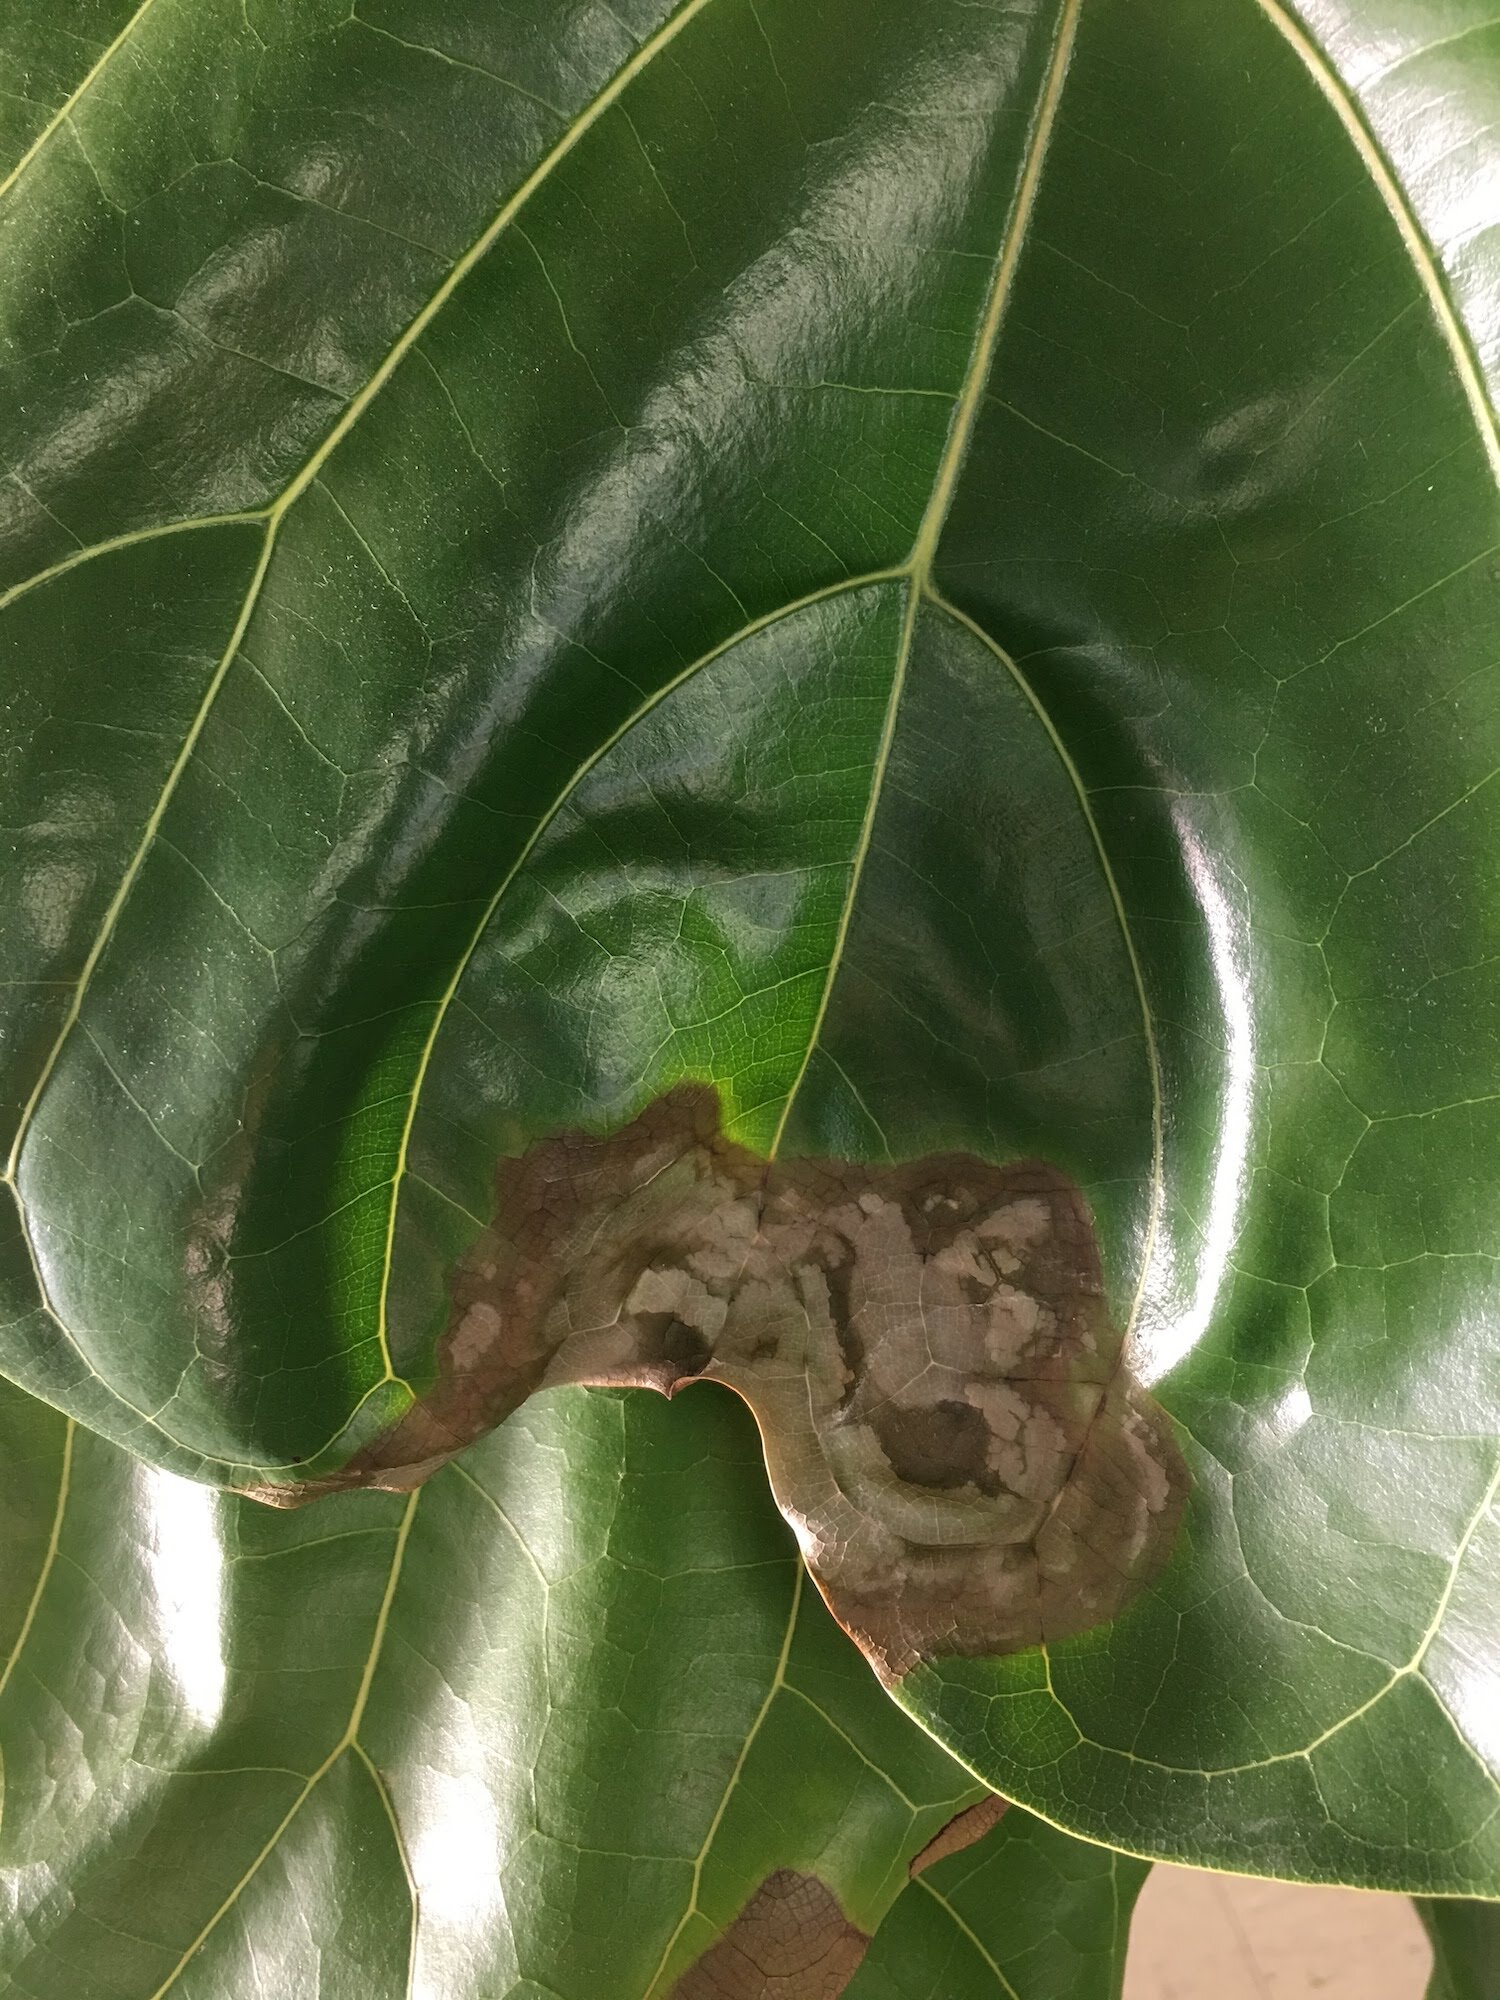
Having a good relationship with your Fiddle Leaf Fig is the best way to ensure that it thrives. Make sure that you take the time to check in with your plant once a week to see how its doing. Rotate to keep a lean from developing. Feel the soil before watering to gauge how much water it actually needs. This is a good time to wipe down and inspect its leaves! Keep your eyes peeled for wilting and brown spots as you clean them.

To ensure that you’re giving your plant the best care you’ll want to use the right tools. Ideally you should have some sharp pruning shears, a watering can, and a moisture meter. As Fiddle Leaf Figs are prone to leaning it can be helpful to have yours on a roomy planter or even one with wheels, this will allow you to rotate it more easily.

10. Respond to Issues Right Away

Fiddle-Leaf Figs spend a lot of energy creating their large viola shaped leaves. So they are slow growers indoors and do not bounce back well from health issues. So you’ll want to act quickly if you spot a brown leaf, mass of insects, or a pronounced lean. Even if you adjust your care do not expect you Fiddle Leaf Fig to show sign of improvement in the winter. Fiddle Leaf Figs can take up to a year to show signs of recovery for certain health issues.

If you have brown edges on the leaves of your Fiddle Leaf Fig that are bothering you do not remove the whole leaf. Instead cut off the spot following the natural shape of the leaf. Given enough time and patience it is possible for your plant to recover from most ailments, and you’ll be a certified green-thumb in no time!

Thank you to resident expert Claire Aiken of the Fiddle Leaf Fig Resource Center! To access comprehensive knowledge and guidance, don't hesitate to acquire your own copy of "The Fiddle Leaf Fig Expert" book and consider checking out The Ultimate Fiddle-Leaf Fig Care Webinar to further enhance your expertise. Your thriving Fiddle Leaf Fig Tree awaits!


Fiddle Leaf Figs

Discover why this classic and sculptural ficus variety is the go-to statement plant for designers and plant lovers alike.

How To Maximize Your Plant's Air-Purification Powers
air purifying plants

Plants have shown that they can remove toxins in the air. They do this through the pores in the epidermis of their leaves. Keeping their leaves clean and dust free will help them breathe better and smile brighter. Here are our favorite ways to keep our plant’s air-purifying powers up, and also to keep people asking "are those real?!":

  • Damp Cloth - take two pieces of tissue, t-shirt scraps or microfiber cloths and wring it through water. Take one cloth in each hand, gently take each leaf between your hands and wipe down the surface. 

  • Feather Duster - take a clean duster and gently wipe or shake it through the leaves. Swiffer dusters are pretty efficient and compact. 

  • Shower - take your plants out of their decorative pot and wash them off in your sink or shower. Make sure the water drains all the way through the bottom and return after a few hours of drying. 

For tough stains like sap from other leaves or white crusty buildup from water, you can use a damp cloth mixed with soap and water, or better yet, our black olive soap formulated specifically for cleaning plants.

Looking for the best plants to remove toxins from your home or office? Shop our collection of fantastic air-purifiers and get one delivered directly to your door!


THE NEW STANDARD FOR PLANTS

Premium plants paired with stylish ceramics, plus lifetime Plant Doctor support. Order online at leonandgeorge.com

The 10 Commandments of Calathea Care

Are you ready to care for your very own Calathea?

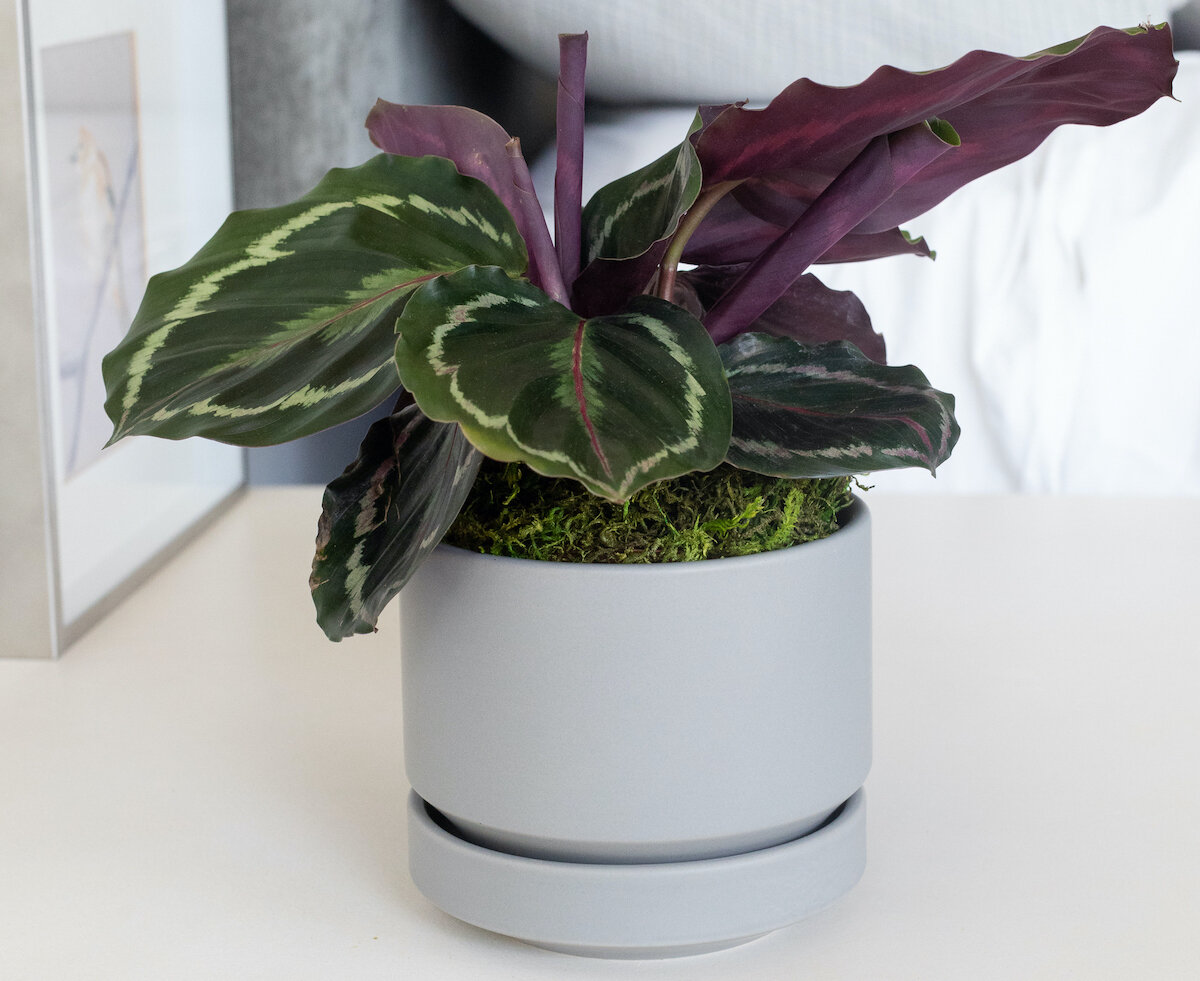
With their ethereal beauty and deeply colored foliage, Calatheas are beloved for the spellbinding presence that they bring to any space. 

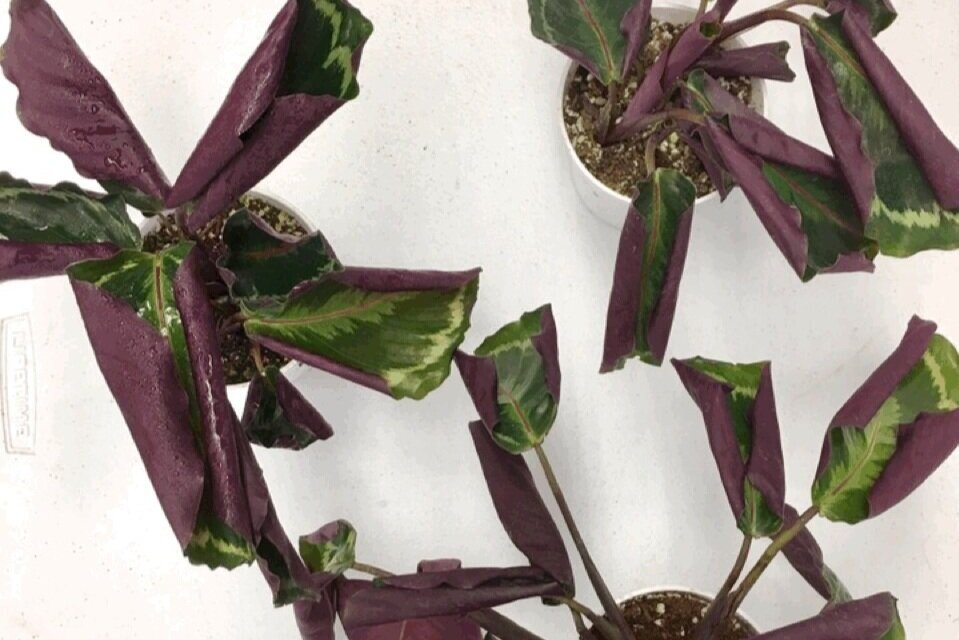
They also have a special quality, known as nyctinasty: their sensitive leaves move in reaction to the light they receive. In the evening, they turn their leaves up, and during daylight hours, they lower them in a beautiful Calathea sun salutation. This behavior is why they’re lovingly referred to as Prayer Plants.

But like any goddess accustomed to being adored, Calatheas appreciate care and consideration. Praise them as you should, and they’ll flourish for years to come. Just follow these 10 commandments! 

  1. Lighting requirements for Calatheas

  2. Humidity requirements for Calatheas

  3. A note on A/C and heating

  4. Temperature requirements for Calatheas

  5. Fertilizing your Calathea

  6. Tips and tricks for watering

  7. Pruning unattractive leaves

  8. Common problems that may arise

  9. Repotting your Calathea

  10. Grouping other plants with the Calathea

1. Give Them the Lighting They Love 

Your Calathea does not want a sunburn. Ensure that it receives indirect light- medium is best, but low light can be well-tolerated- without exposing your plant to the sun’s direct harsh rays. When in doubt, picture your Calathea in its native habitat: a moist, humid rainforest. The light is filtered by a thick canopy of trees, and the air is heavy with mist. These are the conditions that Calatheas love. So don’t be afraid to keep her in the bathroom!

2. Like all of us, Calatheas Need the Occasional Spa Day 

A Native of Brazil, the Calathea appreciates a humid environment which can be difficult to create in indoor spaces. So plan on misting your Calathea regularly (once a week is ideal) to ensure it receives the moisture it craves. Misting is also a great way of interacting with your Calathea and keeping yourself busy without overwatering it, a common mistake that can cause damage that is difficult to undo!

3. Keep Your Calathea Away From Dry Breezes and Appliances

Calatheas are sensitive to even small changes in their environment. Because of this, it’s best to keep them away from vents, air conditioners or heaters, and doors that are frequently opened and closed. 

4. A Steady Temperature Is A Must

Seasons change, but your Calatheas should never have to feel a significant temperature shift. Keep these tropical plants comfortable by ensuring a steady temperature within the range of 65-80 degrees year-round, and your Calathea will thank you for it! 

Plant Care Essentials by Léon & George

Plant Care Essentials

Our full set of apothecary plant essentials was designed to keep your plants clean, insect free and ready to grow. Inspired by the tradition of soaps and perfumes crafted in the south of France, you and your plant alike are sure to enjoy this set of luxurious elixirs

5. Fertilize Your Calathea With Care- and Only During Its Growing Seasons

Calatheas do not need to be fertilized during the winter months, but once Spring arrives, your Calathea will appreciate a monthly dose of foliar plant food like our Foliar Feed, or another gentle fertilizer. This feeding schedule can be continued through the Summer and Fall. 

You may feel the urge to feed your Calathea during the slow winter months, but remember that these plants do not grow nearly as much during the cold season and require less food and water during this time. Over-fertilizing has consequences, so be mindful of the particular needs of this delicate and beautiful plant variety.

6. Give Your Calathea A Long Drink of Water

If you notice that your Calathea’s leaves are curling inward and appear dry, your plant may be signaling that it is under-watered. You can give your Calathea a long drink by removing your plant from its ceramic planter, while keeping it in its plastic nursery pot, and placing it in a sink or bowl. Water the Calathea thoroughly and allow it to sit in the collected water for a few hours. Its roots will drink up exactly as much water as they need. After a few hours, remove your Calathea from the sink or bowl and allow it to drain. Your Calathea should show signs of improving health within a day.

7. Prune Unhealthy Leaves 

It’s normal to feel trepidation about pruning (cutting leaves or stems off of your plant.) However, it’s actually great to get in the practice of pruning your plants because pruning offers so many benefits to the plant’s overall health. All plants will grow over time if they receive the light and water that they need, and all plants will experience occasional dying leaves. It’s just part of life! 

Don’t be afraid to prune off leaves of your Calathea that appear dead or mostly dead. You can simply cut them with scissors or pruning shears at the spot where they meet the stem or base of the plant. If your Calathea’s leaf has only one area of browning, you can trim the brown area off by following the natural curve of the leaf with scissors. If you need a little more guidance, head here for a full step-by-step guide to pruning houseplants.

8. As With All Living Things, Patience is Key!

Calatheas are known for being fussy plants. Like many indoor plants, they’re native to very moist and tropical locations that are a world away from most of our home environments. Your Calathea may experience leaf drop, browning or other growing pains- especially as it becomes accustomed to a new home. 

The flip side, of course, (and it’s so worth it!) is that it will also generate new growth and adorn your home with beauty in the months and years to come. So be patient as your Calathea settles in, and take time to give her special care. She may be a diva, but it’s all part of what makes her a beautiful and unique plant. 

9. Don’t Be Afraid to Repot

As with pruning, repotting can feel like a daunting responsibility, and one that you might rather avoid. That being said, there are tremendous benefits to repotting your Calathea every year or two. 

Over time, soil loses its nutrients- they’re used up by the plants to keep them growing healthy and strong. Repotting is a great opportunity to replace some of that old soil with new, nutrient-rich soil for your Calathea to enjoy. Repotting your Calathea in a larger pot also ensures that your plant has the space to spread out and push out new growth! First time repotting? See our full guide to learn how to repot your plant.

10. Introduce the Company of Friends

Did you know that plants love to be grouped together? By arranging your houseplants close to one another, they create a mini-biome of moisture that can benefit them all. Grouping your plants together also makes it easier to remember to water, feed and pamper them! Just remember to be sure that the plants you’re grouping together will thrive in the conditions of the space, and that their light and water requirements align. 

Consider the rule of three: groupings of three plants in one space are aesthetically harmonious and easy to tend to- especially if you keep your mister and watering can right by them. (The House of Botanicals Watering Can, for instance, contains a mister and watering spout in one, and it’s so pretty that it functions as decor!) 

Every new plant is a new adventure, and Calatheas are no exception. 

They’re gorgeous, spiritual and have a vibrant history of varied uses. So embrace your Calathea, and don’t forget that there’s a wealth of information available to support you on your journey right here


1 TO 1 VIDEO CALL WITH AN EXPERT

Yellow leaves? Worried about watering or struggling with incorrect lighting? Book a call and get truly personalized support for all your plant-related needs.

The Ultimate Guide To Watering Your Calathea
The ten commandments of Calathea care

It’s normal to feel nervous when you first implement your new plant’s watering routine, and this can be especially true with the beautiful Calathea. The last thing anyone wants to do is cause this enchanting plant undue stress! 

But breathe a sigh of relief, because our Ultimate Guide is exactly the resource you need to take the mystery out of the ever-mysterious Calathea’s care routine!

How to water your Calathea

Learn to Test the Soil by Touch 

We know that the beautiful bed of moss that blankets your Calathea’s soil looks perfect the way it is- but don’t be afraid to lift it up! (You can pat it right back down after, and it will still look gorgeous.) 

Using your finger to test the dryness of the top one to two inches of soil is a great way to determine the watering needs of your Calathea. In any environment, conditions are changeable: Winter turns to Spring; heaters are cranked then turned off entirely as seasons change. All of these things affect the watering needs of your plants, so going by touch can be preferable to simply following “Once a week”-style guidance.

You will learn to trust yourself as a plant parent, and cultivate your green thumb, by getting down and dirty with your plant. 

Once or twice a week, probe your Calathea’s soil with your finger. If the top inch of soil feels like it is getting dry, go ahead and water your Calathea. 

The Many Marvels of Misting 

There’s so much to love about misting- and not only for those of us who can’t get enough of cute accessories

Calatheas are native to humid jungles, so they love a good misting, and appreciate being misted every few days.

Consider using lukewarm water when misting, or even leaving a bowl of water out overnight before misting your plants with it. Allowing the water to rest will cause its harsh minerals to evaporate. 

Another benefit of misting is that it gives you a way of interacting with your plant, without the risk of overwatering it- which is by far the most common plant parent mistake and can result in serious health issues for your plant, including the dreaded brown leaves that too often occur.

Potion Magique

An all-natural formula to add to your misting routine, providing extra nutrition and pest control for your plants through their foliage.

$28

Bottoms Up! 

We all know that plants use their roots to drink, but did you know that those roots can function as straws, sucking up just the right amount of water to perk your Calathea up?

You can hydrate your Calathea by allowing it to soak. Remove your Calathea from its ceramic pot, but keep it in its plastic nursery planter. 

Then, place your Calathea in a bowl or sink filled with three to four inches of lukewarm water. Let the Calathea soak for about 45 minutes before testing its soil by touch. (By now, you know exactly what to look for!)

If the soil feels moist, your plant is good to go! Allow it to drain entirely before replacing it in its ceramic pot.

Overwatered? Give it a rest! 

Overwatering any plant can feel heartbreaking. But there are solutions, although recovery will take time. Here are two options for rehabbing your overwatered Calathea: 

  • The True Beginner Method

Take your Calathea out of its ceramic pot, but leave it in its plastic nursery planter. If any water has collected in the ceramic pot, dump it now! Move your plant to a warm spot with medium to bright indirect light, and allow it to dry until moist before returning it to its ceramic pot. 

  • The Practiced Plant Parent Method 

Lay out newspapers in a spot that receives medium to bright indirect light. Once you have those set out, remove your Calathea from both its ceramic pot and its plastic nursery pot. Allow it to rest on the newspapers, roots and all! 

The newspapers will likely soak, so replace them as they fully saturate, until your Calathea stops draining excess water. Then return your Calathea to its plastic nursery pot, and allow it to dry until moist before returning it to its ceramic pot. 

And there you have it! If you’re a Calathea lover (and who isn’t!) these steps will serve you well. So go ahead- add a Calathea to your growing plant family with confidence! 

Ready for more? Read our full guide on Calathea care, including tips for propagation, repotting, and more.


isaac-leon-and-george-09-2019-0546 (1).jpg

Indoor plants, potted & delivered

Premium plants paired with stylish ceramics, plus lifetime plant care support. Order online at leonandgeorge.com

Are You Starving Your Fiddle Leaf Fig?
closeupFLFJPG.JPG

Fertilizer is an important tool for potted plants, and with their large, dense foliage and tendency for fast growth, Fiddle Leaf Figs are no exception! One common mistake plant parents make is rarely or never fertilizing, which can result in slow or stunted growth and poor overall health. So how often should you fertilize, and with what? Here we’ll answer a few common questions when it comes to fertilizing your Fiddle Leaf Fig!

How Often Should You Fertilize a Fiddle Leaf Fig?

Unlike their counterparts in the wild which live in the ground and are constantly replenished with nutrients, our potted plants depend a great deal on the extra nutrients we feed them in their soil. While potting soil contains plenty of nutrients itself, if it’s been over a year since you last repotted or fertilized, it’s very possible your plant’s nutrient level is severely depleted. Fertilizing your plant every 2-4 weeks in the spring and summer is good practice to keep it looking vibrant and healthy!

How Should You Fertilize a Fiddle Leaf Fig Plant?

There are a few different ways to fertilize a Fiddle Leaf Fig. No matter how you fertilize, one thing to be careful with is overdoing it, as this can lead to leaf scorch or fertilizer burn in any indoor plant—not just Fiddles! Also keep in mind that fertilizing is not necessary during the winter, as this is when plants typically slow down their growth and have less need for extra nutrients.

Here are a few different ways to fertilize your Fiddle Leaf Fig:

  • With liquid fertilizer, which is usually diluted in water and simply watered over the soil.

  • With dry fertilizer, usually by sprinkling over the top of the soil and then watering.

  • Foliar feeding, or misting the plant with something like Plant Elixir.

Natural Plant Food

Nourish your plants with this specially-formulated organic liquid plant food. Our Boost Vitaminé is made with potent nutrients from nature to help your plants grow and thrive all year long.

What is the Best Fertilizer for a Fiddle Leaf Fig Plant?

Plant fertilizers have a specific N-P-K ratio, which represents the amount of nitrogen, phosphorous, and potassium in the solution. Indoor plant food is formulated specifically for, you guessed it, indoor plants! But we can get even more specific than that with an N-P-K ratio designed specifically for the needs of the Fiddle Lead Fig. According to the Fiddle Leaf Fig expert, Claire Akin, this ratio is 3-1-2.

Fiddle Leaf Fig Plant Food is a great choice for fertilizing this specific plant, and is gentle enough to use at each watering. You may also try foliar feeding with something like Modern Colony’s Plant Elixir, which is diluted in water and then sprayed on the leaves, and can be used in tandem with liquid fertilizer.

This post was adapted from the Fiddle Leaf Fig Plant Resource by expert Claire Akin. Head to their website to learn more about caring for the Fiddle Leaf Fig.


L-Snake-White-Stand.jpg

Indoor plants, potted & delivered.

Premium plants paired with stylish ceramics, plus lifetime plant care support. Order online at leonandgeorge.com

Choosing the Best Soil for Your Fiddle Leaf Fig
Choosing the best soil for your fiddle leaf fig

Fiddle Leaf Figs are known for their beauty, grace, and of course, finicky nature. While they can be pretty low maintenance plants (we promise!), setting them up in ideal conditions is key to success in their care. As such, choosing the correct soil is important when potting or repotting your Fiddle Leaf Fig. Fast draining, well aerated soils are ideal, as this plant prefers relatively dry soil to keep its roots moist but not wet.

Keep in mind that soil for indoor plants provides a handful of basic functions for your plant:

  • Serves as a place for the roots to anchor and support the plant

  • Provides nutrients for growth and photosynthesis

  • Allows the roots to access oxygen

  • Delivers water to the entire plant, via the root system!

So which soil is best for your Fiddle Leaf Fig? Read on to find out!

Which Soil is Best for Your Fiddle Leaf Fig?

Most houseplant soil blends use perlite to aid with drainage and peat moss to retain moisture. Any good quality houseplant soil mix will work for your Fiddle Leaf Fig, such as MiracleGro indoor potting mix , which is specifically designed to provide aeration, fast drainage, and nutrition for your plants, and is also resistant to fungus and gnats.

NATURAL PLANT FOOD

Nourish your plants with this specially-formulated organic liquid plant food. Our Boost Vitaminé is made with potent nutrients from nature to help your plants grow and thrive all year long.

$24

Giving your Fiddle proper drainage

Even if you purchase the very best soil on the market, it won’t matter if your plant does not have proper drainage. Fiddle Leaf Figs can be incredible unforgiving with overwatering, so set your plant up in a container with good drainage to make sure it gets the most out of its fresh soil!

How to fertilize your Fiddle Leaf Fig

The soil we give our plants is not an endless source of nutrients, and in fact only really nourishes our plants for ~6 or so months. After that, it’s a good idea to fertilize every 2-4 weeks during the spring, summer, and early fall. Any indoor plant food will provide fresh nutrients, and we recommend our all natural plant food for leafy beauties like this one.

This post was adapted from the Fiddle Leaf Fig Plant Resource by expert Claire Akin. Head to their website to learn more about caring for the Fiddle Leaf Fig.


fiddleleaffigbush.jpg

Indoor plants, potted & delivered.

Premium plants paired with stylish ceramic pots, plus lifetime plant care support. Order online at leonandgeorge.com

The 10 Commandments of Potted Fruit Tree Care

Curious about owning a potted fruit tree?

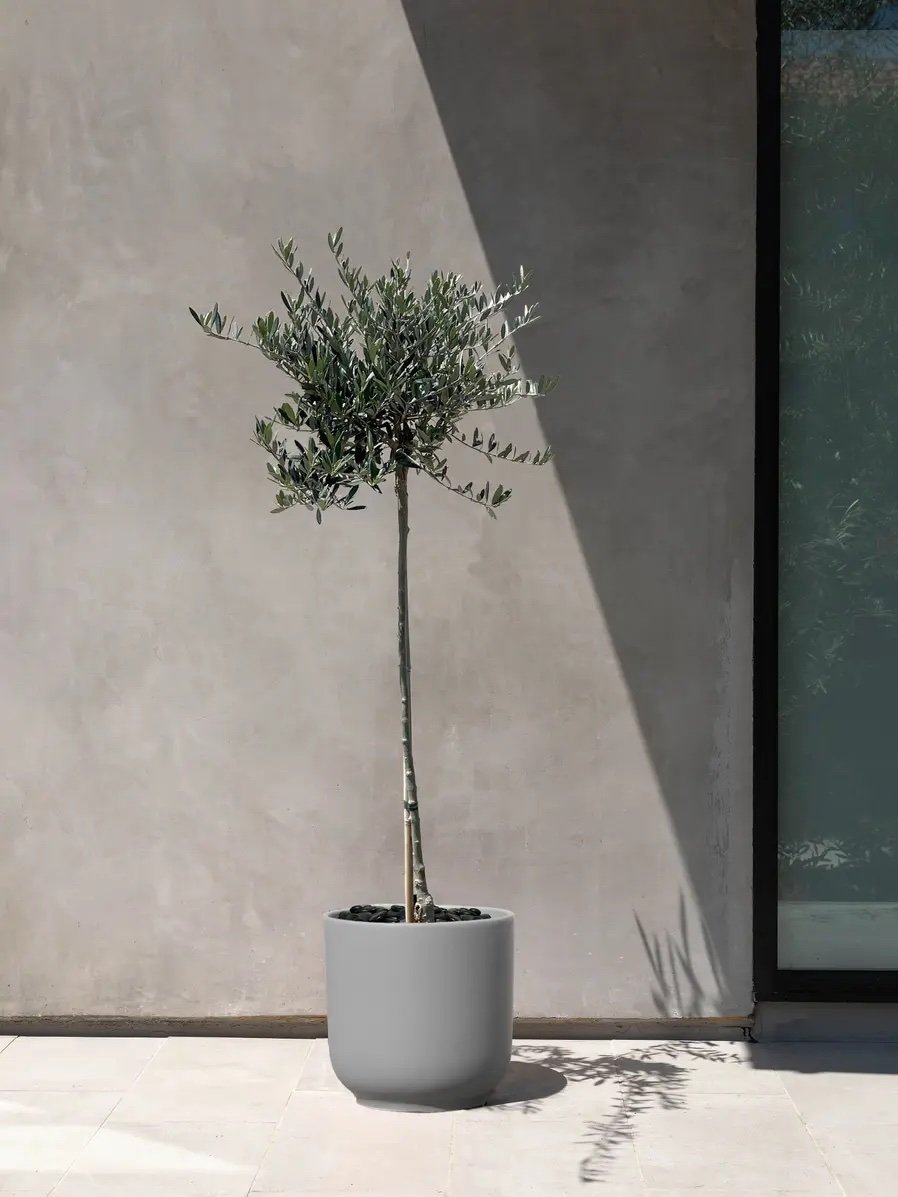
Caring for fruiting trees like Meyer lemon trees or olive trees is a rewarding and exhilarating experience. But the care that these plant varieties require is a little different from your standard flowering plants or ornamentals. It's essential to maintain houseplants that thrive, especially when they can bear fruit.

Potted Fruit Trees, including evergreen varieties, have the potential to reward you, not only with burgeoning, fragrant blossoms but also with actual ripe fruit. Whether this is your end goal, or just a pleasant byproduct of these aesthetically enchanting plants, perhaps reminiscent of olives waiting to be turned into oil, you’ll want to care for them according to some basic tenets. Read on, and be inspired!

1. Give them all the light

Fruit trees need bright sunlight to thrive. Ample, direct sunlight is their main source of energy, and everything from their photosynthesis to the lushness of their foliage to blossoming and pushing forth fruit depends on it. These plants do best in full sun but will tolerate some shade. Place your plant in an area that receives as much direct light as possible—most fruit-bearing plants need a minimum of 4-6 hours a day of direct sunlight. Regular pruning can also help in ensuring the plant gets adequate light and maintains healthy growth.

2. Water regularly and healthily

All plants need water to survive, but fruiting plants often require more water than standard indoor houseplant varieties. However, it's essential that the soil is well-drained to prevent root rot. Higher temperatures, especially if the plant is placed outside, direct sunlight, and features of the weather, like wind, all affect the rate at which your plant uses the water you give them. Some fruiting plants may also be drought-tolerant, meaning they can withstand periods without water better than others, but it's still crucial to monitor their moisture needs closely. Both of our potted fruit trees, Olive and Meyer Lemon, should be watered when their top two inches of soil are dry to the touch. More on that later, but to start off, plan on checking those moisture levels regularly. 

3. But Beware of Overwatering

We know, we know. Determining how much water to give your plants, and how often, can feel like baffling arithmetic. Give them water, but not too much, lest you awaken some monster in the roots of your plants. But we can simplify it for you: if the topsoil of your potted fruit tree is wet, it does not need more water yet. We know that it can be tempting to douse it anyway out of boredom and the wild love and longing to connect that all of us plant folks feel with our green friends. But re-channel that energy into...

Never overwater your plants again with these sleek and simple moisture meters.

leon-and-george-moisture-meters.jpg

Moisture Meter

Finally, a moisture meter that actually works. Tested by our very own Plant Doctors, all orders of Large or Extra Large Léon & George plant sets include a moisture meter.

$24-$29/pack

4. Probe That Soil!

At Léon & George, we are avid fans of sticking our fingers in dirt. And it’s not just because we’ve never fully matured out of our sandbox days-- it’s because probing your plant’s soil truly is the best way to measure its moisture and determine if it needs water. When planting in pots, choosing the right soils is essential, especially if you're aiming for a Mediterranean feel, which often requires specific soil types.

If you’re squeamish, wear a gardening glove (we’ve never been ones to turn down an opportunity to accessorize). But do stick your finger down into the top two inches of your plant’s soil-- at least once weekly is best— and gauge its moisture. This hands-on method also allows you to detect any pests early on, ensuring that your plants remain healthy and vibrant.

If the top two inches of soil are dry, rejoice! It’s time to water, and you can use another fun accessory, like a sweet watering can. 

5. Don’t Overthink It

Ah, our favorite tenet of all. So easy to say and so challenging sometimes to truly practice. The fruit trees on offer at Léon & George are low-maintenance by nature. They need only a few things to thrive, like light, water, love, and occasional plant food. 

It can be hard not to get a little meddlesome with your plants. Are they happy? How do you know, since they can’t talk? They look happy, but are they for sure? These concerns are totally normal, and we experience them, too. Still, for the good of your tree, keep it simple and avoid

  • Plant Food Spikes. Fruiting trees want food in liquid form. So say chin chin and offer them their fertilizer in a draught (aka, water soluble) rather than a spike. 

  • Musical Chairs. We love re-arranging decor, but this practice is best exercised with things that are, well, not alive. Your plant will not appreciate being shuffled about regularly. So find a spot that satisfies its lighting needs, and stick with it. Your plant wants nothing more than to “bloom where it’s planted.”
  • Repotting just for fun. Especially during the warmer months, it is not advised to re-pot your plant. Summer is the time of fastest growth for fruit trees, and they want to direct their energy toward that growth, rather than toward adjusting to a new container. So don’t throw a hitch in your plant’s giddy-up unnecessarily by attempting to repot during the summer. Instead, sit back and watch as it manifests gorgeous growth for you!

6. Watch Out For Bugs

It’s unlikely that your plant will experience any issues with insects. After all, olive trees are naturally pest resistant. Thank you, Mother Nature! Still, there are easy ways to eradicate insects should you experience an unexpected visitation. 

There are plenty of pest-control products for fruiting outdoor plants available, and you can use them with confidence, because they will not have an adverse affect on your plant. If you prefer to explore an all-natural solution, neem oil is a great alternative, and you can learn all about it and other natural pest remedies here. Just make sure not to apply neem oil to your tree on particularly sunny days, which can cause leaf scorching, not unlike the sunburn we’d get if we oiled up on a super-hot day.

7. Be Patient

Can’t wait until your potted evergreen tree, perhaps an Olea europaea, proffers a tumble of olives for your martini? We get that! But gardening is a meditative pastime. It takes time, lots of light, fertilizing during the growing season, and consistency for fruit trees to bear fruit, and it can sometimes take up to a few years. In the meantime, be patient with your tree, enjoy its grace, its gorgeous silhouette, and the strength of its branches. Every phase of a plant’s growth is beautiful, and if you learn to enjoy them all, you will never be disappointed. Your Meyer lemon bars will come in time. Until then, enjoy every moment of your plant’s evolution. After all, it’s because of your love and care that it is growing at all.

8. Treat Overwatering Briskly

We’re not pinning this on you-- freak rainstorms have been known to occur, as have overzealous garden hoses. So not to worry, if you’ve overwatered, there is a simple solution: it just requires a little elbow grease.

Your plant is in a plastic nursery pot, which is situated within its ceramic pot on top of a level consisting of a foam block. Using containers that have drainage is adequate for plant growth, and this system helps ensure just that. Don your gardening gloves and grasp your plant as low as possible on the base of its trunk. Be careful to support the plant as you lift it, still within its plastic pot, out of the ceramic planter.

See standing water in the ceramic pot? Say good riddance and dump it out! Then leave your plant, still clad only in its plastic pot, in a sunny spot to dry. Don’t water again until its top two inches of soil are dry to the touch, at which time you can return it to its ceramic pot.

9. Tune In To the Rhythm 

Unsurprisingly, your fruiting plants will respond to seasonal changes. These plants are often fast growers that produce fruit when given the right conditions. And when the weather beckons you to the beach, tempts you with a summer treat, or calls for celebratory fireworks, it’s also signaling to your plants to grow, baby, grow!

During spring and summer, your fruit trees will want to be fed plant fertilizer about every two weeks. It's essential to fertilize your plants consistently during these periods. Your tree won’t want to be repotted, and it will desire more water. So if you’re reaching for your Evian facial spray, your plant might crave its equivalent. Probe its and allow soil to dry out to be sure before watering.

The same logic goes for colder months. If visions of sugarplums are dancing in your head, your plant is likewise ready to dream and rest. And if (and only if!) temperatures are freezing or below freezing, your plant will want to go inside, just like you.

10. A Word on Winter and Frost

Citrus trees, with their ornamental stems and vibrant blooms, are particularly vulnerable to frost and should not be left outside in freezing or near-freezing conditions. As autumn turns colder and if your location experiences freezing temperatures during the winter, you as a gardener will need to bring your tree inside, either into a garage or inside your home. The tree will go dormant during the winter. During this time, its stems might seem less lively and it may not be in its blooming best. But don’t worry! It’s perfectly natural, and the plant will awaken and revive as the season moves into spring.

We understand that even though our fruiting tree collection is right outside your door, it’s still a new frontier. Don’t be shy- we’re here to help! Our Plant Doctor service offers unlimited guidance for your Léon & George plants. So if you have questions that haven’t been answered here, just reach out. Log into your Léon & George account, upload photos of your plant as a whole and close ups of any areas of concern, and tell them a bit about what you’re seeing. Good things happen when we work together, and we answer inquiries punctually and thoroughly. 


Outdoor collection - blog.jpg

FRUITING TREES AND BUSHES BY LÉON & GEORGE

Luxurious greenery for vibrant, brightly lit spaces. Order online at leonandgeorge.com

The 10 Commandments of Snake Plant Care
Snake Plant care

If you’re reading this, you’re probably already an aficionado of the Snake Plant— and for good reason! They’re striking and sculptural, and they are renowned for their low-maintenance disposition. 

A member of the Sansevieria genus, Sansevieria trifasciata is the variety that we champion here at Léon & George. Also known as Mother-In-Law’s Tongue and Snake Tongue, the Sansevieria trifasciata is emblematic of every trait that makes this species special (That variegation! That height!).

Snake Plants are a shoo-in for any discerning plant parent seeking to enhance the aesthetic of their living space, and they’re truly as simple as 1-2-3. But like every plant, even the hardy Snake Plant has unique characteristics and needs. So read on, because we’re sharing the ten essential commandments of Snake Plant care!

1. Gentle Light is Best

Don’t worry: Snake Plants really are as tolerant of varied light conditions as you’ve heard. That being said, they don’t love the intensity of bright direct light. So if possible, it’s best to place your Snake Plant somewhere it’ll receive a good amount of indirect light. You want to keep your Snake Plant’s leaves verdant and emerald, not scorched.

2. Drop That Can: A Caution Against Overwatering

We know, you’re excited! You want to commune with your plant by stroking it, singing to it, (perhaps playing “Plantasia” to it…) and of course, by watering it. But wait! It’s important to be sure that your Snake Plant is ready to be watered. They typically only need to be watered every ten days to two weeks, and can go even longer without watering. 

Remember, the best way to know for certain that your Snake Plant is ready for watering, is to...

moisturemeter.jpg

Moisture Meters

Sleek design and simple to use, a plant tool that will tell you exactly when to water your plants.

3. Get Dirty!

It’s tempting to want to schedule the things that are important to you (ahem, Google Calendar and constant Zooms.) But going based on a calendar- or a clock- is not the best way to keep track of when to water any of your plants.

This is where getting dirty comes into the equation. Snake Plants want to be watered only when their topsoil (the top 1-2 inches of soil, beneath the decorative moss) are dry. So check your moisture levels by lifting up a bit of the Snake Plant’s decorative moss, sticking your finger into the top 1-2 inches, and determining whether it is dry or still moist. If it’s moist, hold off on watering until it dries.

4. Keep An Eye Out for Squatters- Yes, We Mean Bugs

At L&G, we take extra-special care to prepare our plants for a pristine and insect-free life. And of course, we do guarantee that our plants are lovingly cleaned and prophylactically treated for bugs before we ship them out. When bugs occur, they occur in the plant’s new environment— and it’s most common when they move in with other plants, in spaces that have higher levels of humidity. 

Snake Plants are adored by a bug called the thrip, a tiny black insect that can do damage over time. If you’re concerned your environment may have bugs, lift your Snake Plant and give it a shake over a piece of white paper. If you see that tiny black bugs have fallen off the plant, you may be unwittingly housing thrips. 

But don’t panic! You can simply remove severely damaged leaves with clean, sharp shears or scissors, spray the Snake Plant thoroughly with water, and wipe it down with a clean cloth. A follow-up regimen of neem oil or diluted, organic soap can be helpful as well. 

5. Shine On, You Crazy Sansevieria 

If you notice that your Snake Plant is lacking luster, you can return it to a healthy shine with a little TLC. Just use two soft cloths and wipe off the blades one by one, from base to tip. This also helps your Snake Plant’s photosynthesis-- less dust on the blades makes it easier for the plant to drink up light. 

6. Don’t Crack Up! 

If you notice that your Snake Plant is showing cracks on its blades, don’t worry— this doesn’t signal an issue in your care regime. Cracking in blades is a naturally occurring trait of Snake Plants. Think of them as being like the veins in Carrara marble— they denote the natural beauty of the plant. 

Léon & George Snake Plant

Léon & George Snake Plant

7. SOS- I’ve Overwatered! 

So, your Snake Plant has been overwatered. Maybe you had an overzealous plant-sitter, or maybe you didn’t want your Sansevieria to experience FOMO as you drank your weekend prosecco by her side. Don’t worry— we’ve got you.

Your Snake Plant may exhibit symptoms of overwatering by showing mushy or soggy leaves. (Trust us, you’ll know them when you see them.) If you suspect overwatering, remove your Snake Plant from its ceramic pot and its plastic nursery pot. Take a look at the soil and roots. 

If it’s a swamp down there, leave your Snake Plant out of the ceramic pot (but inside the plastic nursery pot) until at least half of its potting soil is dry. After a few days, you should be able to return the plant and plastic pot to the ceramic pot. 

Be sure to check periodically that no excess water is gathering in the bottom of the ceramic pot.

8. Patience, Patience

Snake Plants are somewhat slow growers, especially if they are in environments with low light. This can be great if you think your plant is perfectly sized at the time of its purchase! If you want your Snake Plant to grow, it will reward you in time. Just make sure you keep your Snake Plant in a spot where it receives ample indirect sunlight. You can also fertilize it in the spring and summer months for an extra energy boost.

9. Don’t Be Afraid to Repot

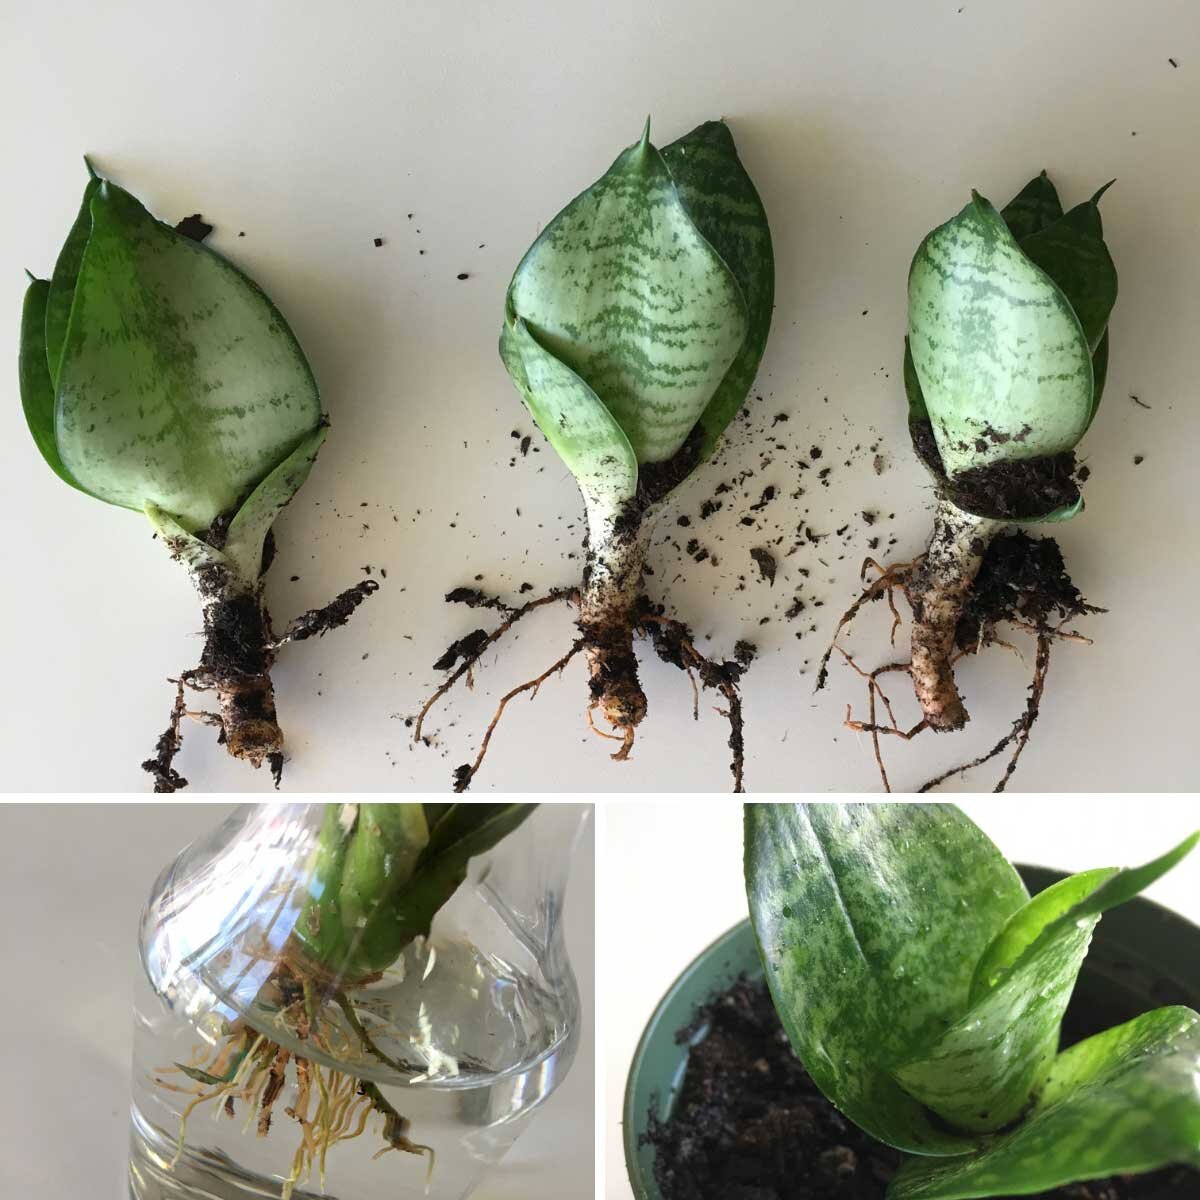
Snake Plants don’t need to be repotted often, but when they do, they’ll let you know! You’ll likely see that your Snake Plant’s roots are beginning to outgrow its pot. 

If you just want to freshen your Snake Plant’s soil, you can repot it in the same ceramic pot. This can be a good idea as over time, soil loses its nutrients- they’re used up by the plants to keep them growing healthy and strong. Just remove the Snake Plant from its pot and shake off as much of the old soil from its base and roots as possible. Then place the plant in the center of the pot, add new nutrient-rich soil and pat down firmly. Water the soil and place the Snake Plant in an area with bright, indirect light.

The same instructions go for re-potting in a new pot— just pot your Snake Plant into a ceramic pot with a diameter at least two inches larger than its original pot. For more information on how to repot your Snake Plant or any other plant, click here.

10. Pair Your Snake Plant With a Peer

Plants like to be grouped among other plants, and if you arrange them close to each other, there are benefits to be had- like a microbiome that regulates humidity, the simplification of your watering routine.

That being said, it’s important to be sure that the plants you’re pairing in a group have the same basic requirements for care, especially light. It’s best not to situate your Snake Plant next to another plant that needs frequent watering, because accidental overwatering of a Snake Plant can cause serious damage to the plant’s health. 

Consider situating your Snake Plant next to another easy-care plant like the Zanzibar Gem. Like Snake Plants, they prefer to be watered sparingly and can are tolerant of varied light levels.

Embrace your Snake Plant and maximize its benefits! 

Snake Plants are exceptional air purifiers. According to NASA, they are incredibly effective at filtering out environmental toxins like formaldehyde and xylene. They also convert carbon dioxide into oxygen at night, so they’re a great choice for a bedroom plant.

The Snake Plant is a newbie plant owner’s dream and an experienced green thumb’s vacation plant- they thrive with remarkably little care. So embrace your Snake, and remember the old adage: Less is More when it comes to caring for your Sansevieria. 


isaac-leon-and-george-09-2019-0546 (1).jpg

Indoor plants, potted & delivered

Premium plants paired with stylish ceramics, plus lifetime plant care support. Order online at leonandgeorge.com

The 10 Commandments of Monstera Deliciosa Care
Monstera deliciosa care

Oh, the Monstera Deliciosa! She’s been enjoying a place in the spotlight lately, but Monsteras have long been a desirable and iconic plant for stylish interiors. This sculptural plant enjoyed wild popularity from the 1950s to the 1970s, and like most things retro, she is making her mark once more!

Monsteras radiate positivity, playfulness, and an aura of vibrant growth. What many plant enthusiasts don’t realize is that they are also a flexible, easy-going plant that can adapt to almost any environment- so shop with confidence and follow these simple commandments. Your Monstera will be a joyful presence for years to come!

1. A Place Near the Sun 

The Monstera Deliciosa is tropical (native to Central America) so like many indoor tropical plants, they appreciate light and warmth, but don’t need a lot of direct light. Monsteras tend to do best in rooms where they receive bright, indirect light, but they can also adjust to medium levels. Again, they’re low-maintenance! Just be sure not to place your Monstera too close to direct bright sun. As with many tropical plants, this can cause a Monstera’s leaves to scorch.

2. Misty Mornings…In Moderation!

When warmer weather hits, many of us instinctively reach for our Evian atomizers. Your Monstera does not need to be misted, but they enjoy a touch of humidity from time to time. If you would like to bond with your plant through misting, limit misting to once weekly. Misting in the morning will ensure that the plant has time to enjoy the moisture before the temperature drops for the evening. 

3.  Don’t overwater! 

We know, we know— we say this all the time, but don’t overwater your Monstera. Monsteras like to dry out between waterings, so plan on watering your Monstera only when its topsoil is dry. Which brings us to...

4.  Get Used to Getting Dirty!

It’s tempting to want to schedule the things that are important to you (ahem, Google Calendar and constant Zooms.) But going based on a calendar- or a clock- is not the best way to keep track of when to water any of your plants. 

This is where getting dirty comes into the equation. The Monstera Deliciosa wants to be watered only when its topsoil (the top 1-2 inches of soil, beneath the decorative moss) is dry. So check your Monstera by lifting up a bit of its moss, sticking your finger into the top 1-2 inches, and determining whether it is dry or still moist. If it’s moist, hold off on watering until it dries.

leon-and-george-moisture-meters.jpg

MOISTURE METERS

Finally, a moisture meter that actually works. Tested by our very own Plant Doctors, all orders of Large or Extra Large Léon & George plant sets include a moisture meter

$24-$29/pack

5. Ga-Ga for Growth? Monsteras Like to Be Fed!

When the conditions are right, Monsteras can grow fast. And this may or may not be what you’re going for, but if you would like your Monstera to rise to meteoric heights, you can fertilize it 1-2 times a month in the warmer months of spring and summer. You can also feed it using gentle foliar feed (plant food that is misted directly on a plant’s leaves) year round. 

6. Curling Leaves? Consider a Refreshing Shower.

Monsteras will occasionally experience curling leaves if they are not receiving enough water. You can remedy this by giving your Monstera a shower. Just  take it out of its decorative pot (but keep it in the plastic nursery pot, or you’re in for something of a landslide) and place it outside or in a bathtub. Water it copiously, but let the water drain entirely before returning the Monstera to its ceramic pot. 

7. A Little Haircut

It’s normal to feel trepidation about pruning (cutting leaves or stems off of your plant). However, it’s actually great to get in the practice of pruning your plants because pruning offers so many benefits to the plant’s overall health. 

You can safely remove dead or dry leaves from your Monstera year round, by cutting them off at the base of their stem using sharp, clean scissors or shears.

Major pruning jobs (or “haircuts”) should be saved for the warmer spring and summer months, when your Monstera has the most energy to generate new growth. 

Need a little more guidance on pruning your plant? See our step by step guide here.

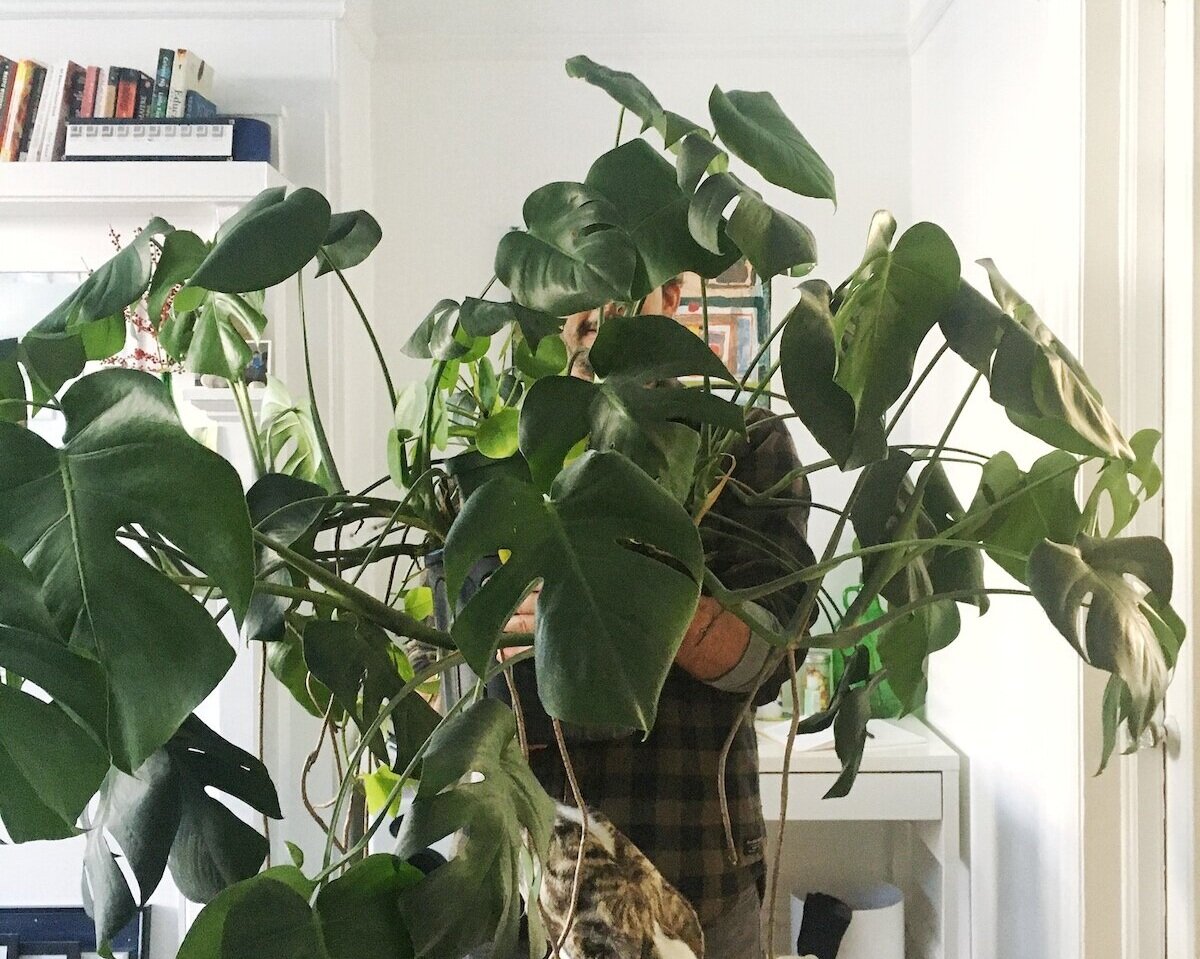
Léon & George Monstera Deliciosa. Photo by Apt2B.

Léon & George Monstera Deliciosa. Photo by Apt2B.

8. No Holes? No Problem! 

If you notice that your Monstera does not have holes in some of its leaves, don’t worry! This feature can take time. You’ll likely find that when your young Monstera grows up a bit and pushes out new leaves, they’re wonderfully holey. If you love the swiss cheese look and want to encourage more holes, move it to a spot that receives brighter (but still indirect!) light. 

9. Don’t Be Afraid to Repot

Again, the Monstera Deliciosa is a prolific grower. Like a B-52 with a burgeoning beehive, they long to reach toward the light! So don’t be afraid to repot. 

Monsteras are known for exhibiting aerial roots, and some may grow outside of the pot at any point in a Monstera’s life cycle. But when it’s time to repot, you’ll likely see that your Monstera’s stems have grown significantly larger, and their roots have as well. They may appear to flow outside of the pot at this point. 

Follow the directions here under “Repotting” to safely and securely repot your Monstera.

10. Consider Supporting Your Monstera with Stakes

Like your favorite friend after happy hour, your Monstera can get a little floppy. It’s part of her charm! But it can also be controlled. If you’d like your Monstera to grow with a more pronounced vertical climb, you can stake the plant.

Bamboo poles make beautiful stakes, and nurseries and home improvement stores have great options for stakes that blend into the palette of the plant and won’t disrupt the aesthetic of your gorgeous Monstera’s foliage. 

Read our full guide on how to stake the Monstera here.

Celebrate! The Monstera Deliciosa is all about positivity and joy.

In Feng Shui, Monsteras are renowned for bringing good luck (and even money!) to their owner. For guidance on all things Monstera, keep an eye on our blog, which features many posts on this beloved plant variety and is always being updated! 


isaac-leon-and-george-09-2019-0546 (1).jpg

Indoor plants, potted & delivered

Premium plants paired with stylish ceramics, plus lifetime plant care support. Order online at leonandgeorge.com