Posts by Barbie Lucio-Bartoli
5 Tips For Pruning Away Dead Leaves
4be09668-a24f-4a10-93b4-5ca3c9e8155c.jpg

If your plant is exhibiting foliage issues like yellowing, browning or dry leaves that no longer appear viable, don’t panic! This is nature at work: as plants age, some of their leaves will lose liveliness and strength. New leaves will grow to replace them, and they’ll grow even quicker with a little help. Pruning off old foliage signals to your plant that it can direct its energy toward pushing out new growth. So don’t be afraid to give your plant a snip — follow the steps here, and prune with confidence.

Shape It Up

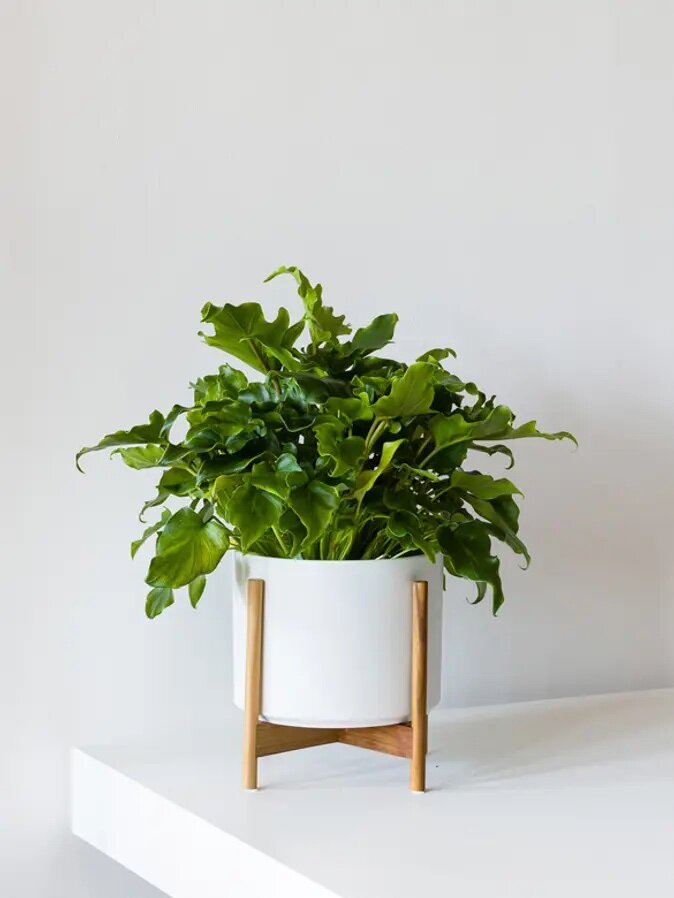
Your plant is like a living sculpture: you can maintain the ideal shape and size for your space by pruning off unruly stems and leaves. Simply cut close to the base of the stem or tug on the root and see if you can pull it out completely. Maintaining a balanced structure has the additional benefit of preventing tilting and sagging.

Clean Up The Edges 

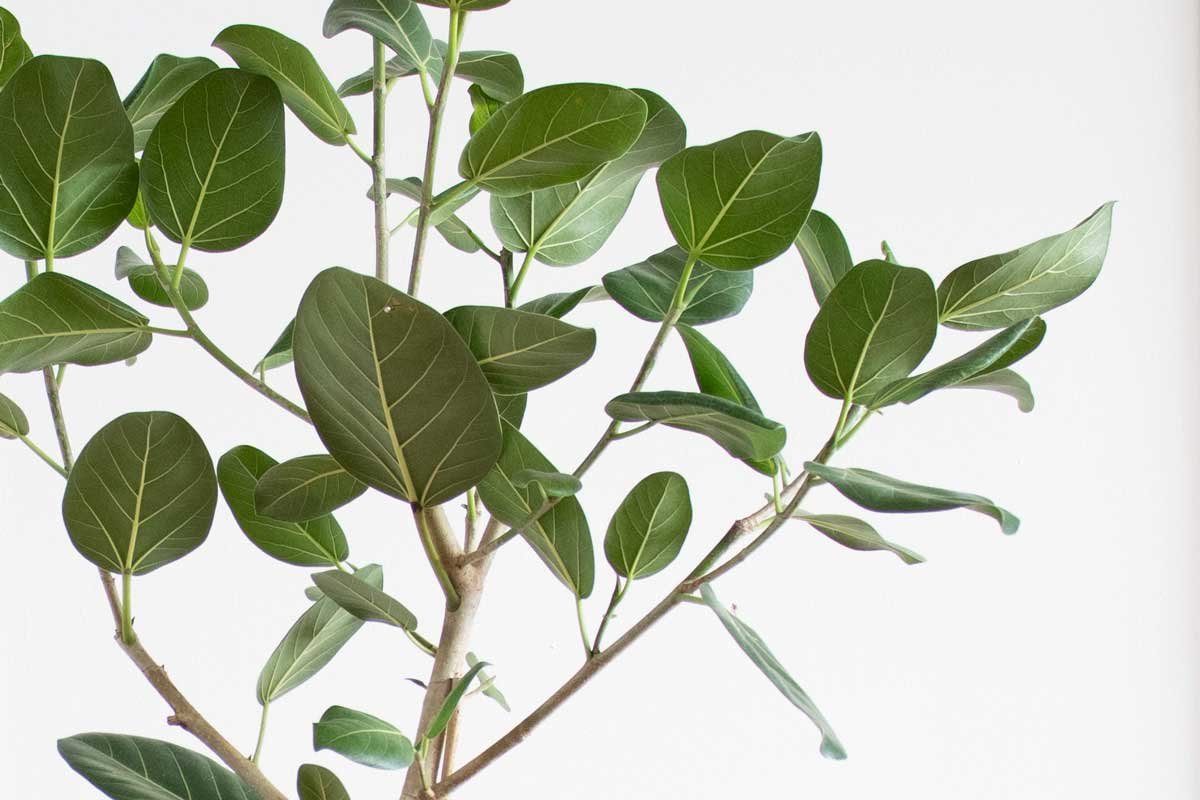
Every plant can use a manicure from time to time. With sharp scissors, you can trim off imperfect or discolored leaf edges and re-shape your plant’s edges for uniform foliage. Unless you’re aiming for a complete reshape of the leaf, be sure to leave the slightest sliver of brown, right before the green. Cutting into a healthy part of the leaf will create fresh wounds that will need to dry out and heal.

A Light Touch 

Plan on pruning no more than 25% of the plant’s overall foliage at any one time. This ensures that your plant doesn’t go into shock and allows you to take time to consider the overall desired shape.

Take a Step Back

Once you’ve finished your first round of pruning, take a step back and look at the plant from a distance. If any leaves you’re considering pruning contribute nicely to the overall shape, leave them on. Pruning is essentially an art (think bonsai and ikebana) and it allows you to take the reins in determining how you would like your plant to look. Assess the plant regularly throughout your pruning routine to ensure that it’s headed in the direction that is beautiful to you. 

Last but not least, a *pro tip*: scared of pests? Keep your plant well-pruned! Pests are significantly less likely to make your plant their new home if it has well-maintained foliage. (Think of it like this: fewer branches to hang their hammocks from!) 


BIRD OF PARADISE

With long elegant leaves rising up from the bottom, the Bird of Paradise is a popular indoor plant for creating that instant jungle atmosphere.

Rotating your plants in the winter
bathroom.jpg

The latest in plant care tips for keeping your foliage happy and healthy, brought to you by premium plant delivery service Léon & George.

Rotating indoor plants is always a good idea, but during shorter winter days and sometimes gloomy periods, it’s more necessary than ever. Here are a few tips for how and why to rotate your houseplants:

  • Does one side of your plant look nicer than the other? Try leaving the less bushy side facing the window for a bit longer than usual to even things out. Hint: You can always turn your plant back around when people visit to put its best face forward. 

  • Do any of your plant stems seem to be leaning or growing more on the sides closer to the windows? Plants will always follow the sun, so this is normal if you're not rotating them for even light exposure.

  • While you're there, take a second to dust off the leaves so your plants can soak in more light, and give any brown tips a trim as these tend to appear more during winter.


zz.jpg

ZANZIBAR GEM

Long and graceful wandlike stems with lush fleshy leaves, resembling a group of feathers, the Zanzibar Gem is a near indestructible indoor plant.

Easy Breezy: How to Aerate Your Houseplants' Soil, and Why You Should!

The benefits of aerating your plant’s soil

Did you know that loosening up your plant's soil before watering allows better and more even distribution of moisture? And that it also helps oxygen flow more easily through the plant’s roots? Most people think of watering when it comes to basic plant care, but what they don’t realize is that aerating the soil is also a small task that can make a big difference.

How to aerate houseplants’ soil

Follow these easy steps and enjoy healthier, happier houseplants:

Step 1: Find a chopstick

Step 2: Gently poke a few holes through the top of the soil (you may strike a root or two, don't worry)

Step 3: Give your plant a thorough watering around the base towards the center, allow all the water to drain through the bottom of the nursery pot

Will aerating the soil damage roots?

Worried about damaging roots along the way? Rest assured that even though you might break some roots in the process, this is nothing compared to what overly-compact soil might cause.

If your plants are staged in a decorative pot, empty out any excess water from the bottom and fluff up any soil toppings like moss or rocks. Within a few hours, you should notice a more refreshed look on your foliage.

How often should you aerate the soil?

Houseplant whisperer Derryl Cheng of @houseplantjournal prescribes doing this approximately every other watering for best results.

As always, keep an eye on your leafy friends to notice any changes or trends!


Indoor plants, potted & delivered

Premium plants paired with stylish ceramic pots, plus lifetime plant care support. Order online at leonandgeorge.com

Take It Up A Notch: How to Use the Notching Technique for New Plant Growth
How to encourage new growth by notching. Photo by @vintagerevivavls

How to encourage new growth by notching. Photo by @vintagerevivavls

Ficus owners—ever wonder how to make your Fiddles or Rubber Trees grow new branches? Try out a simple technique called notching.

What is notching?

Notching is a way of encouraging new growth by making a small cut in the branch of your plant. In a way, you're making a deep incision that causes your plant to panic. Yes, sounds painful at first, but then your plant will try to relieve itself by growing new shoots!

How to use the notching technique on your plants

There are just a few simple steps to encourage new growth on your plants through notching:

  1. Find the nodes - pick an area where you'd like a new branch to grow. Identify where the nodes are, small bumps on the trunk, usually with some space between each one. 

  2. Make the cut - Take a sharp clean knife and make an angled cut about 1/4 of the way through the trunk. You should immediately see a white sticky sap, indicating you've made the cut correctly! Wipe up the sap with a wet towel so it doesn't drip everywhere, and note that this sap can be irritable for sensitive skin.

  3. Wait - Make sure your plant is getting bright light and on a consistent watering schedule. Mist the leaves every now and then to create humidity. In a few weeks, you should start to see one or multiple tiny bumps in the area that you cut. Be patient as these grow out and enjoy your fuller ficus!

What to do when Notching doesn’t work

After a few months, if this technique doesn't seem to be working don't worry. Expert Ficus owners report that this method works about 50% of the time. You can try again, or stay tuned for other upcoming tips!


rubber-tree-stand.jpg

Rubber Tree

With dark leaves and crimson casings holding new leaves, perfect for decorators that want plants in other colors than green.

The Quickest, Simplest Way to Stake Your Fiddle Leaf Fig
How to stake a plant

The darling of the houseplant world, the Fiddle Leaf Fig is a popular albeit infamously finicky indoor plant. But though it can be a bit picky about its light and water needs, once you’ve found the right balance and routine with this beauty, it can be an incredibly low maintenance and fast growing plant.

But what happens when it grows too fast? Plants like the Fiddle Leaf Fig can grow to be quite top-heavy, oftentimes growing unevenly (especially if you’re not regularly rotating it). If this is the case for your Fiddle, our Plant Doctors recommend staking the plant as a temporary solution to help it grow stronger roots and stand up straight.

Though staking is most common for plants like the Fiddle Leaf Fig, this method can be used for virtually any leaning plant with a trunk. Here are simple steps to staking your plant:

Staking Fiddle Leaf Fig Tree
  1. Find a dowel or stake

At your local hardware store, find a dowel or stake that’s tall enough to span the entire length of the trunk from at least a few inches under the soil to the area where the trunk begins to branch out. Insert the stake gently into the soil of your plant. Be careful not to force the stake into the roots as this may cause stress.

If you’d like to reduce to risk of damaging the roots, and depending on how severe the leaning is, you may want to use two stakes on either side of the trunk.

2. Attach the stake to your plant

Using hooks or plant tape, attach the stake(s) to your plant. Pro tip: when you do this, do so in a way that is easy to “undo”. The reason for this is that you may want to sway your tree back and forth once a week or so to further strengthen the roots. Swaying the trunk helps the tree develop stronger roots, in addition to aerating the soil, creating small oxygen pockets that will keep it happy. After the gentle sways, tie it back to the stake and let it be.

3. Check in on the plant’s stability

After a month or two, check your tree’s progress. When you remove the hooks or ties on your stake(s), does it still lean heavily? If so, leave the stakes in and keep at it! Over time, though, with proper care and regular rotation, your plant should be able to stand erect on its own.

In the meantime, if your plant is lopsided or has some degree of uneven growth, it may be time to prune! Check out our step by step guide to pruning your Fiddle Leaf Fig Tree here.

Before and after of trimming a Fiddle Leaf Fig. A complete makeover!

Natural Plant Food

Nourish your plants with this specially-formulated organic liquid plant food. Our Boost Vitaminé is made with potent nutrients from nature to help your plants grow and thrive all year long.

$24

How to Care for and Grow Your Hope Philodendron

How to care for and grow the Hope Philodendron AKA Philodendron Selloum

Full, serrated leaves and lots of personality, the Hope Philodendron is a plant that enjoys a shady, tropical-like home, similar to its native regions of South America. Here’s everything you need to know to keep the Hope Philodendron healthy, happy and growing.

Light

  • Prefers bright or medium indirect light

  • It can adjust to lower levels of light, but will grow slower and turn darker green

  • Avoid harsh direct sunlight that may burn your plant’s leaves

Water

  • Water about once a week, when the topsoil is just dry to the touch

  • Mist between waterings to provide humidity

Growth

  • In prime conditions, the Hope Philodendron grows relatively fast and can reach up to two feet in height

  • Fertilize your Hope Philodendron 1-2 times per month in the spring and summer with indoor plant food, or foliar feed year round.

Natural Plant Food

Nourish your plants with this specially-formulated organic liquid plant food. Our Boost Vitaminé is made with potent nutrients from nature to help your plants grow and thrive all year long.

$24

Common problems with the Hope Philodendron

Yellow leaves - overwatering or too much light

  • Symptom - pale yellow leaves, or new leaves unfurling pale or yellow

  • Cause - in most cases, the cause of yellow leaves is overwatering. While the Hope Philodendron likes moisture, it does not want too much moisture or to become waterlogged. If the plant is not overwatered, it’s possible that the plant is exposed to too much light.

  • Remedy - ensure that the soil is not waterlogged — remove from plastic nursery pot and investigate the roots. If they are soaked or emit a stench, it’s possible your plant has root rot and you will need to repot. If it’s just slightly damp, leave the plant in a well-ventilated area with plenty of indirect light and hold off on watering.

Brown tips - underwatering

  • Symptom - edges and tips of plant are brown and dry or crispy

  • Cause - not enough water

  • Remedy - give your plant a thorough shower, allowing all the roots to have a chance to drink and refresh. Wait until water has drained before returning to decorative pot.

Brown spots - overwatering or fungal bacteria

  • Symptom - wet or soggy brown spots on new and or old leaves

  • Cause - overwatering or fungal bacteria

  • Remedy - ensure that the soil is not waterlogged — remove from plastic nursery pot and investigate the roots. If they are soaked or emit a stench, it’s possible your plant has root rot and you will need to repot. If it’s just slightly damp, leave the plant in a well ventilated area with plenty of indirect light and hold off on watering.

How to care for little hope plant

How to maintain a beautiful and healthy Hope Philodendron

Take care of your Hope Philodendron and it will take care of you! Below are simple tips to continue caring for and growing your Hope Philodendron over time.

  • Pruning - the foliage of this plant can get wild! If the plant is taking up too much space, or has unattractive, old, or “leggy” vines, you can safely trim back with a clean blade, this will give your plant more energy to grow new leaves!

  • Trimming - if there is just a small portion of a leaf that was damaged such as the edges, trim off any discoloration or blemishes by following the natural lines and shape of the leaf.

  • Cleaning - regularly remove dust to ensure your plant can soak in as much light as possible. Use a damp cloth and gently wipe the leaf clean.

How to grow and repot the Hope Philodendron

  • Growing - in prime conditions with the right light/water/temperature balance, Hope Philodendron plants are fast growers. After some time, if you don’t see any new growth, consider adjusting one of its elements. During spring and summer, use a diluted fertilizer to give your plant a vitamin boost.

  • Repotting - L&G Hope Philodendron plants come in 6” grow pots and only need to be repotted every few years if you notice the roots outgrowing the pot, or to refresh the soil and give it new nutrients. If you’d like your plant to grow larger, find a new grow pot that is 2” larger than its current pot. If you’re happy with the current size, you can reuse the same pot and simply change the soil.

    • Getting your hands dirty with or without a yard - spread out newspaper on the floor, remove the plant from the pot and shake off as much of the old soil as possible so that you have clean roots. At the bottom of the grow pot, and a layer of soil, then place the plant in the center of the pot and cover with new soil. Pat down firmly and water thoroughly. Place the plant in an area with bright indirect light. Your plant will take 2-4 weeks to settle from the shock and adjust to its new home.

How to propagate the Hope Philodendron

Propagating a Hope Philodendron is best down with cuttings and during spring or summer.

  • Make a clean cut below a node - The node is like a joint in the stem — where new leaves grow from. Using sharp, clean scissors or shears, remove a cutting from the plant and place in fresh water in an area with bright indirect light. Change the water every few days to keep it fresh.

  • Wait for roots to grow and repot- After a few weeks, you will see roots forming. Transfer to a pot with fresh soil and water thoroughly.

  • Stabilize - Keep the soil moist to the touch for one to two weeks as the cutting roots.


Hope Philodendron

This happy and hopeful philodendron will bring joy to any space with its unique wavy leaves and compact shape. They are easy to care for and on NASA’s list of best air-purifying houseplants.

Introducing Luxurious Greenery for Vibrant Outdoor Spaces

New this summer, our hand-picked collection of outdoor potted plants was inspired by the tradition of Mediterranean container gardening and our personal connection to Southern California’s legendary climate. We are so excited to bring you beautiful outdoor plants that will flourish and adorn your outdoor space for years to come. Each plant is sourced from our trusted, California-based nursery partners, and nurtured from the very start for a lifetime of good health and strength. 

You don’t need ample outdoor space to enjoy the magic of watching a tree grow, thrive, and bring forth delicate foliage and glistening, colorful fruit. We’ve ensured that this pleasure is accessible to all our customers, by pairing our outdoor plants with weatherproof, hand-finished ceramic stoneware pots that are suitable for small and large spaces alike. Whether you’re decorating a small balcony or a spacious entryway, these outdoor plants are a perfect fit.

The varieties we’ve chosen for this collection are classic legacy plants, with timeless, painterly  silhouettes and the strength to thrive over years and become a part of your home’s heritage. They create enchanting focal points for the welcoming atmosphere of porches, doorways or patios, and are a natural complement to our indoor plant varieties. With their requirement for generous light, these new plant varieties are intended exclusively for outdoor placement.

The Olive Tree and Bush, Olea europaea have elegant, silvery green foliage, and are naturally both pest and drought resistant. With generous light, these varieties produce a profusion of fruit within months, featuring a classic olive flavor profile and rich in antioxidants.

The Meyer Lemon Tree and Bush, Citrus meyeri, are adorned with vibrant green foliage and emanate an enchanting, fresh citrus aroma. With ample light, and over the course of several months, these varieties push forth delicate, white blossoms and exquisite, sun-sweetened fruit. From cocktails to baked goods, you’ll always find a good use for your Meyer lemons. 

The Sago Palm, Cycas revoluta, is a textural dream, with feathery, high-gloss fronds and a richly tactile, deep mahogany trunk. With their preference for indirect bright light, Sagos are well situated for outdoor areas that receive some shade. Slow growers, Sagos have been known to live for hundreds of years. 

Shop our new collection of luscious greenery for inspired outdoor spaces.

Snake Plants and Their Soggy Spots

Snake Plants & Soggy Spots

The Snake Plant or sansevieria is a member of the succulent family, making it super adaptable to almost any environment and incredibly low maintenance. Despite its easy-going attitude, there are still a few easy traps to fall prey to.

  • Soggy fronds and brown tips are a result of overwatering or an inconsistent watering schedule. With shallow root systems, they're susceptible to root rot which will cause fronds to tip over and show soggy spots.

    • To treat, first identify if root rot has occurred. If yes, trim infected roots and change the soil. If no, start decreasing the amount of water you give the plant and get on a regular schedule.

    • Brown tips can be trimmed, but leave a thin sliver of dried edge to avoid further damage to the plant.

  • Scars are common but can be easily avoided. Even though Snake Plants are hearty and can survive a wide range of conditions, they don't have the toughest skin. Any bumps or scratches will cause the skin to break and eventually scar.

    • While you can't remove the scars, eventually, they'll appear smaller as the plant grows and therefore less noticeable. Keep your plant in a low traffic area to avoid the risk of more damage.

  • Fronds that fold in on themselves is less common, but a crucial problem to remedy as quickly as possible. An infestation of a pest called Thrips is likely the cause. They're nearly impossible to see, but can be harmful to the plant if left untreated. 

    • Remove any fronds that are curled in or are suspect to infection. Wipe down remaining leaves with Neem Oil, check every few weeks and re-apply to avoid re-infestation.

large-snake.jpg

SNAKE PLANT

A large succulent and thus extremely adaptable and low maintenance – the perfect starter plant. It is also a terrific air purifier, making it a healthy and attractive addition to any indoor space.

Where Are The Splits On My Monstera?
Monstera no holes

Monsteras With No Splits: What Gives?

This stylish and iconic plant from the art deco era has made a comeback in a big way and is more popular than ever. Though extremely beautiful, it can be picky and quickly expresses any neglect it might encounter.

One of the most common questions we get with this plant is around the splits in its leaves: what causes them, and why do they sometimes not appear? Rest assured that there’s absolutely nothing wrong with a Monstera with no splits, and know that most likely your plant does not have splits either because it is too young or because it does not get enough light. But let’s dig a little deeper to learn more.

Why Do Monsteras Have Splits?

The splits in the leaves of the Monstera Deliciosa are a naturally occurring feature called fenestration. There are many different theories around what causes fenestration but the most likely one is that the plant creates these holes in the leaves to allow more light to pass through to the lower leaves on the plant.

Why Won’t My Plant Produce Holey Leaves?

Have you ever seen a small or young Monstera? Most likely most of its leaves did not have holes on them. You may have even not recognized this plant as a Monstera! Monsteras grow leaves with more holes as they mature, so it’s perfectly normal for a young plant to not have any.

What about those enormous leaves with many holes? To accomplish this feat, your plant will need plenty of bright indirect light. Often when a Monstera is showing little to no holes, it’s because it’s not getting enough light. Other signs that your plant might need a little more light is if it looks leggy and has lost its “bushy” look, or if it’s wilting or showing signs of malnourishment.

Ready to take a deeper dive into caring for and growing your Monstera Deliciosa? Check out our complete care guide with repotting, pruning, and more, or have a quick read through the 10 commandments of Monstera care!


Monstera Deliciosa

A fabulous statement plant with sculptural, swiss-cheese foliage and a low-maintenance disposition! The Monstera Deliciosa is an ideal easy-care plant for a joyful, textural space.

Cleaning dusty plant leaves
Photo credit: wikihow

The latest in plant care tips for keeping your foliage happy and healthy, brought to you by premium plant delivery service Léon & George.

Dusty leaves be gone! Dirty or sticky leaves not only look unpleasant, they also prevent your plant from photosynthesizing properly. Here are ways to kick the cleanliness up a notch, and get your plants looking and feeling their best!

  • Mix your cleaning solution - use a ratio of 3 tablespoons of mild dish soap mixed with a gallon of room temperature water.

  • Cleaning small plants - dip and swish their leaves around in the solution to remove dirt, grime or bugs and rinse with clean water immediately after.

  • Cleaning large plants - use a cloth and wipe each leaf clean with the soapy water, rinse off with a clean non-soapy damp cloth (if you're seeing bugs, leave the soapy solution on for a few minutes to an hour).

*Bonus tip* - dish soaps can double as a mild insecticide. If you're seeing any critters, leave the soapy mix on for a few minutes to an hour before rinsing.

*Extra bonus tip!* Use our Plant Doctors’ favorite black olive oil soap, which comes in a ready to use spray bottle formula. Not only does it clean plants and reveal a brilliant shine, but it also acts as a natural insecticide and pest repellant.


parlorpalm2.jpg

Indoor plants, potted & delivered

Premium plants paired with stylish ceramics, plus lifetime plant care support. Order online at leonandgeorge.com

Why you should rotate your plants
Photo credit: General Store

Photo credit: General Store

The latest in plant care tips for keeping your foliage happy and healthy, brought to you by premium plant delivery service Léon & George.

Just like humans, plants have good and bad sides! Unlike us, plants need to show both on an equal basis for balanced growth. And if you’ve ever seen a heavily leaning indoor plant, you can bet it wasn’t getting a regular rotation.

So why is it a good idea to rotate indoor plants? Unlike the sun, which moves across the sky throughout the day, windows and artificial light limit the amount of light exposure our plants are getting, and where they’re getting it. And because all plants grow towards the light, this can often lead to uneven growth patterns. Rotating them essentially ensures that our plants are getting an even amount of light, reducing the lean and also promoting new growth in areas that might otherwise stagnate.

So how often should you rotate your indoor plants? For plants that prefer lots of light, rotating them once every few months should do the trick. However, for a plant placed in a medium to low light area, you may need to rotate them more often, up to once every few weeks or once a month.

And as a helpful reminder: if it’s been a while since you’ve rotated your plant, you may need to give the side that’s been hiding a bit of a clean up! Wipe the leaves clean of dust build-up, and don’t be afraid to remove any dried out foliage while you’re at it.


fiddle.jpg

FIDDLE LEAF FIG TREE

A lush and sculptural plant with elegant violin-shaped leaves.

Real Plants, Real People: Ashley, Danny, & Baby Ana
ashley&dannyhometour.jpg

Ashley and Danny have lived in their San Francisco home for almost ten years. In a way, taking care of plants together has been a crash course for the real parenting adventure they have only just begun.

--

How did you know this home was for you?

It actually took us leaving this apartment to realize how special it is. We had to patiently wait for the new tenant to move out so we could move back in! There is something about having an expansive view of the ocean and the Golden Gate Bridge ... seeing that beauty everyday must calm the nervous system or something. It has an ineffable quality. 

What inspires you when you decorate?

We wanted to honor the older details of this building by adding a more antique, vintage touch. Comfort is also a key decorating theme so we sought beautiful, cozy pieces that jived with the historical elements. 

What are your plant care secrets?

Top secret: pick easy to care for, healthy-already plants! We also had a bit of negotiating to do as it relates to their care-taking. One of us (we won’t name names!) is a bit more enthusiastic about owning plants than the other, and that person also happens to be the one who travels more often and needs more help keeping up with them. But even though we aren’t equally passionate about the hobby, we both benefit so much from having plants, and in the end we found a care routine that works for both of us. Splitting the responsibilities means every plant gets what it needs and we maintain our marital bliss. Kind of like regular parenting, but maybe a little easier!


Shop the story